At this point, over half the frames made prior to our Scottsdale Adventure have been carved and gilded. You may recall that before Diane and I left Las Vegas I had prepared about a dozen frames from the moldings we bought at Foster Planing Mills seconds area. They are a minimum of 3-3/4″ wide with a rabbet suitable for a canvas. We’re enjoying our adventure here and are even considering a move from Las Vegas! There is a thriving art scene here that is centered around the Scottsdale Artist School where Diane has made many connections with like minded artists. Although my first love is designing and creating one of a kind furniture pieces, carving and gilding frames is great as well and a bit easier on the body! Could I do both?, well; I think so!
As for framing, there is a wide gap between the $1,000.00+, 22kt. gold frames and the $75.00 imported ones available at the big box art supply stores. My goal would be to fill that gap with hand carved, composition gold frames and keep them in the $350.00-$600.00 range. There is a lot of truth in that expression “starving artist” and I’d like to work with other artists just as I do with Diane. She’s recently been invited to show her female figurative work at a gallery in Charleston and of course, she needs gallery quality frames. Having a retired school teachers’s pension and combining that with hers pension doesn’t allow us to spend the money needed to buy frames that would be considered as “gallery quality”. Establishing myself here as an affordable framer for other artists who find themselves in that position is a goal I’d like to pursue.

Water Lily & Water Flow
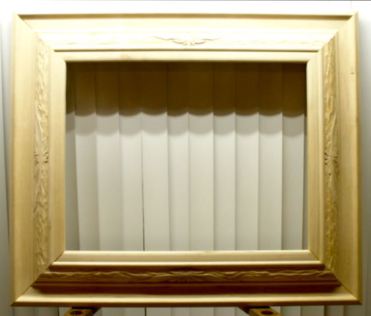
Here’s the latest one, ready for final inspection and then the gilding process. The title of the painting is “Stepping Out” and features a woman in a flowing dress, putting on her shoes and getting ready for the evening.

Stepping Out by Diane Eugster
You can see in this image of that painting what I mean. There are a lot of flowing lines in her dress and the background so Diane suggested some sort of floral motifs surrounded by a flowing texture to compliment the brush strokes in her painting. Although it doesn’t show up too well in the photograph, once this frame has been gilded and toned I’m hoping the contrast between the center floral carve and the textured panel will be what she envisions. The size of this painting is 14″ x 18″, it’s on stretched canvas.
I believe we’re always learning about our own work. Being somewhat anal (still not sure I like that shortened version of analytical) and having a tendency towards trying to achieve perfection, carving has moments that it just can’t be attained! For example, the area between the lobes of small leaves is virtually impossible to get smooth. It’s a struggle for me to leave well enough alone even though I realize the burnisher/sealer used to prime the frame prior to gilding will fill in that area and it’ll never be noticed! Even after that phase, the toning may seep in or rottenstone will fill the area. And lastly — it’s really about the painting and such a small area no one (other than me or another anal woodworker) will ever notice so give it a rest man!!!

Transferring Design
Consider it rested, here’s a brief explanation/tutorial of the process. It all begins with getting the design onto the frame. As a rule, Diane refines the designs I come up with as her artistic abilities and vision are much better then mine. My preference is to make 1/2 of it on paper which is glued onto a piece of salad container plastic. It provides a firm pattern to follow and allows me to write down sizes of carving tools used. That’s on the left of the picture. On the right is a piece of tracing paper used with a soft pencil that allows me sketch inner details of the design as shown on the right side of this picture. By flipping it over to do the opposite sides you essentially create your own carbon paper.

Outer Design Defined
Next up is outlining the main shape. Using the same sweep and width tool for certain elements is what results in similar designs on both sides. Various tools were used to remove the waste depending on their size and location. This part of the frame is convex in profile which adds to it’s difficulty. The tool laying in the panel is a long bent 3mm V-tool.

Leaves Separated
That long bent shape is used to cut the outlines between the leaves. It’s easiest to start at the bottom and work your way up and into the convex profile. Although the lobes may vary a little bit, doing those first is wiser since you can start the separation where they meet and free form into the leaf interior.

Modeling the Leaf
The final step is to model them which is accomplished with a #8/13mm and also a #8/8mm. This is the only part of the carving that gets a light sanding after all of the chisel work is done. This area needs to be smoothest so the gilding needs to have the smooth substrate here.

Texturing
The final step in the carving phase was to texture the remaining convex portion of this molding to complement the brush strokes and subject of Diane’s painting. Besides working on that rounded surface, the changes in the grain direction resulted in some tear out. Even though the burnisher/sealer will fill some of the minor tear-out the plan is to go over it very lightly with a freshly honed gouge. Then it’s time to use the burnisher/sealer; for this frame I’ve decided to go with a yellow. Burnisher/sealer dries thoroughly and is then buffed with 4/0 steel wool. Then comes the gilding process which will be the next blog.
Tagged: carved picture frame, carving patterns, carving template, Diane Eugster painting, Foster Planing Mill, hand carving, picture frames 
![]()
SOURCE: Woodworks by John – Read entire story here.