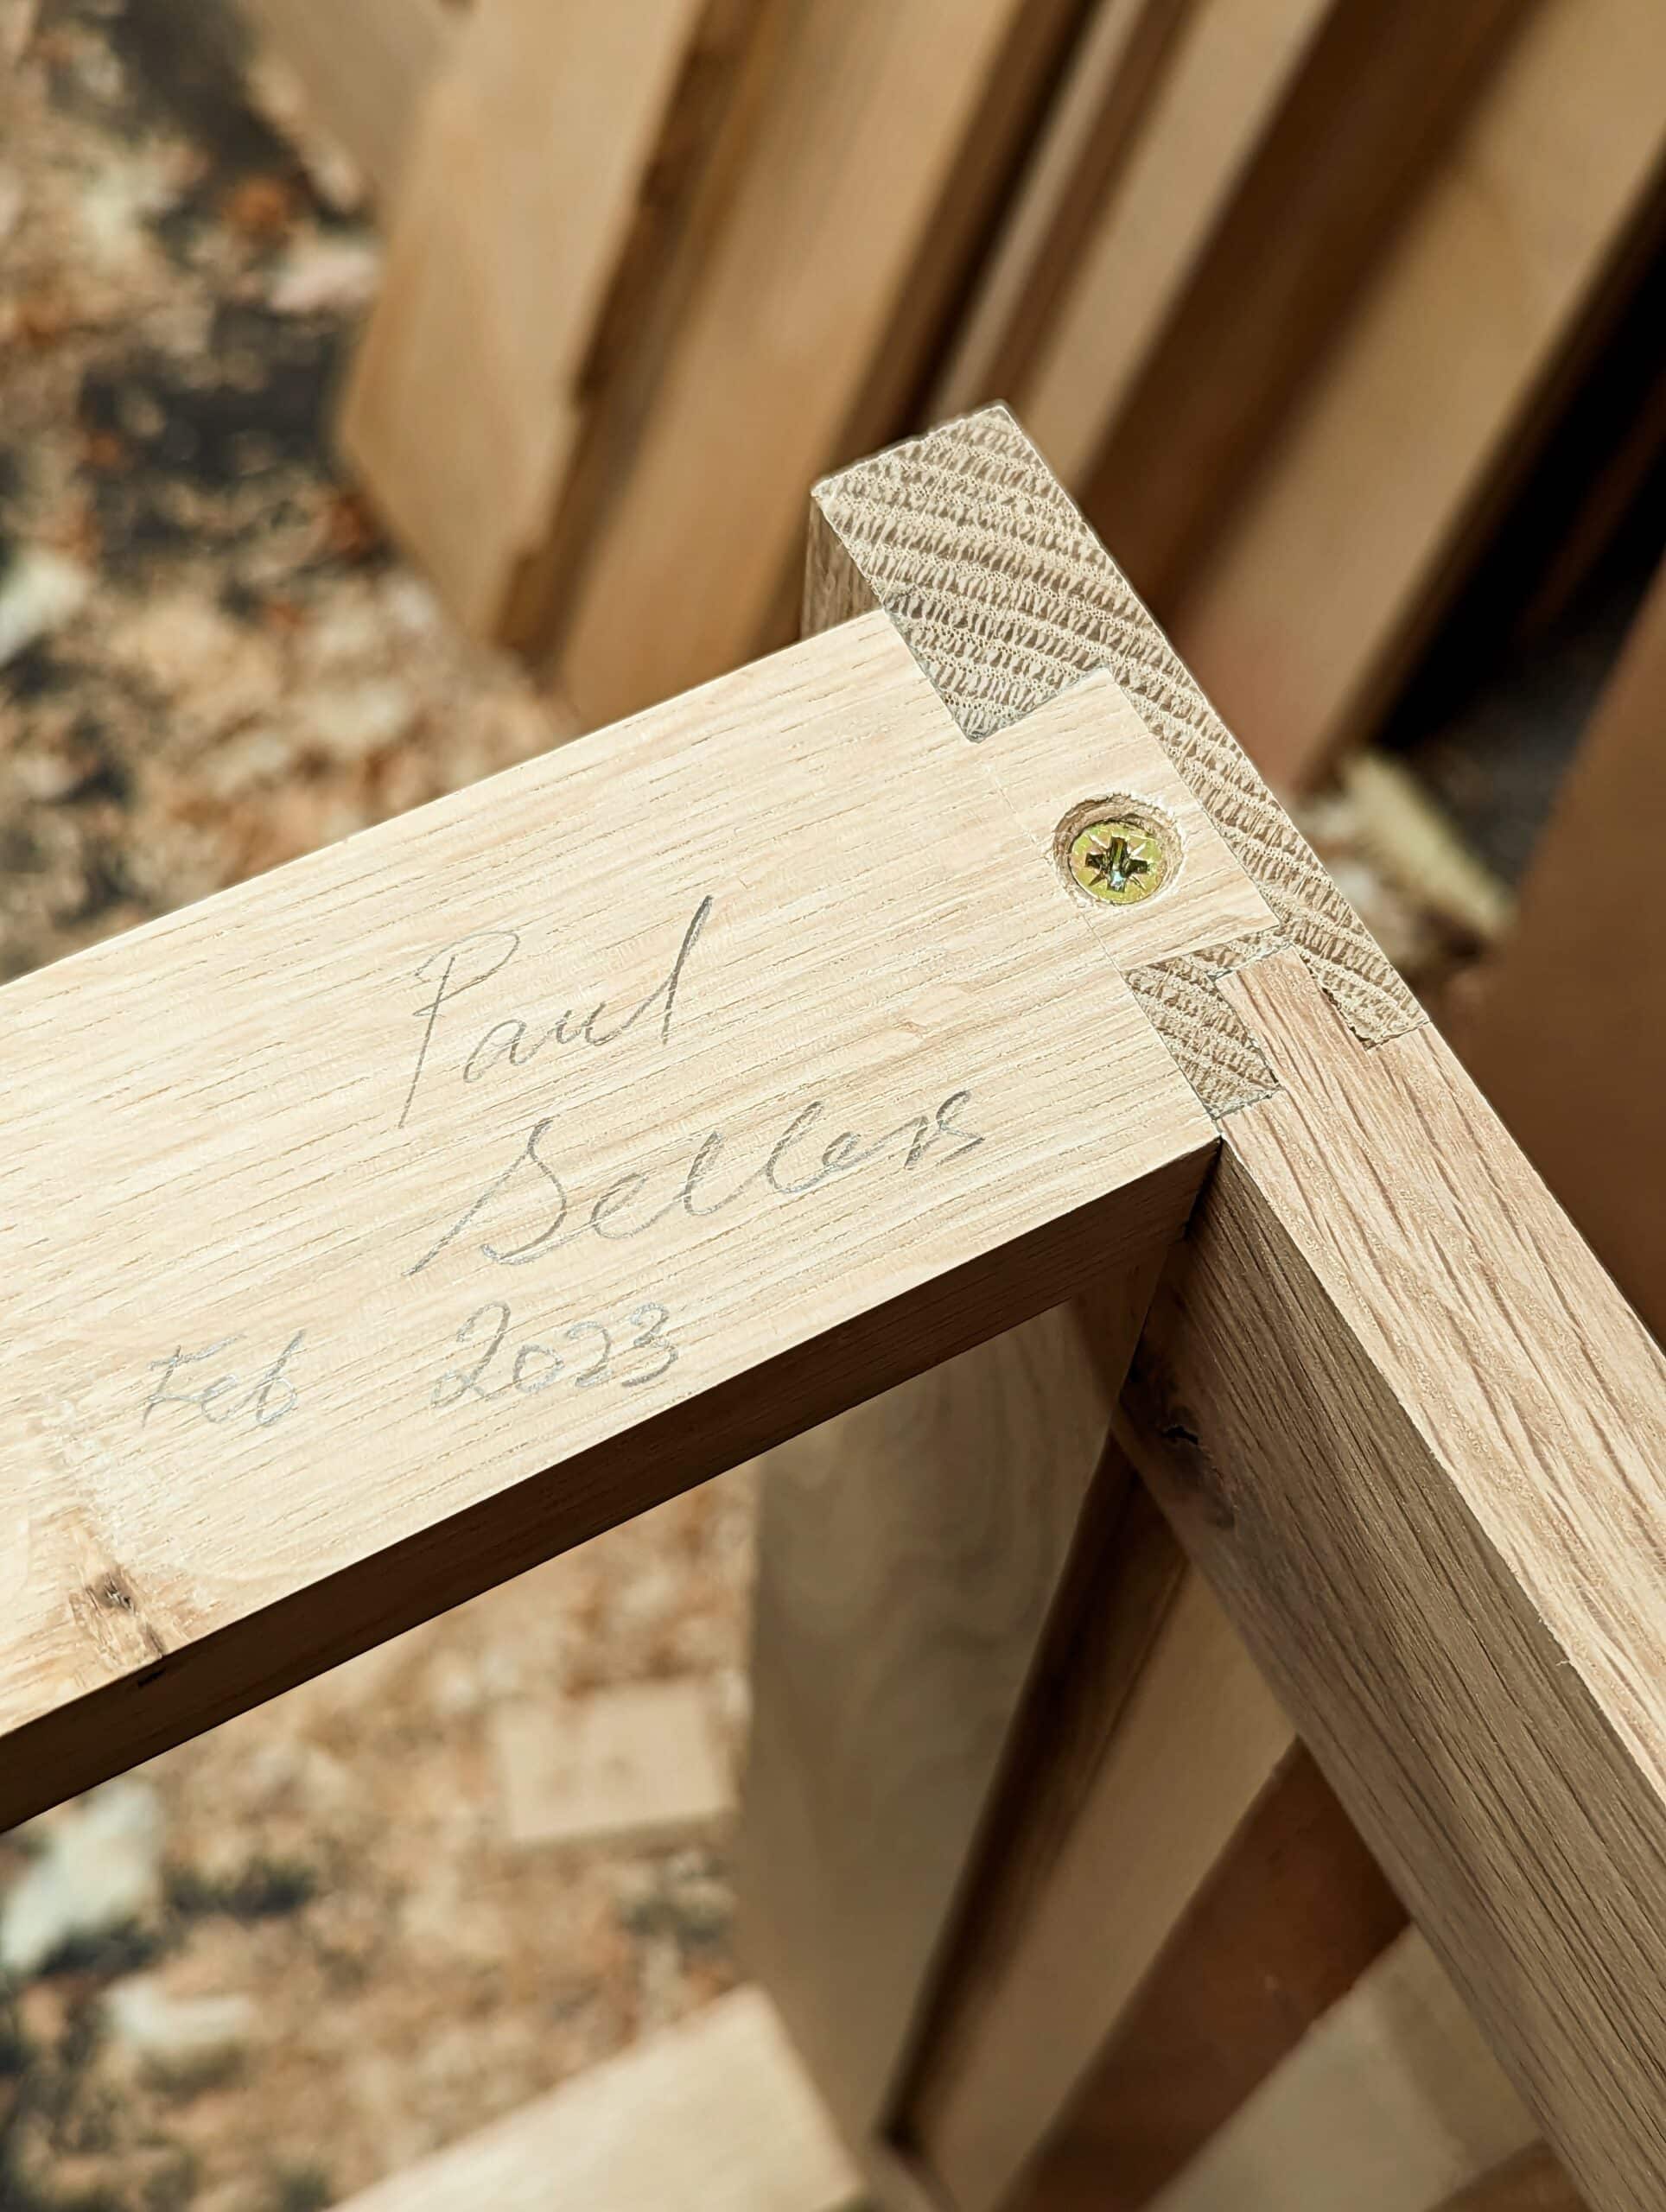
A few weeks ago I posted a blog on the pieces I had made over the last two years. So other woodworkers, you know, the professional ones, the ones who say you cannot make a living working with your hands using hand tools and just a bandsaw, could see what can be done if you apply yourself to master hand tools. I thought it would help if I priced what I would sell the pieces I made for the Sellers’ Home series for but not as a famed woodworker. I based the prices on what I sold my work for when I lived in and around my last years living in Texas which ended in 2009.
Remember that every one of these pieces made for the house is a new and unique design from my Sellers’ Home Portfolio Collection. I have not added any design costs as I might if I were making to sell a unique design of my own to a customer so that would increase the pricing. I have always clarified to my customers that if I design a unique piece for them, a piece never designed or made before, then there is a design cost simply because a new and unique design takes as much time as making the piece. The design, intellectual property and copyright always remain mine as the designer-maker alone and are never transferred with the piece unless determined ahead of time.
January 2021
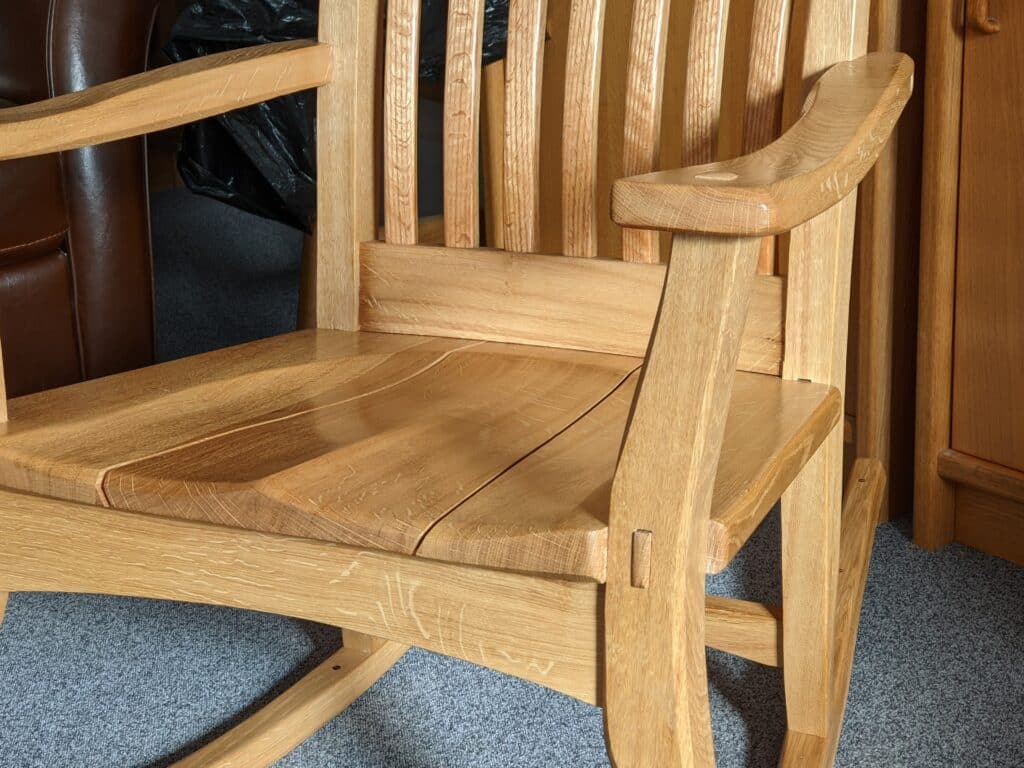
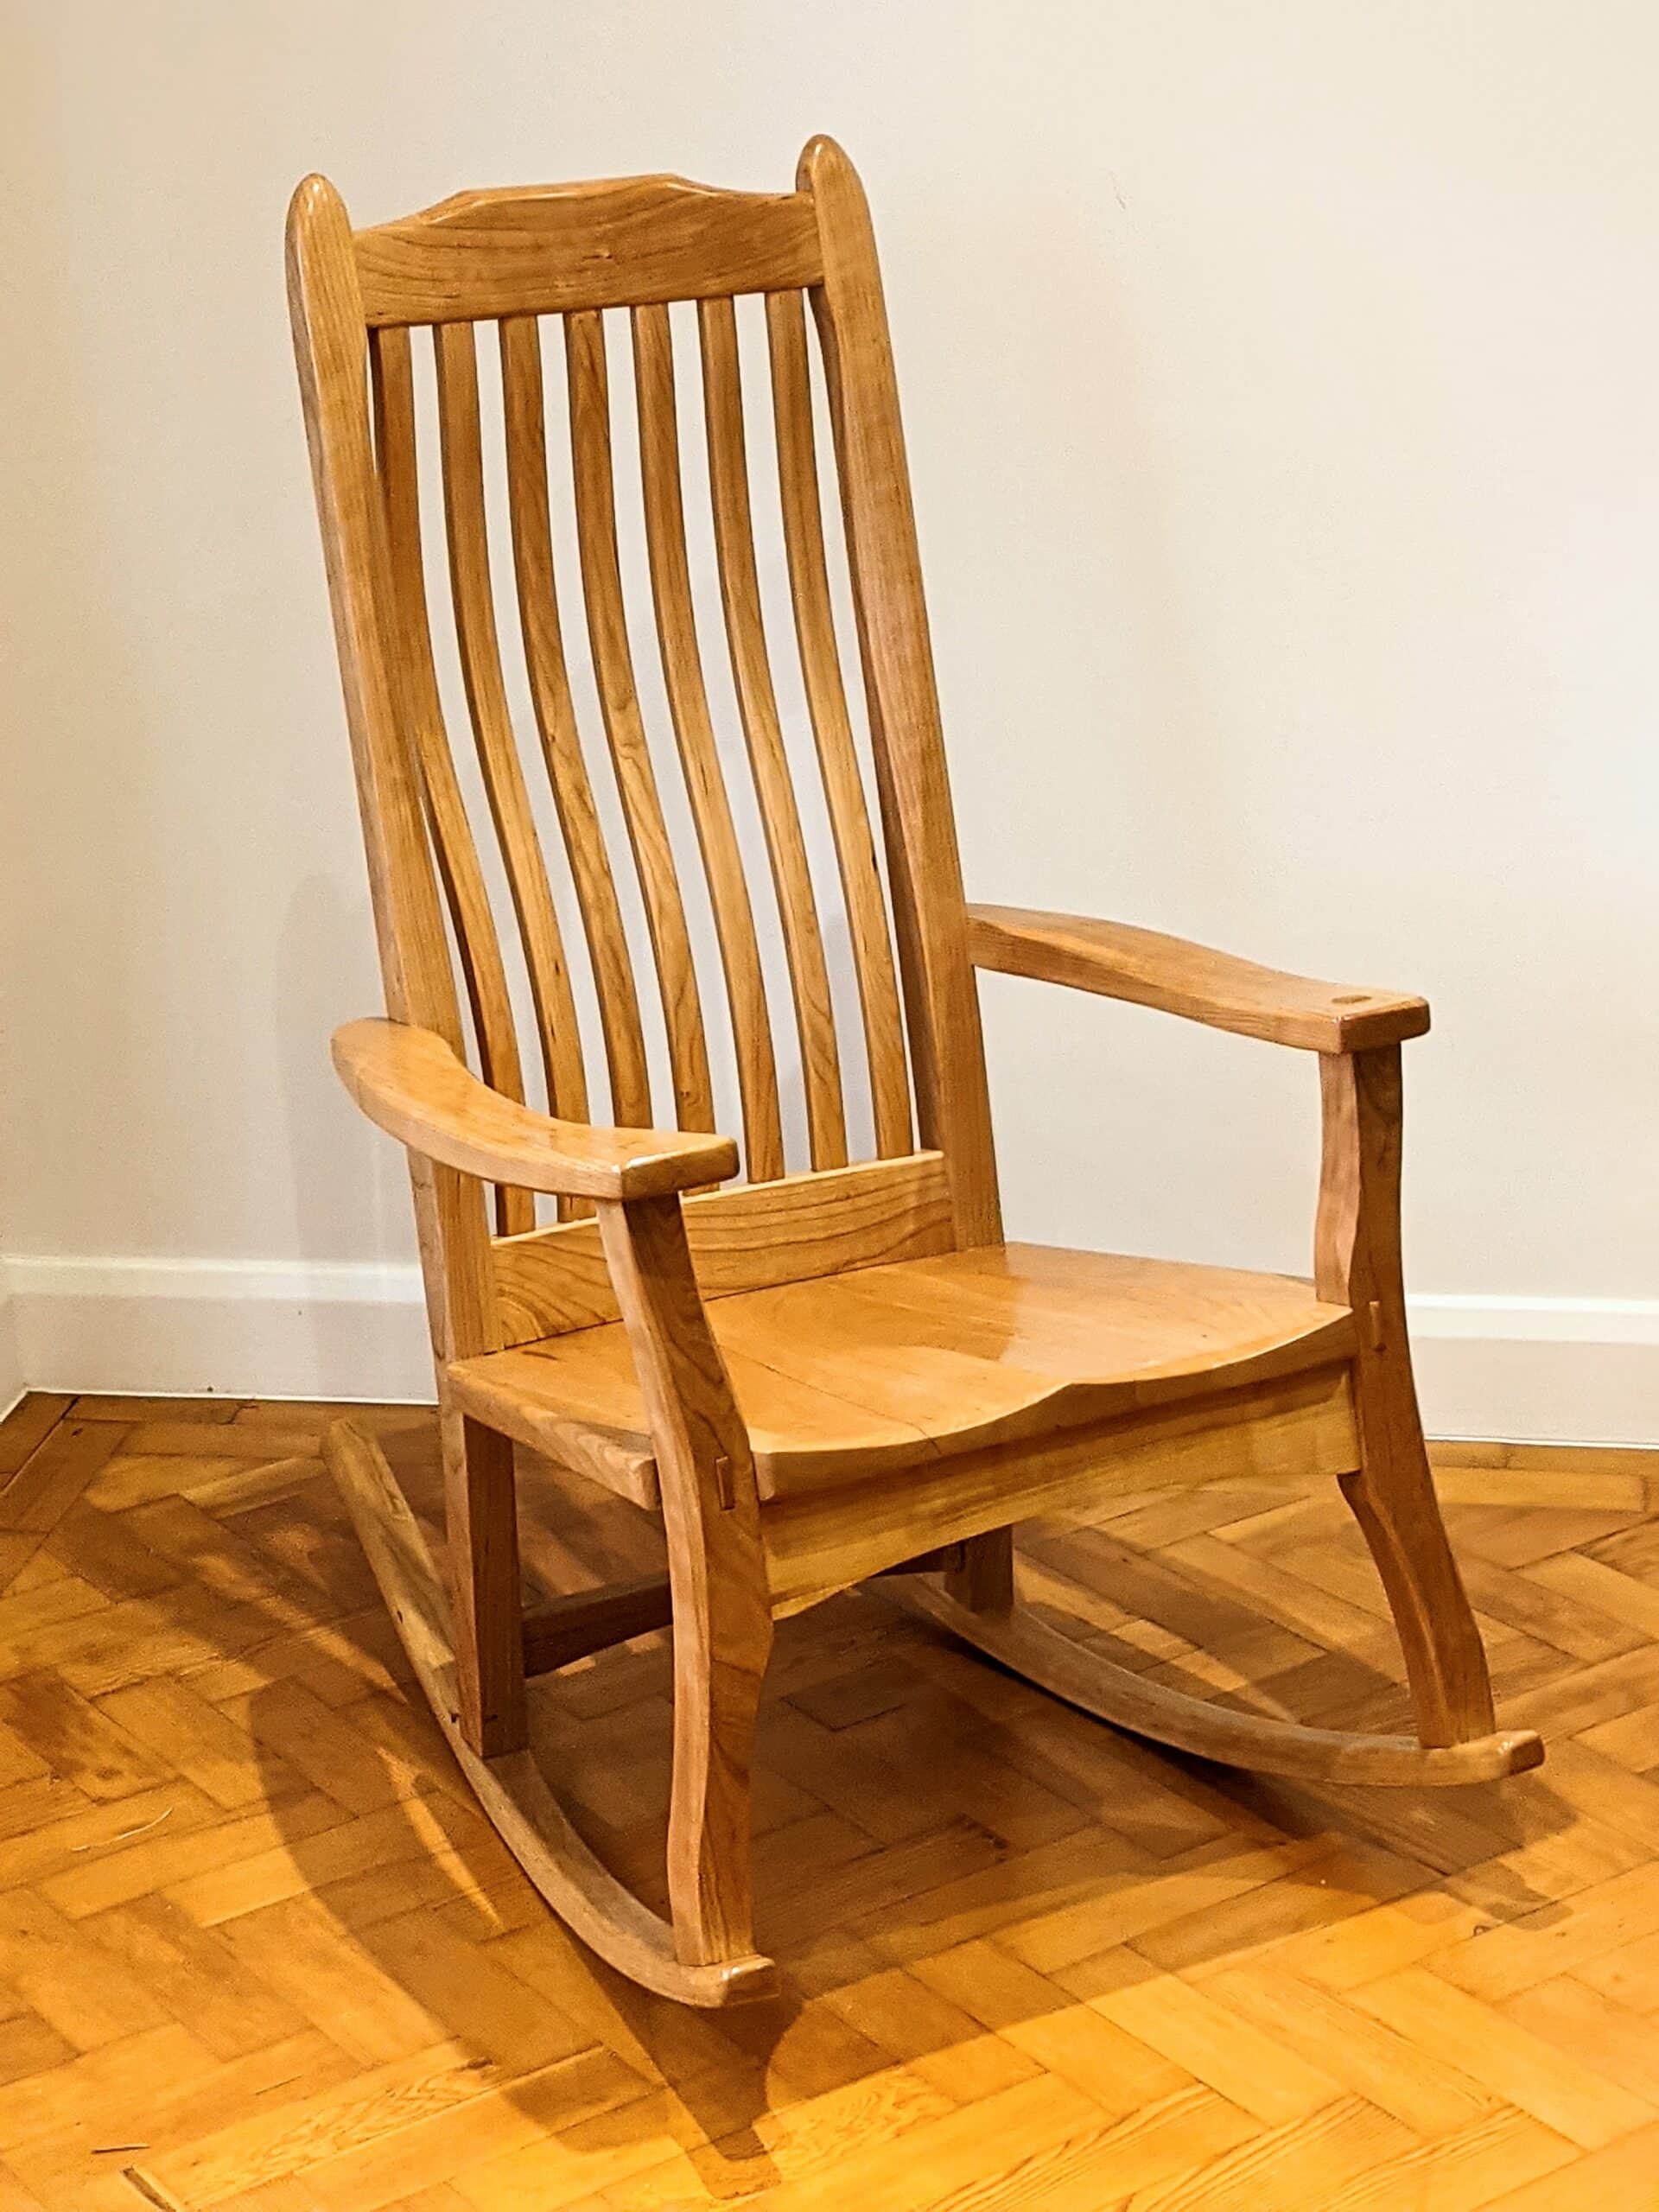
The first piece I made was the cherry rocking chair. I can make this in five to six days ten-hour days so let’s say six days. I would sell this chair for $3,600 and it would sell easily for that. The Brazos rocking chair I designed and made in Texas for a decade sold over and over for $4,000.
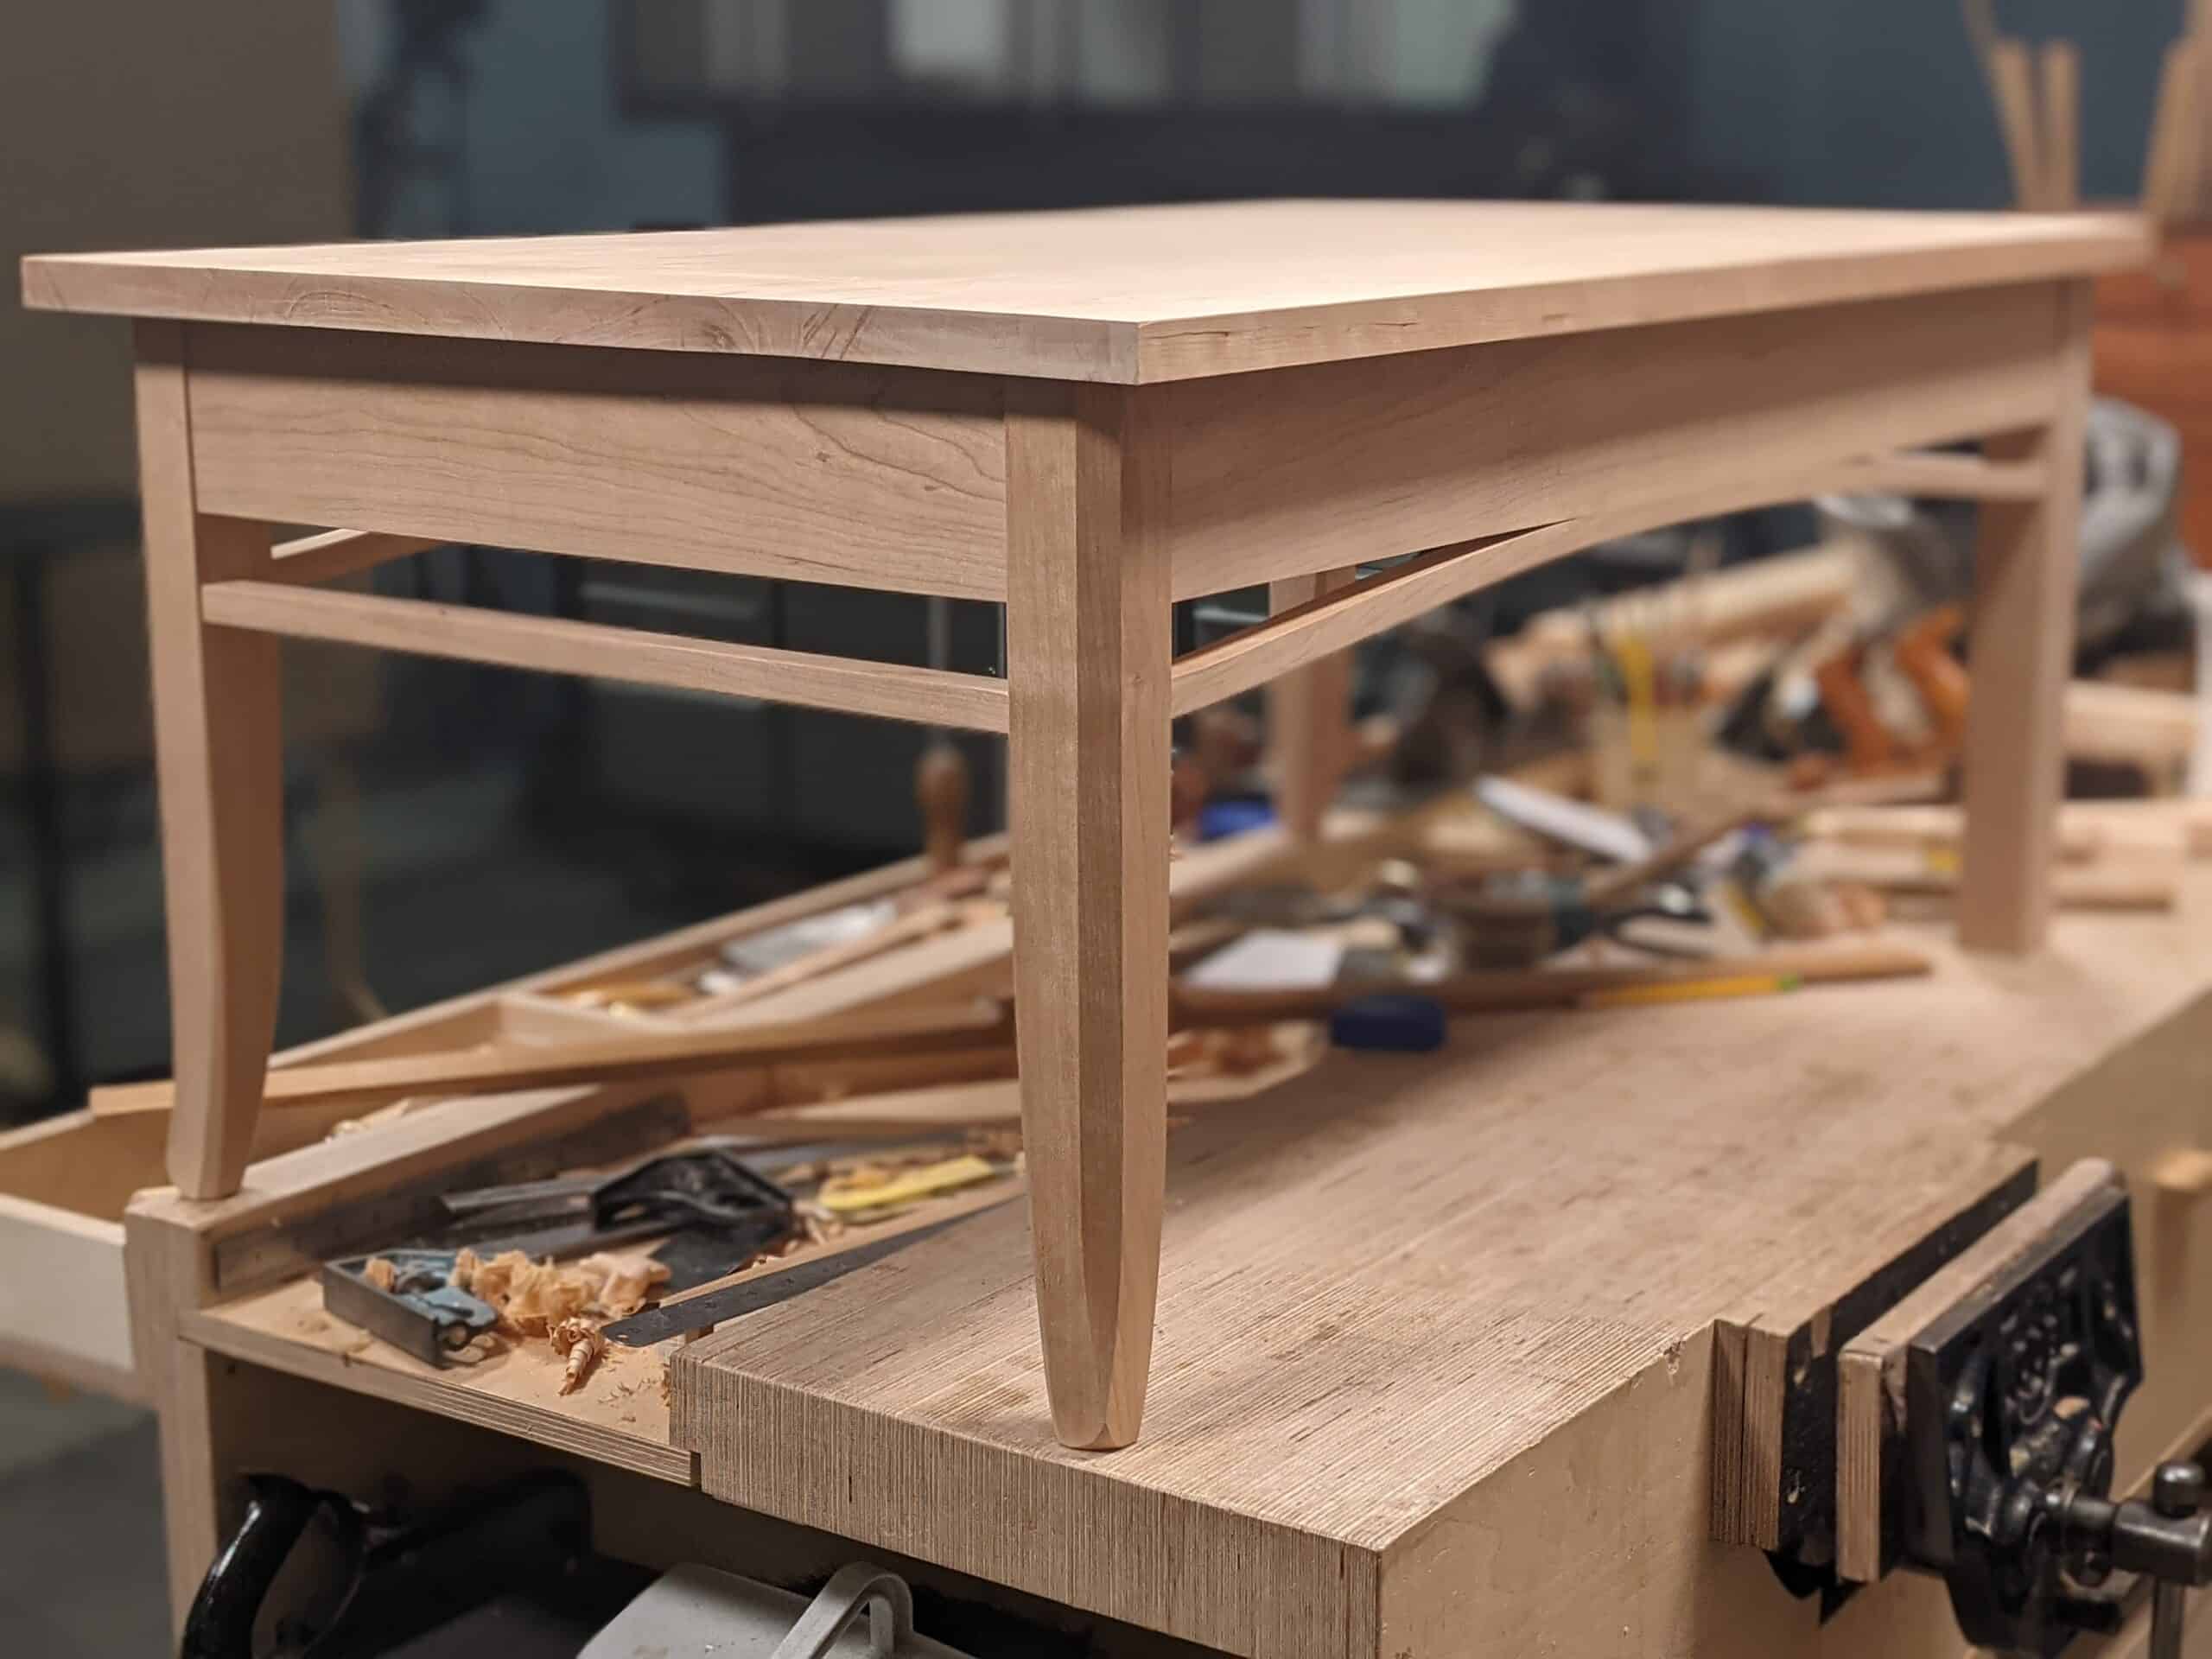
The coffee table would sell for about $2,000. Probably more, $2,500. This was a week’s work. Why am I working in dollars? Because the USA was where I lived and worked and sold my work in the more recent decades so why not?
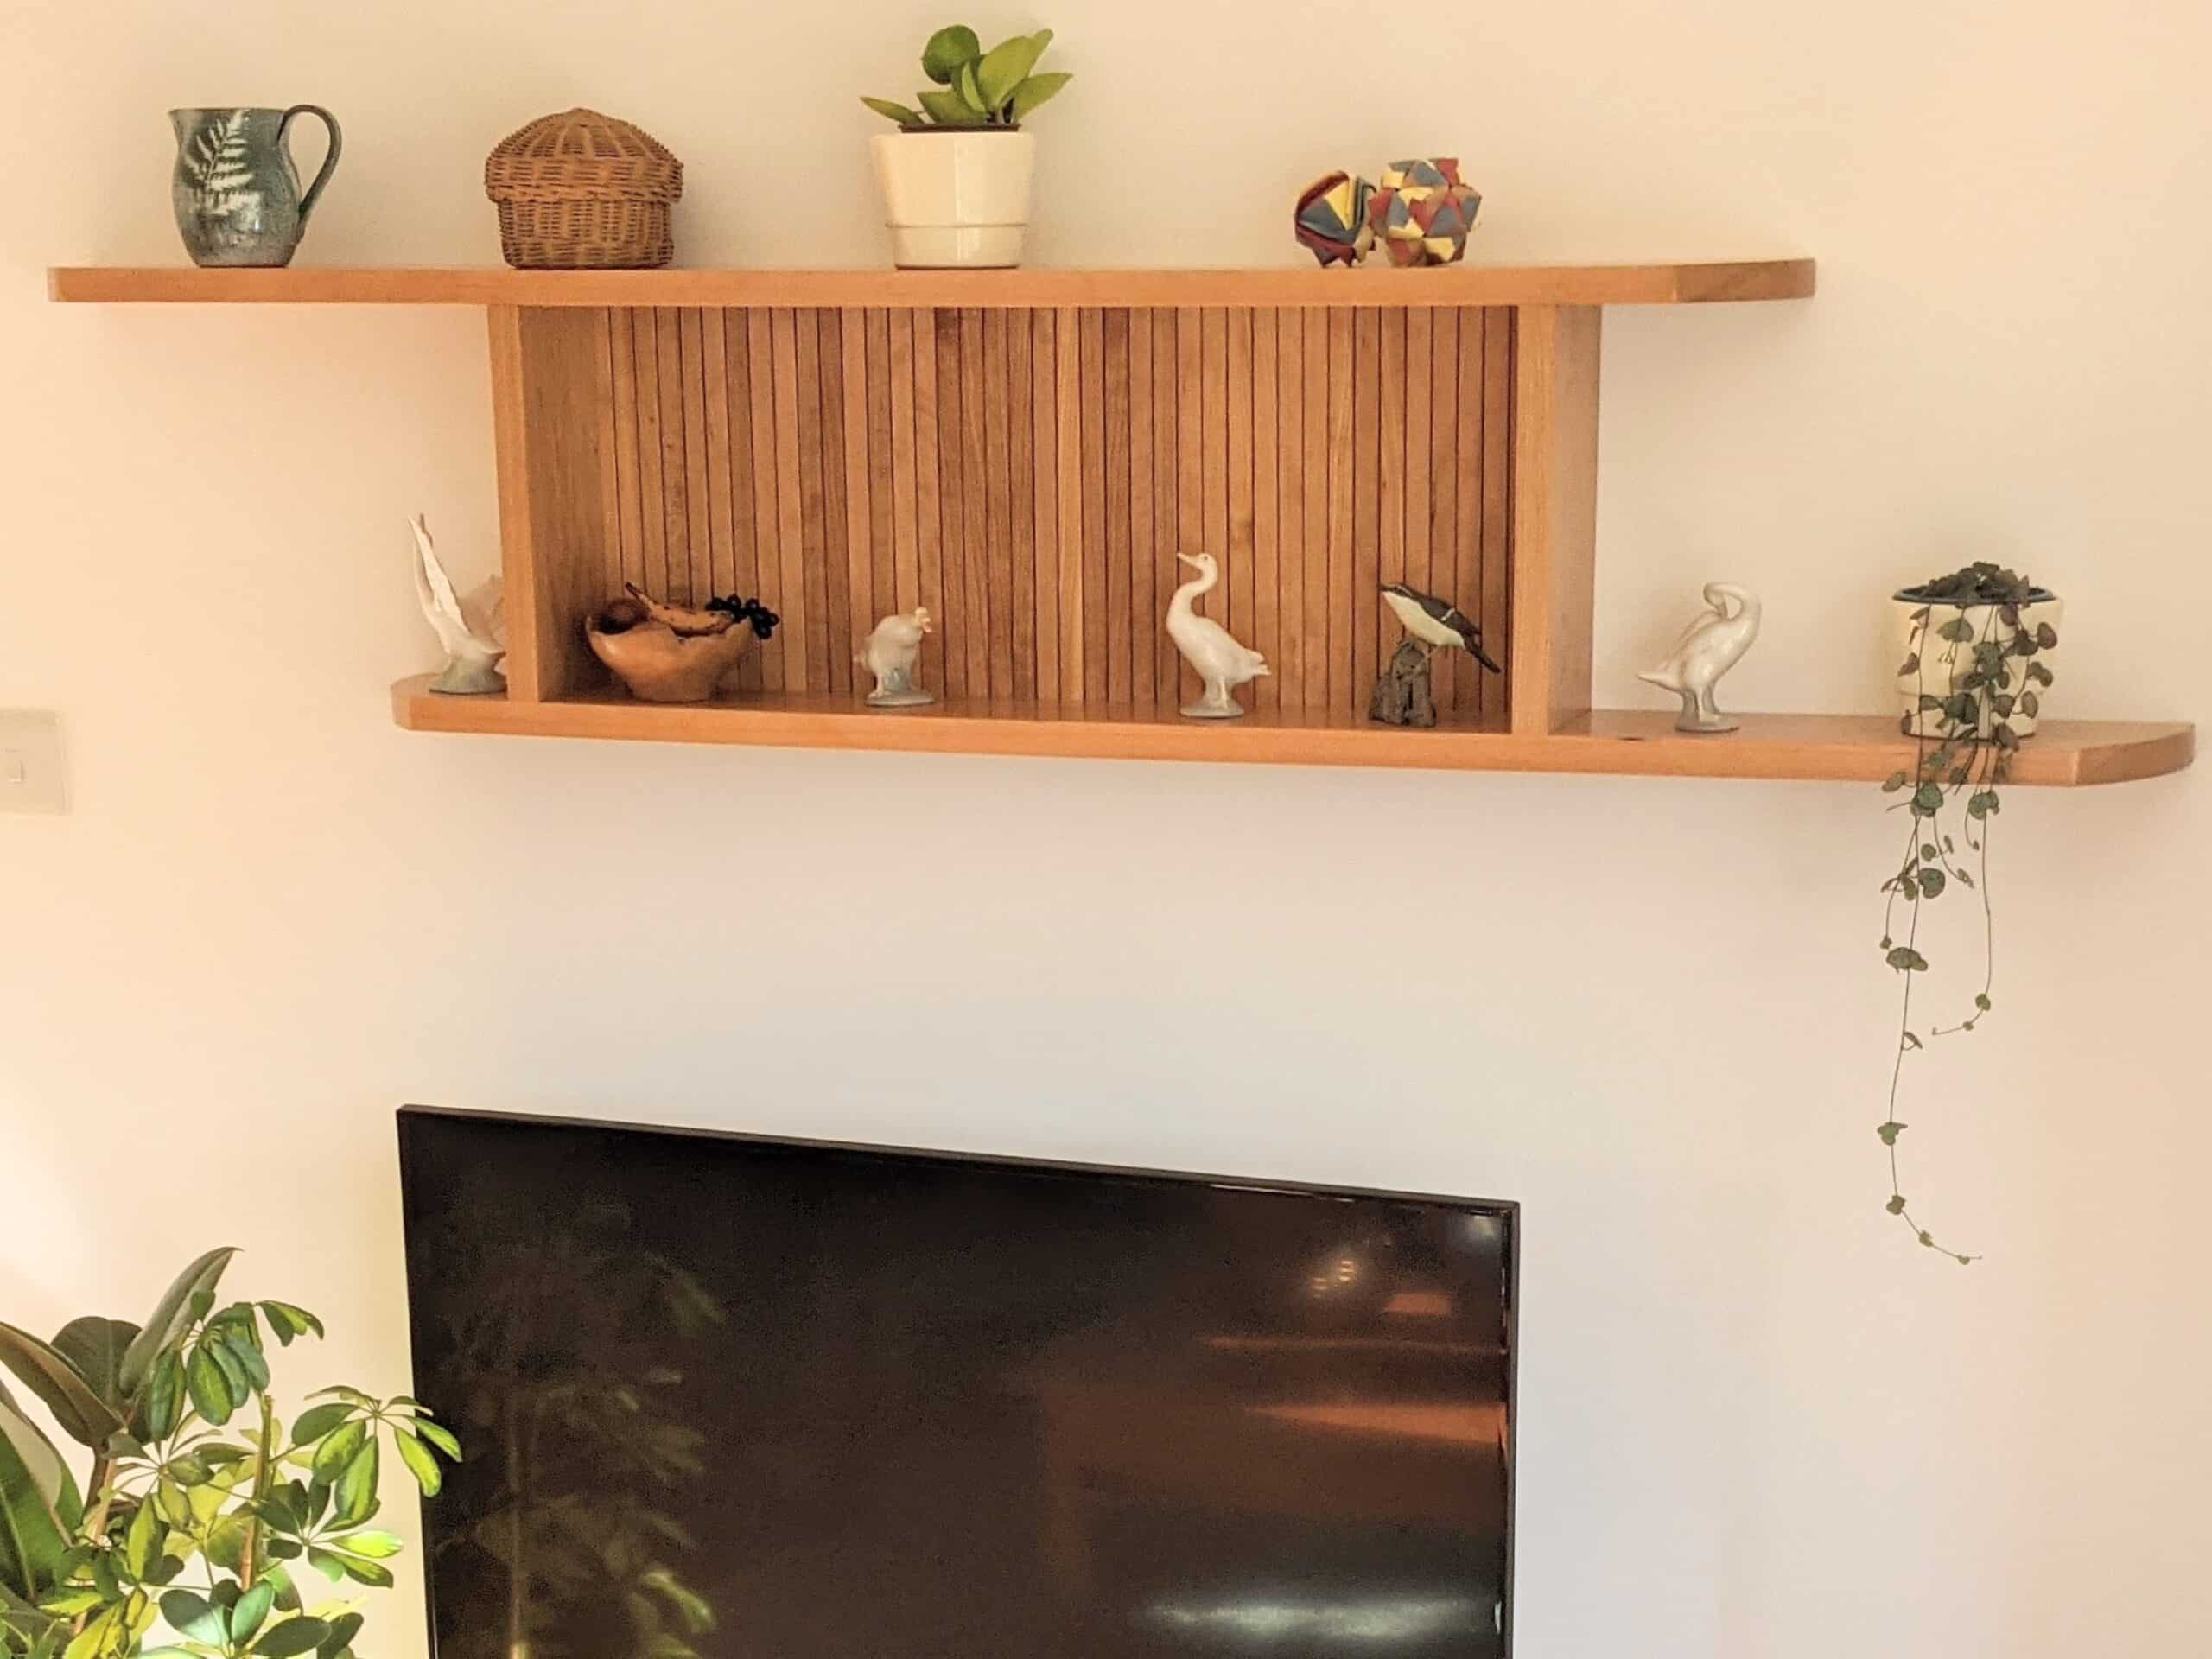
The wall shelf I would sell for $500. I could sell a larger, deeper version for more, perhaps double that, even though it would not take twice as long to make. This was a day’s work.
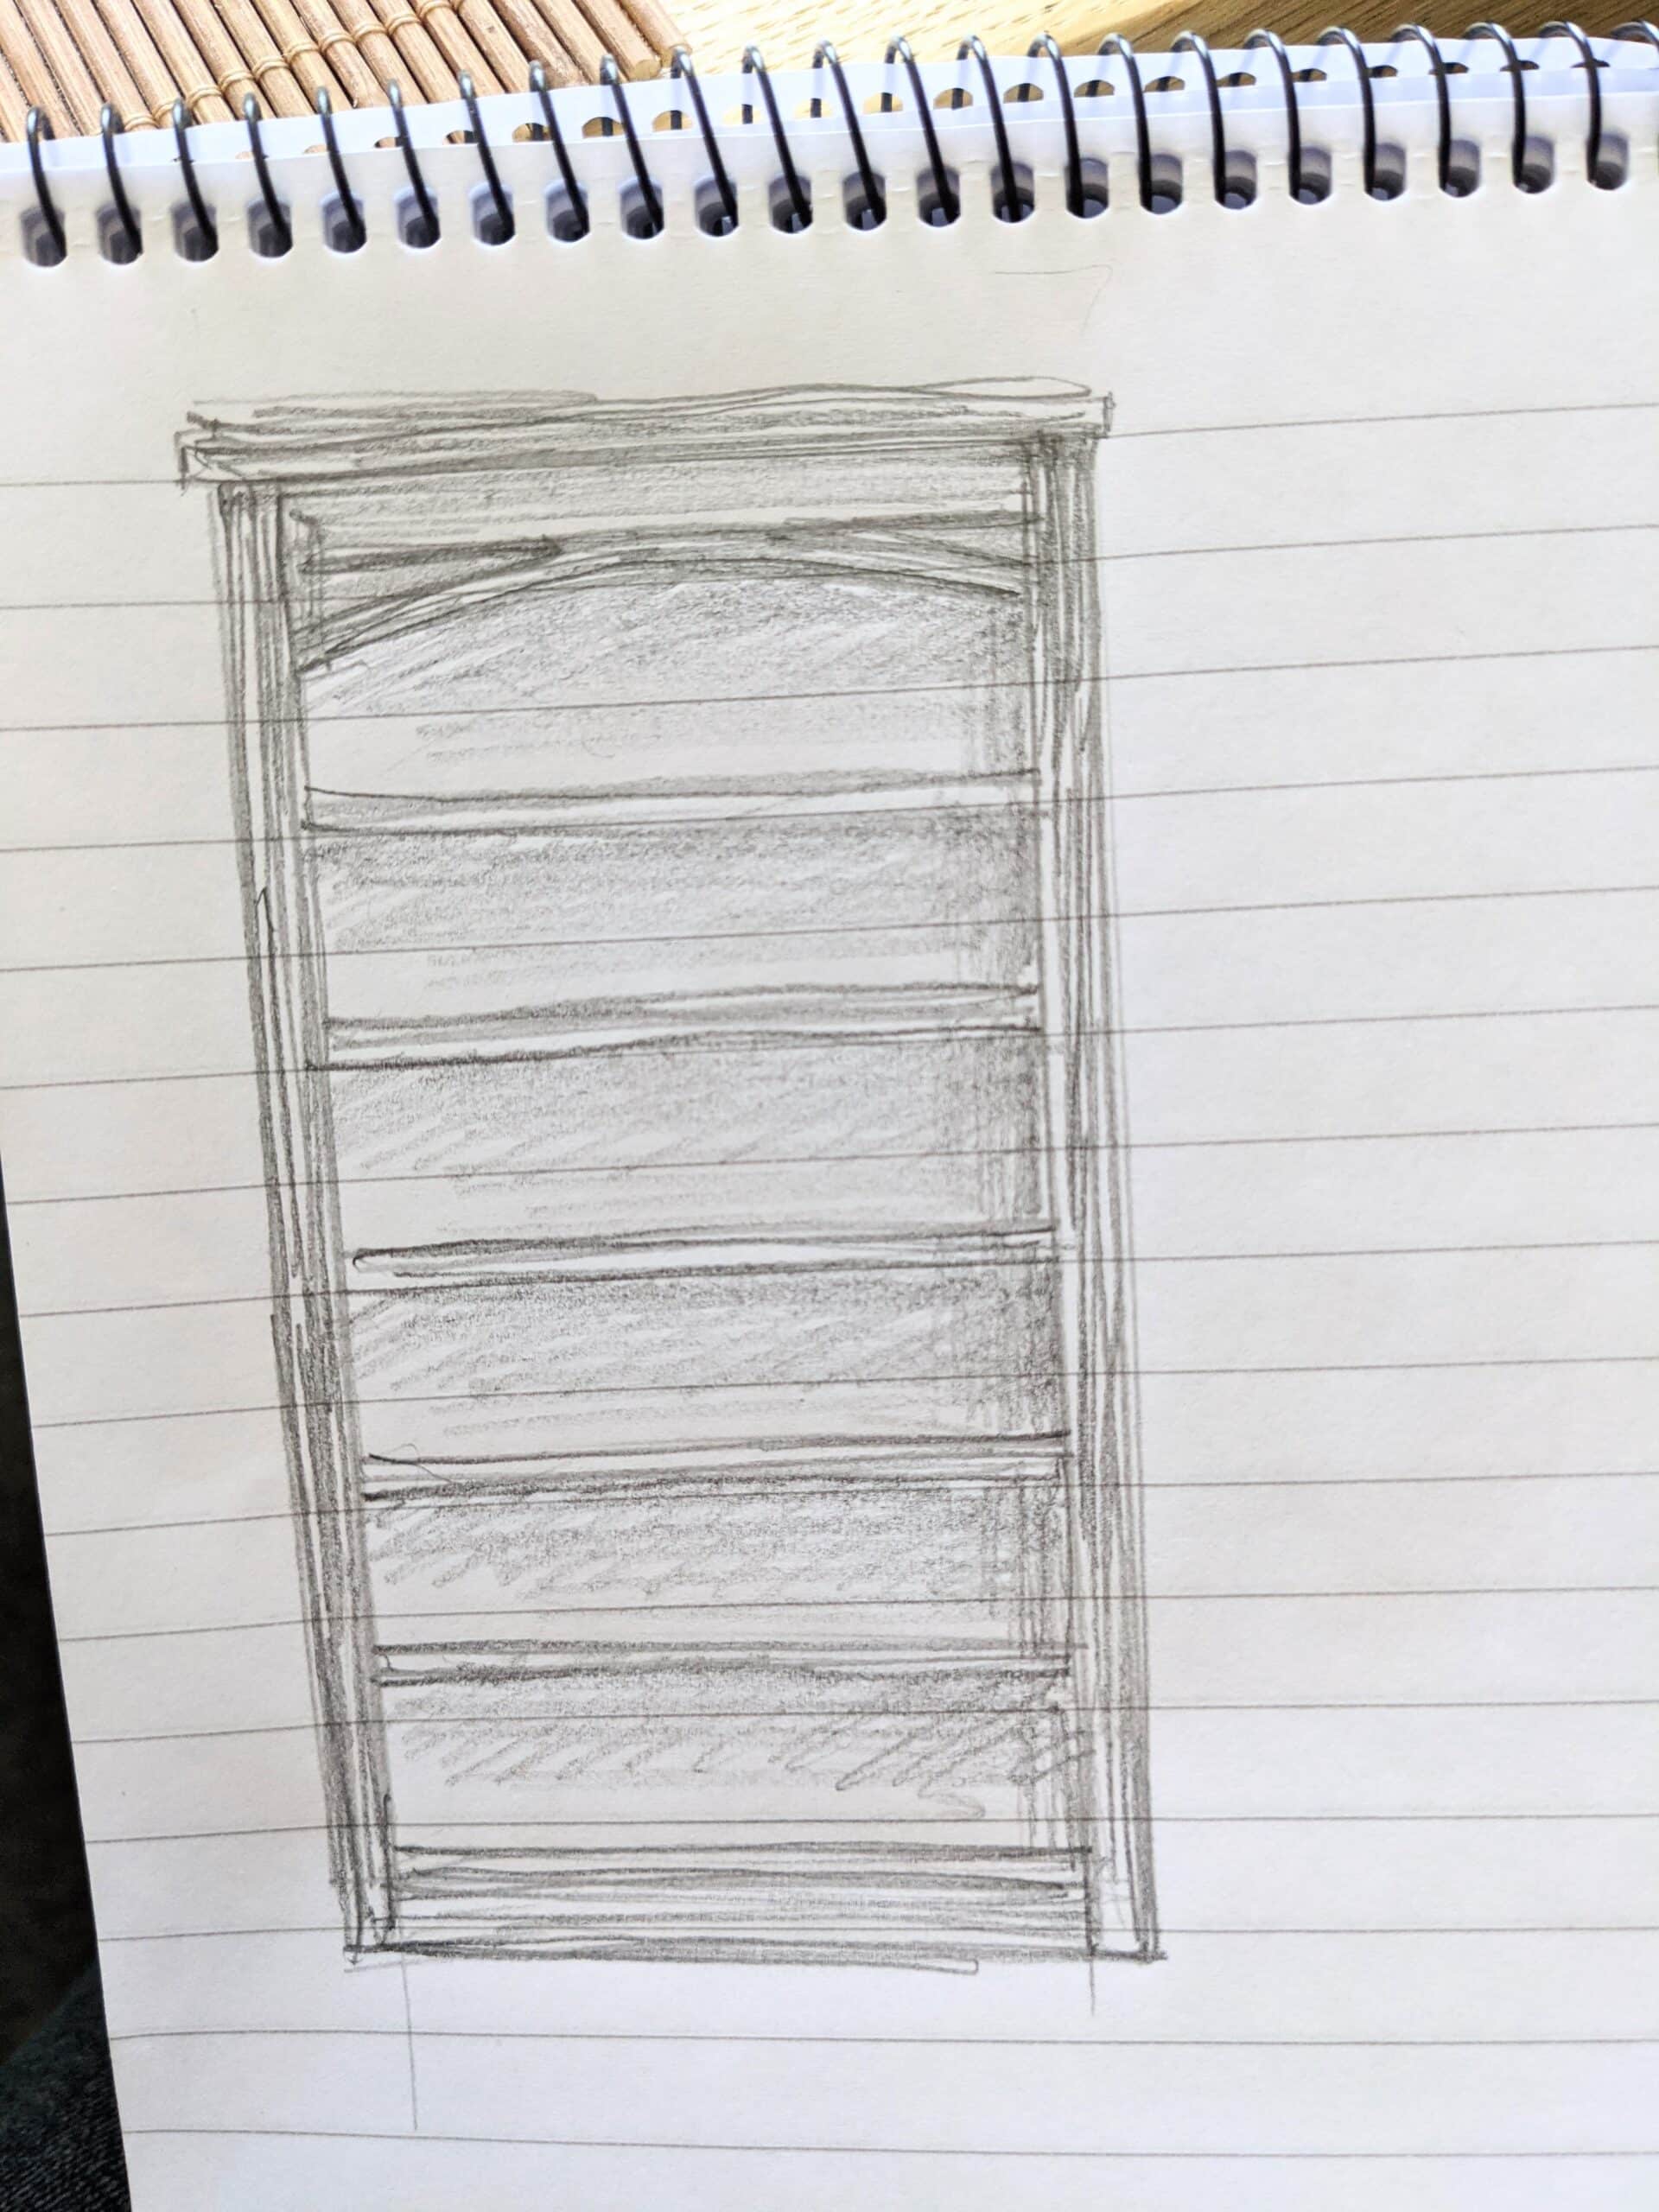
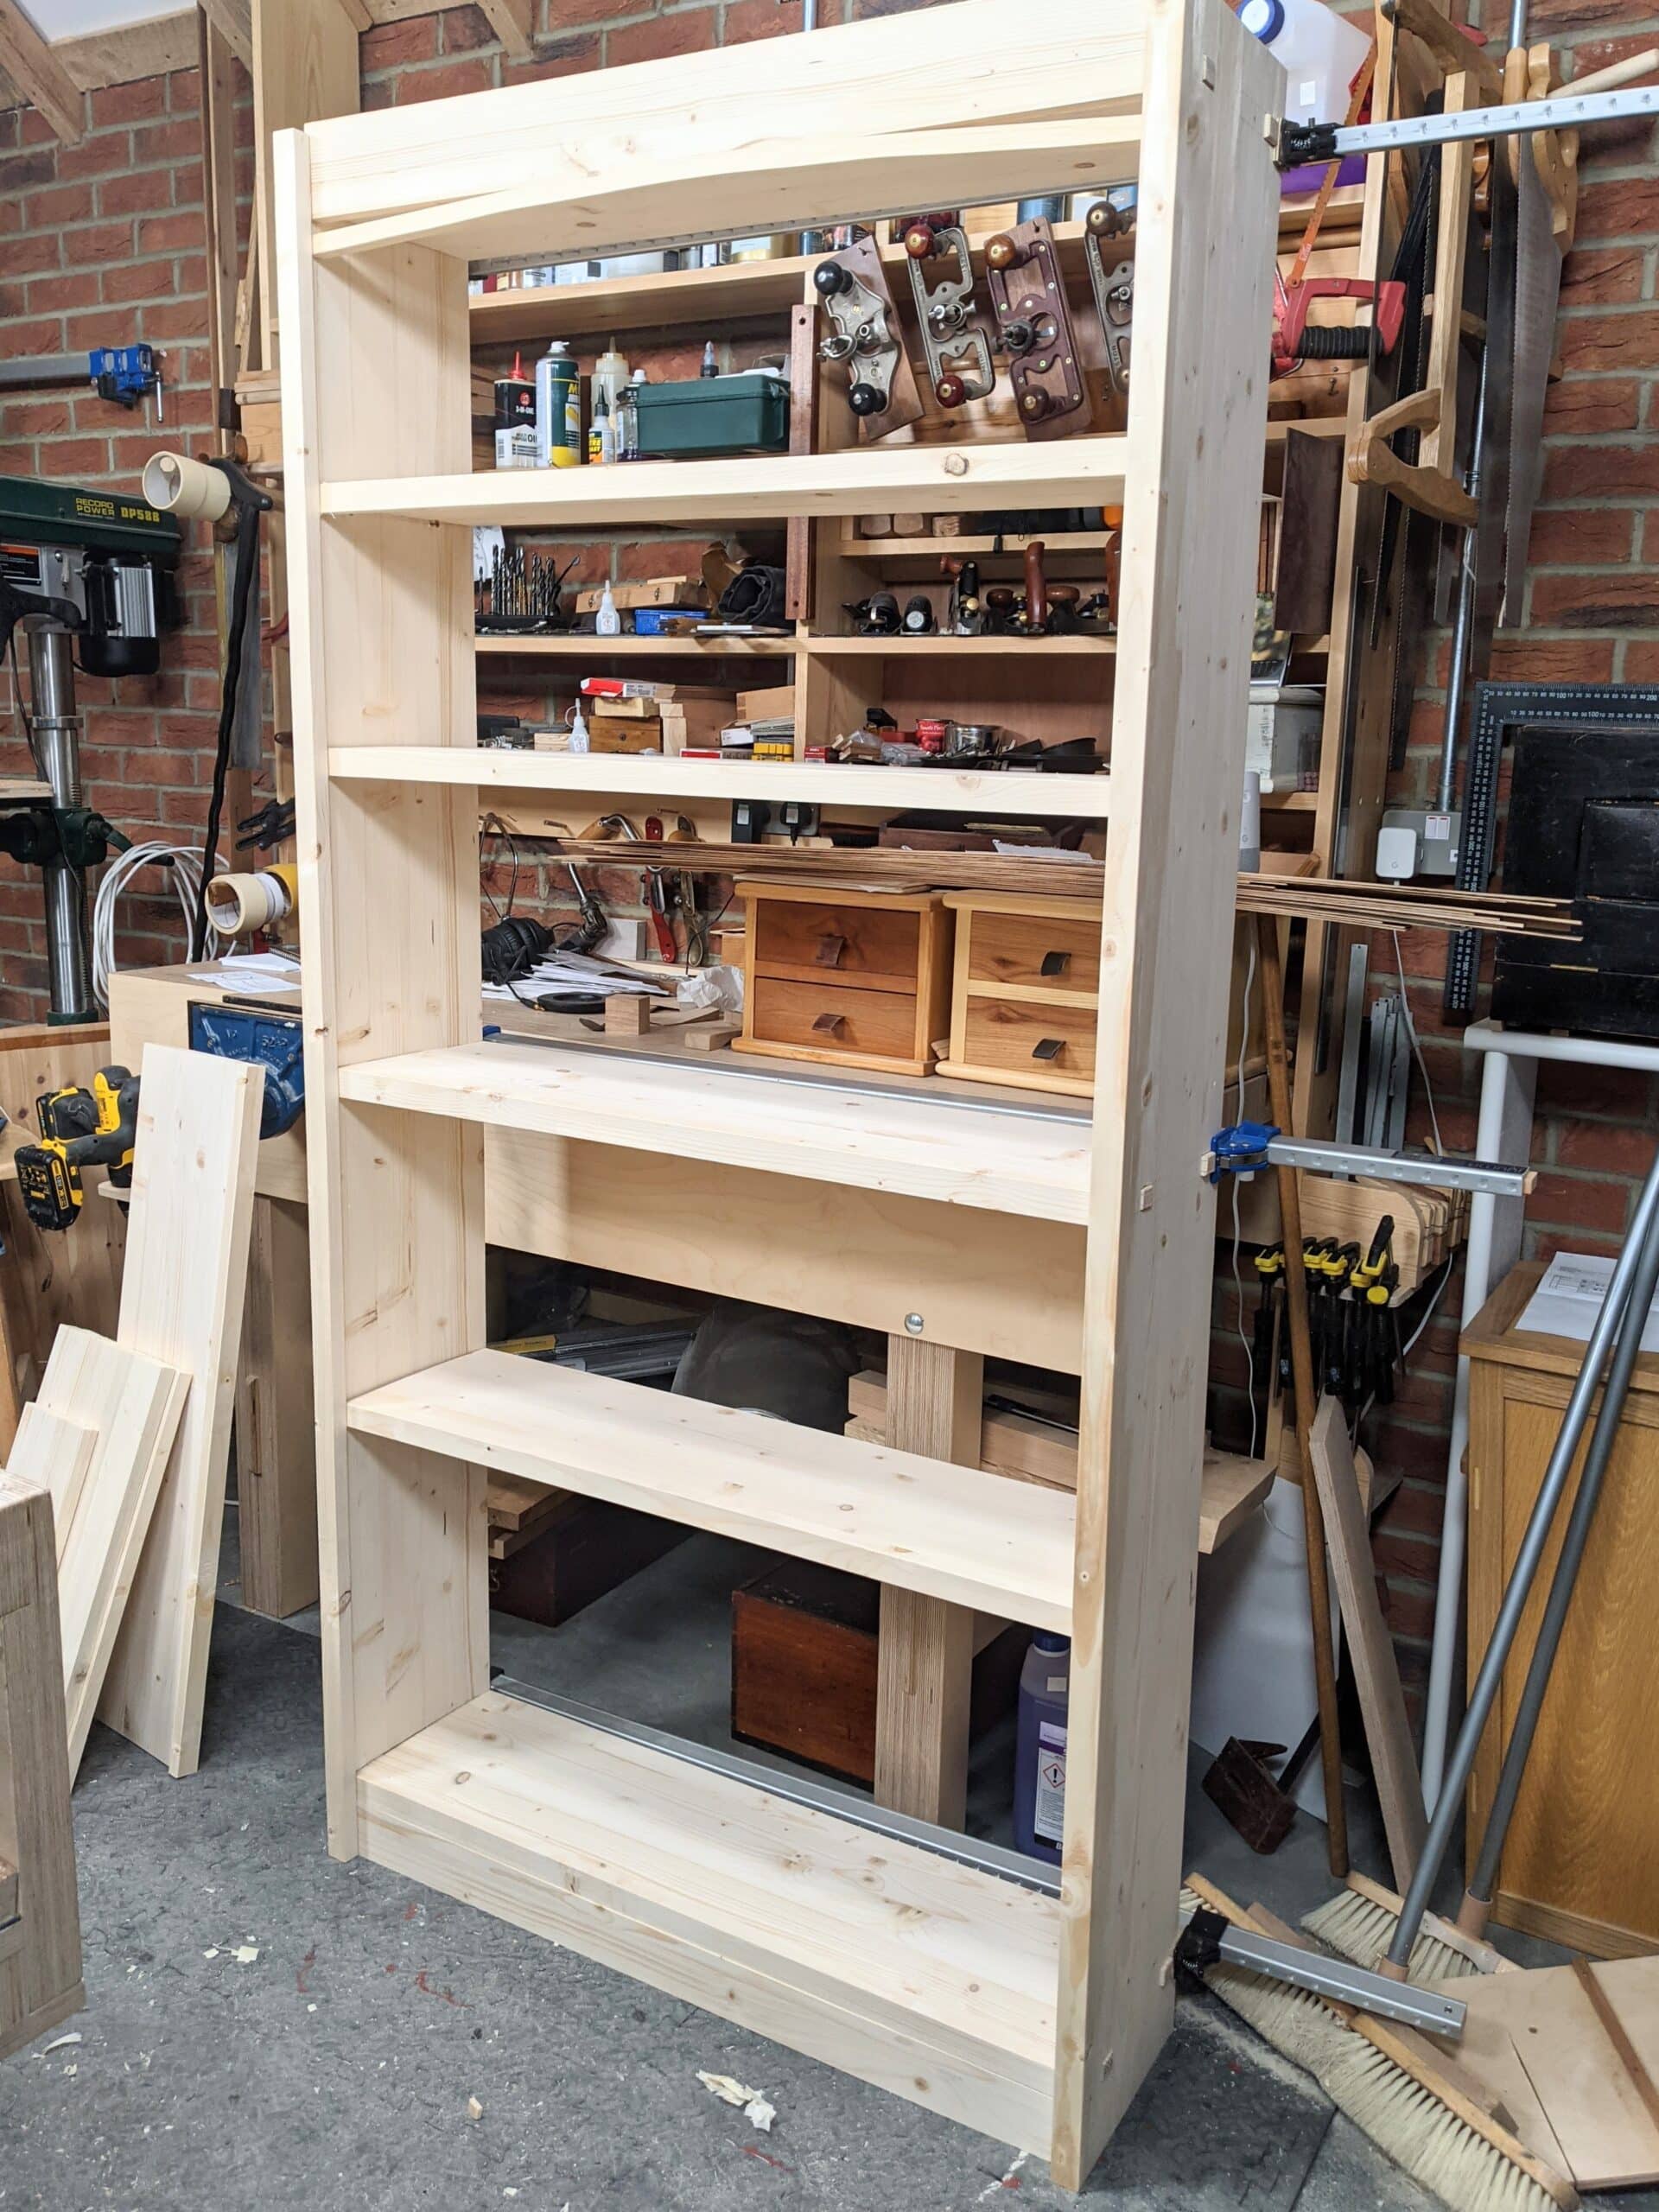
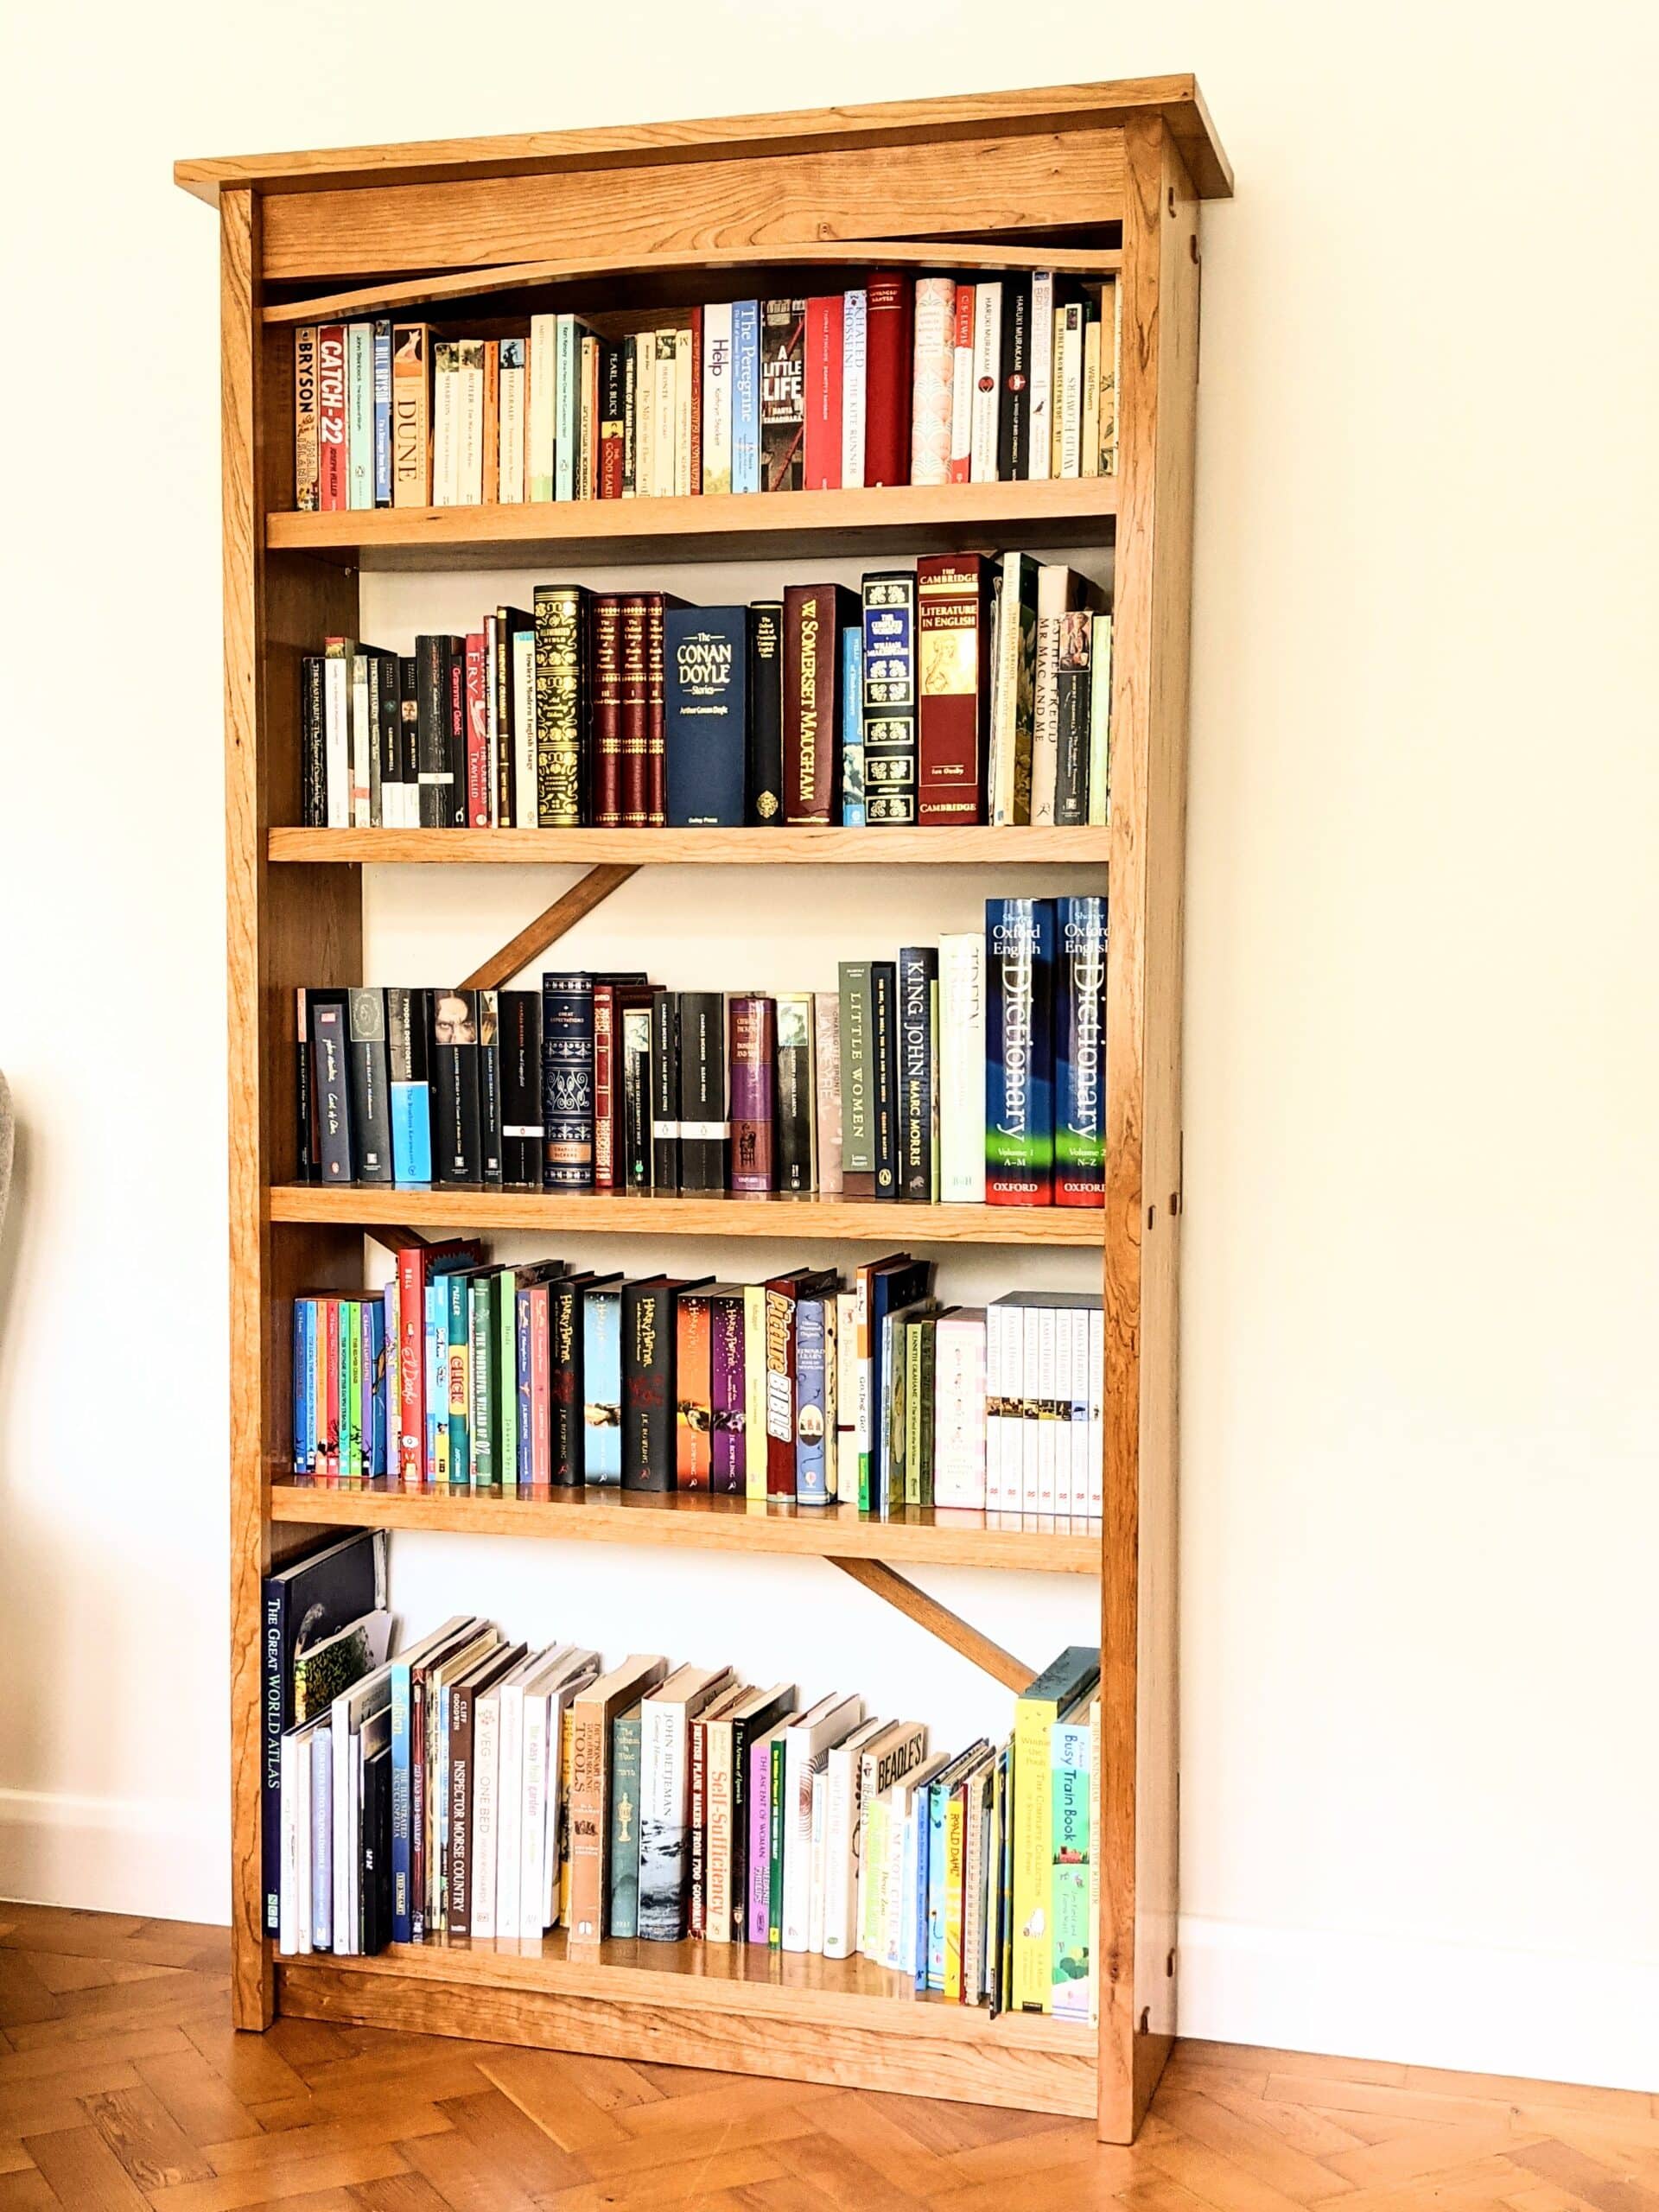
The bookshelf will sell for $1,200 though I would most likely simplify some of the construction by not having through-tenons and using a cherry plywood panel for the back rather than the bracing. This was a week’s work and some of the features were added to make the project more of a challenge for those following and learning. The through tenon idea added a lot of substantive strength and resilience to the piece.
Sub total so far is $7,800 for about 18 days labour. So, $433 a day less materials.
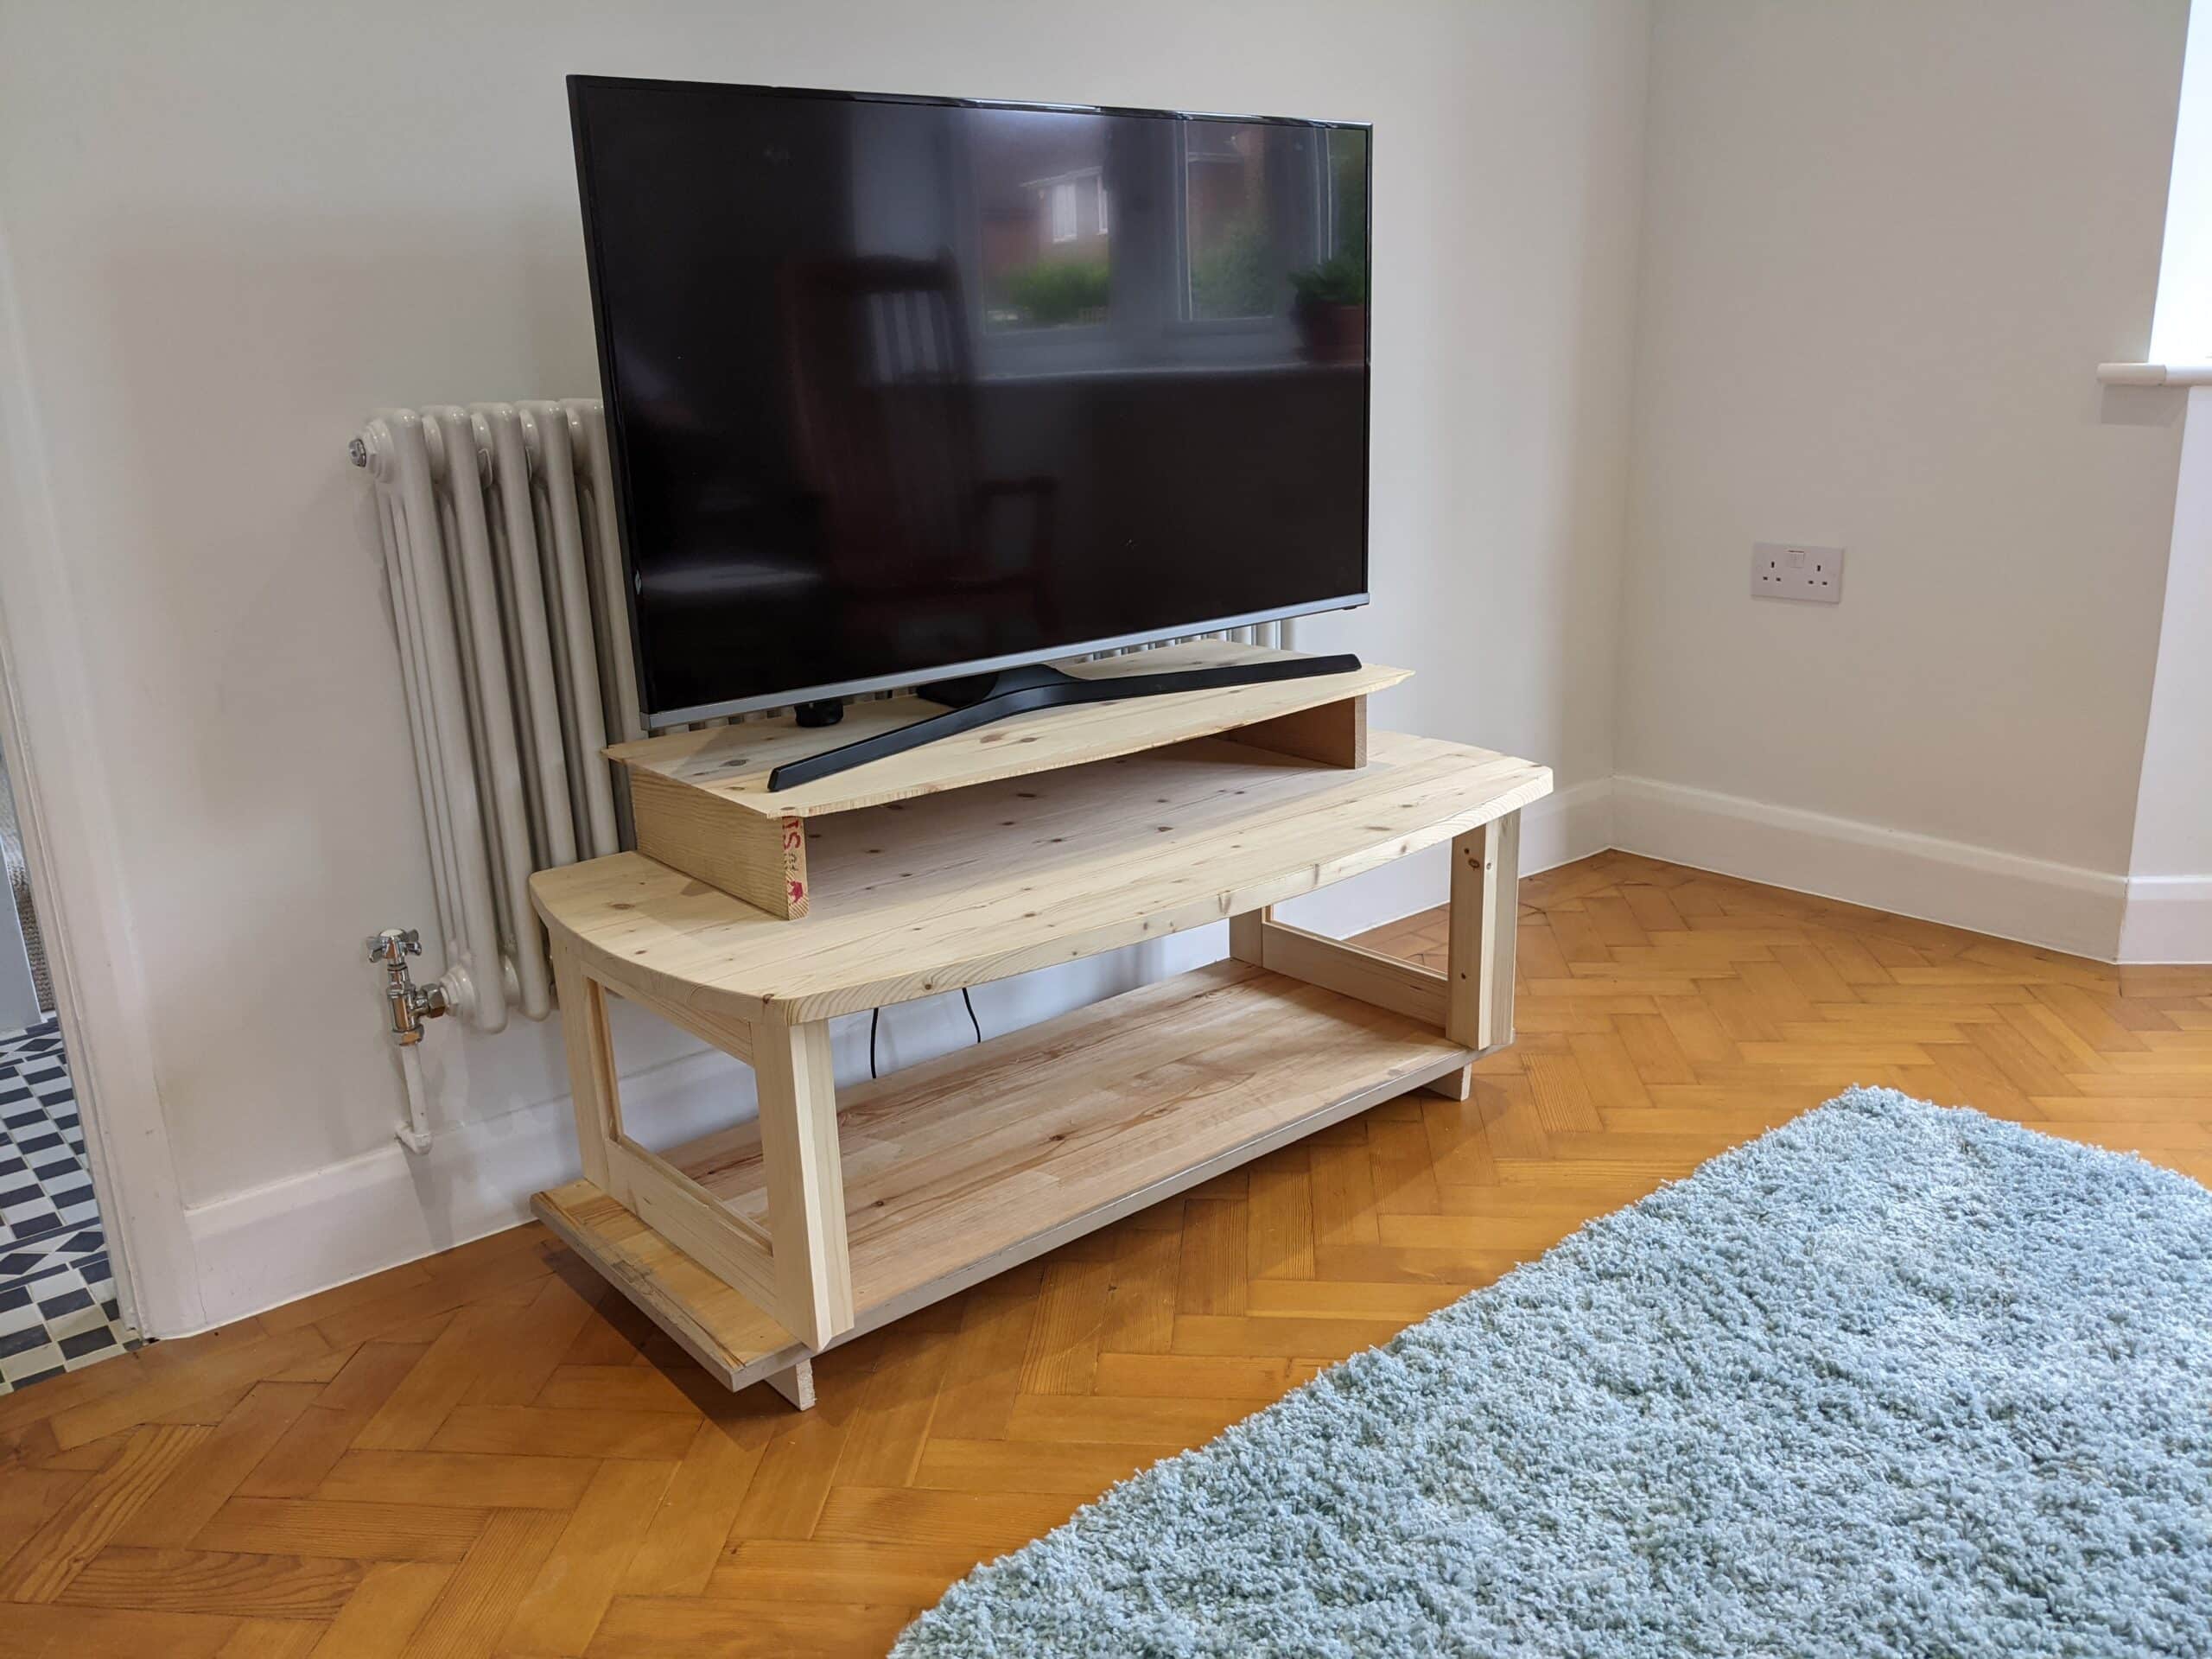
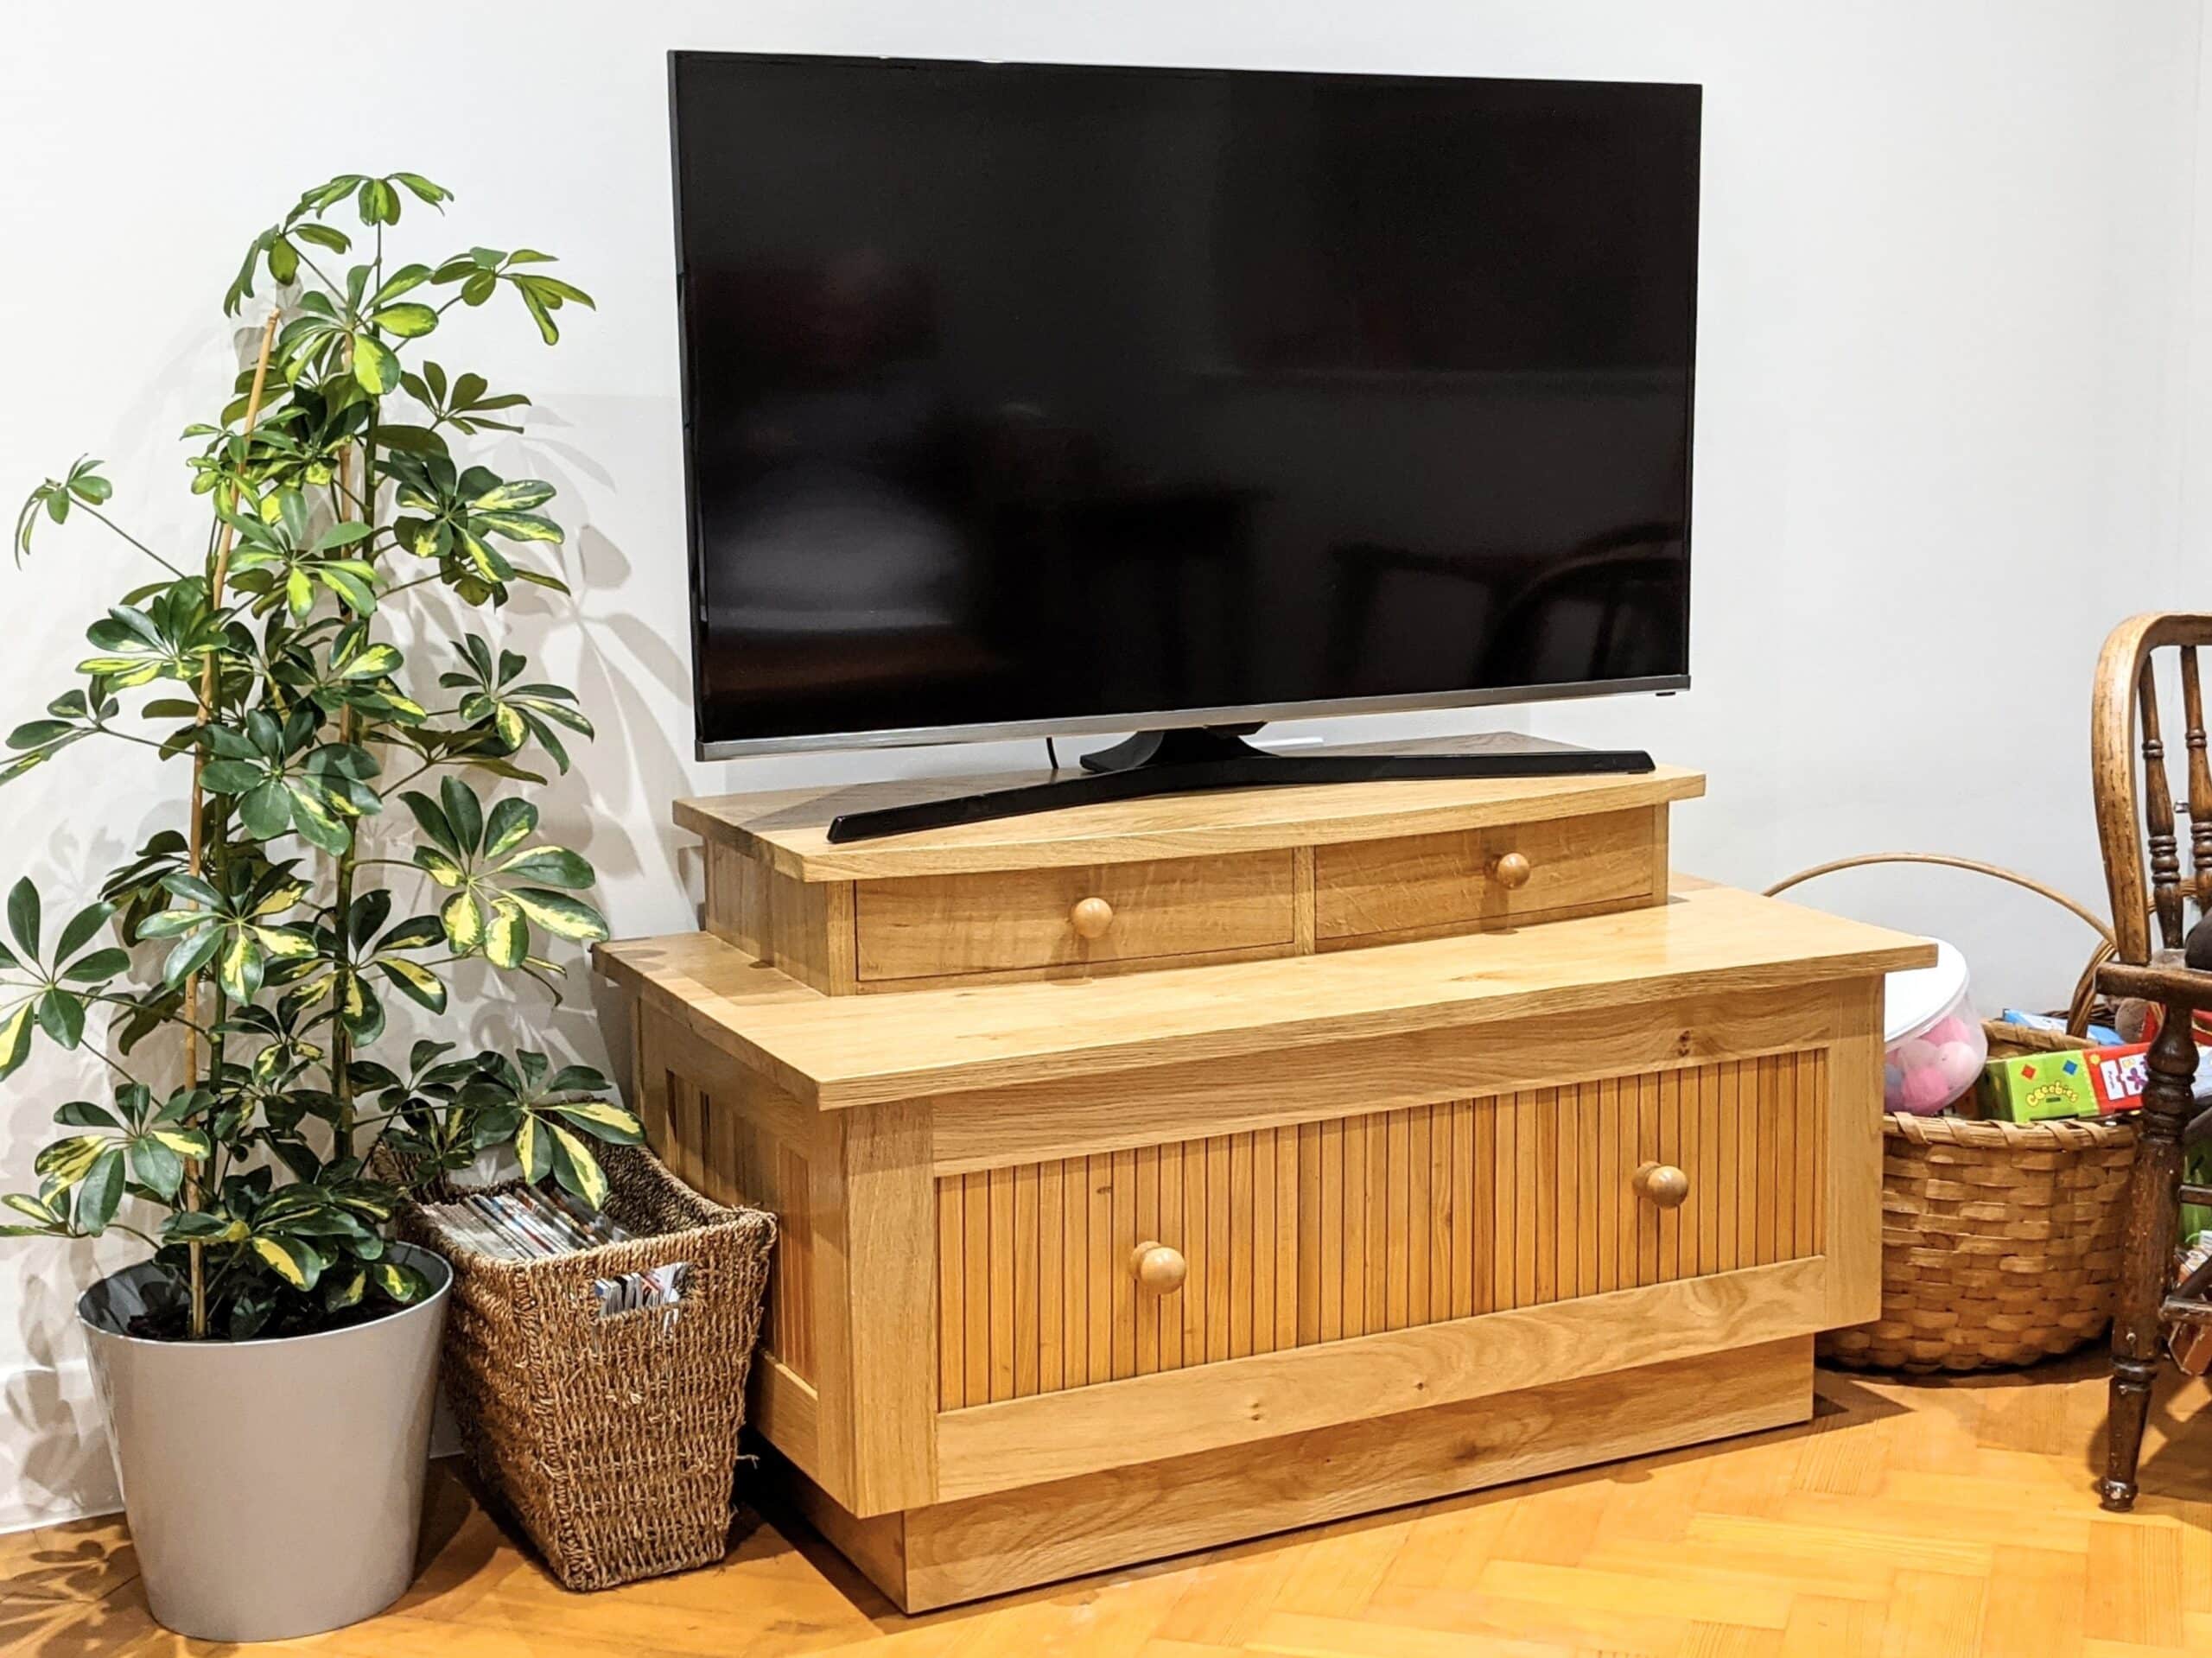
The TV stand was quite intensive and I’d allow 10 days for this one. The design and functionality combine as practical solutions for a place for the flatscreen and storage for things like toys and blankets, less used things too. I am going to say $2,000 for this so we drop in our daily rate here. I could be wrong.
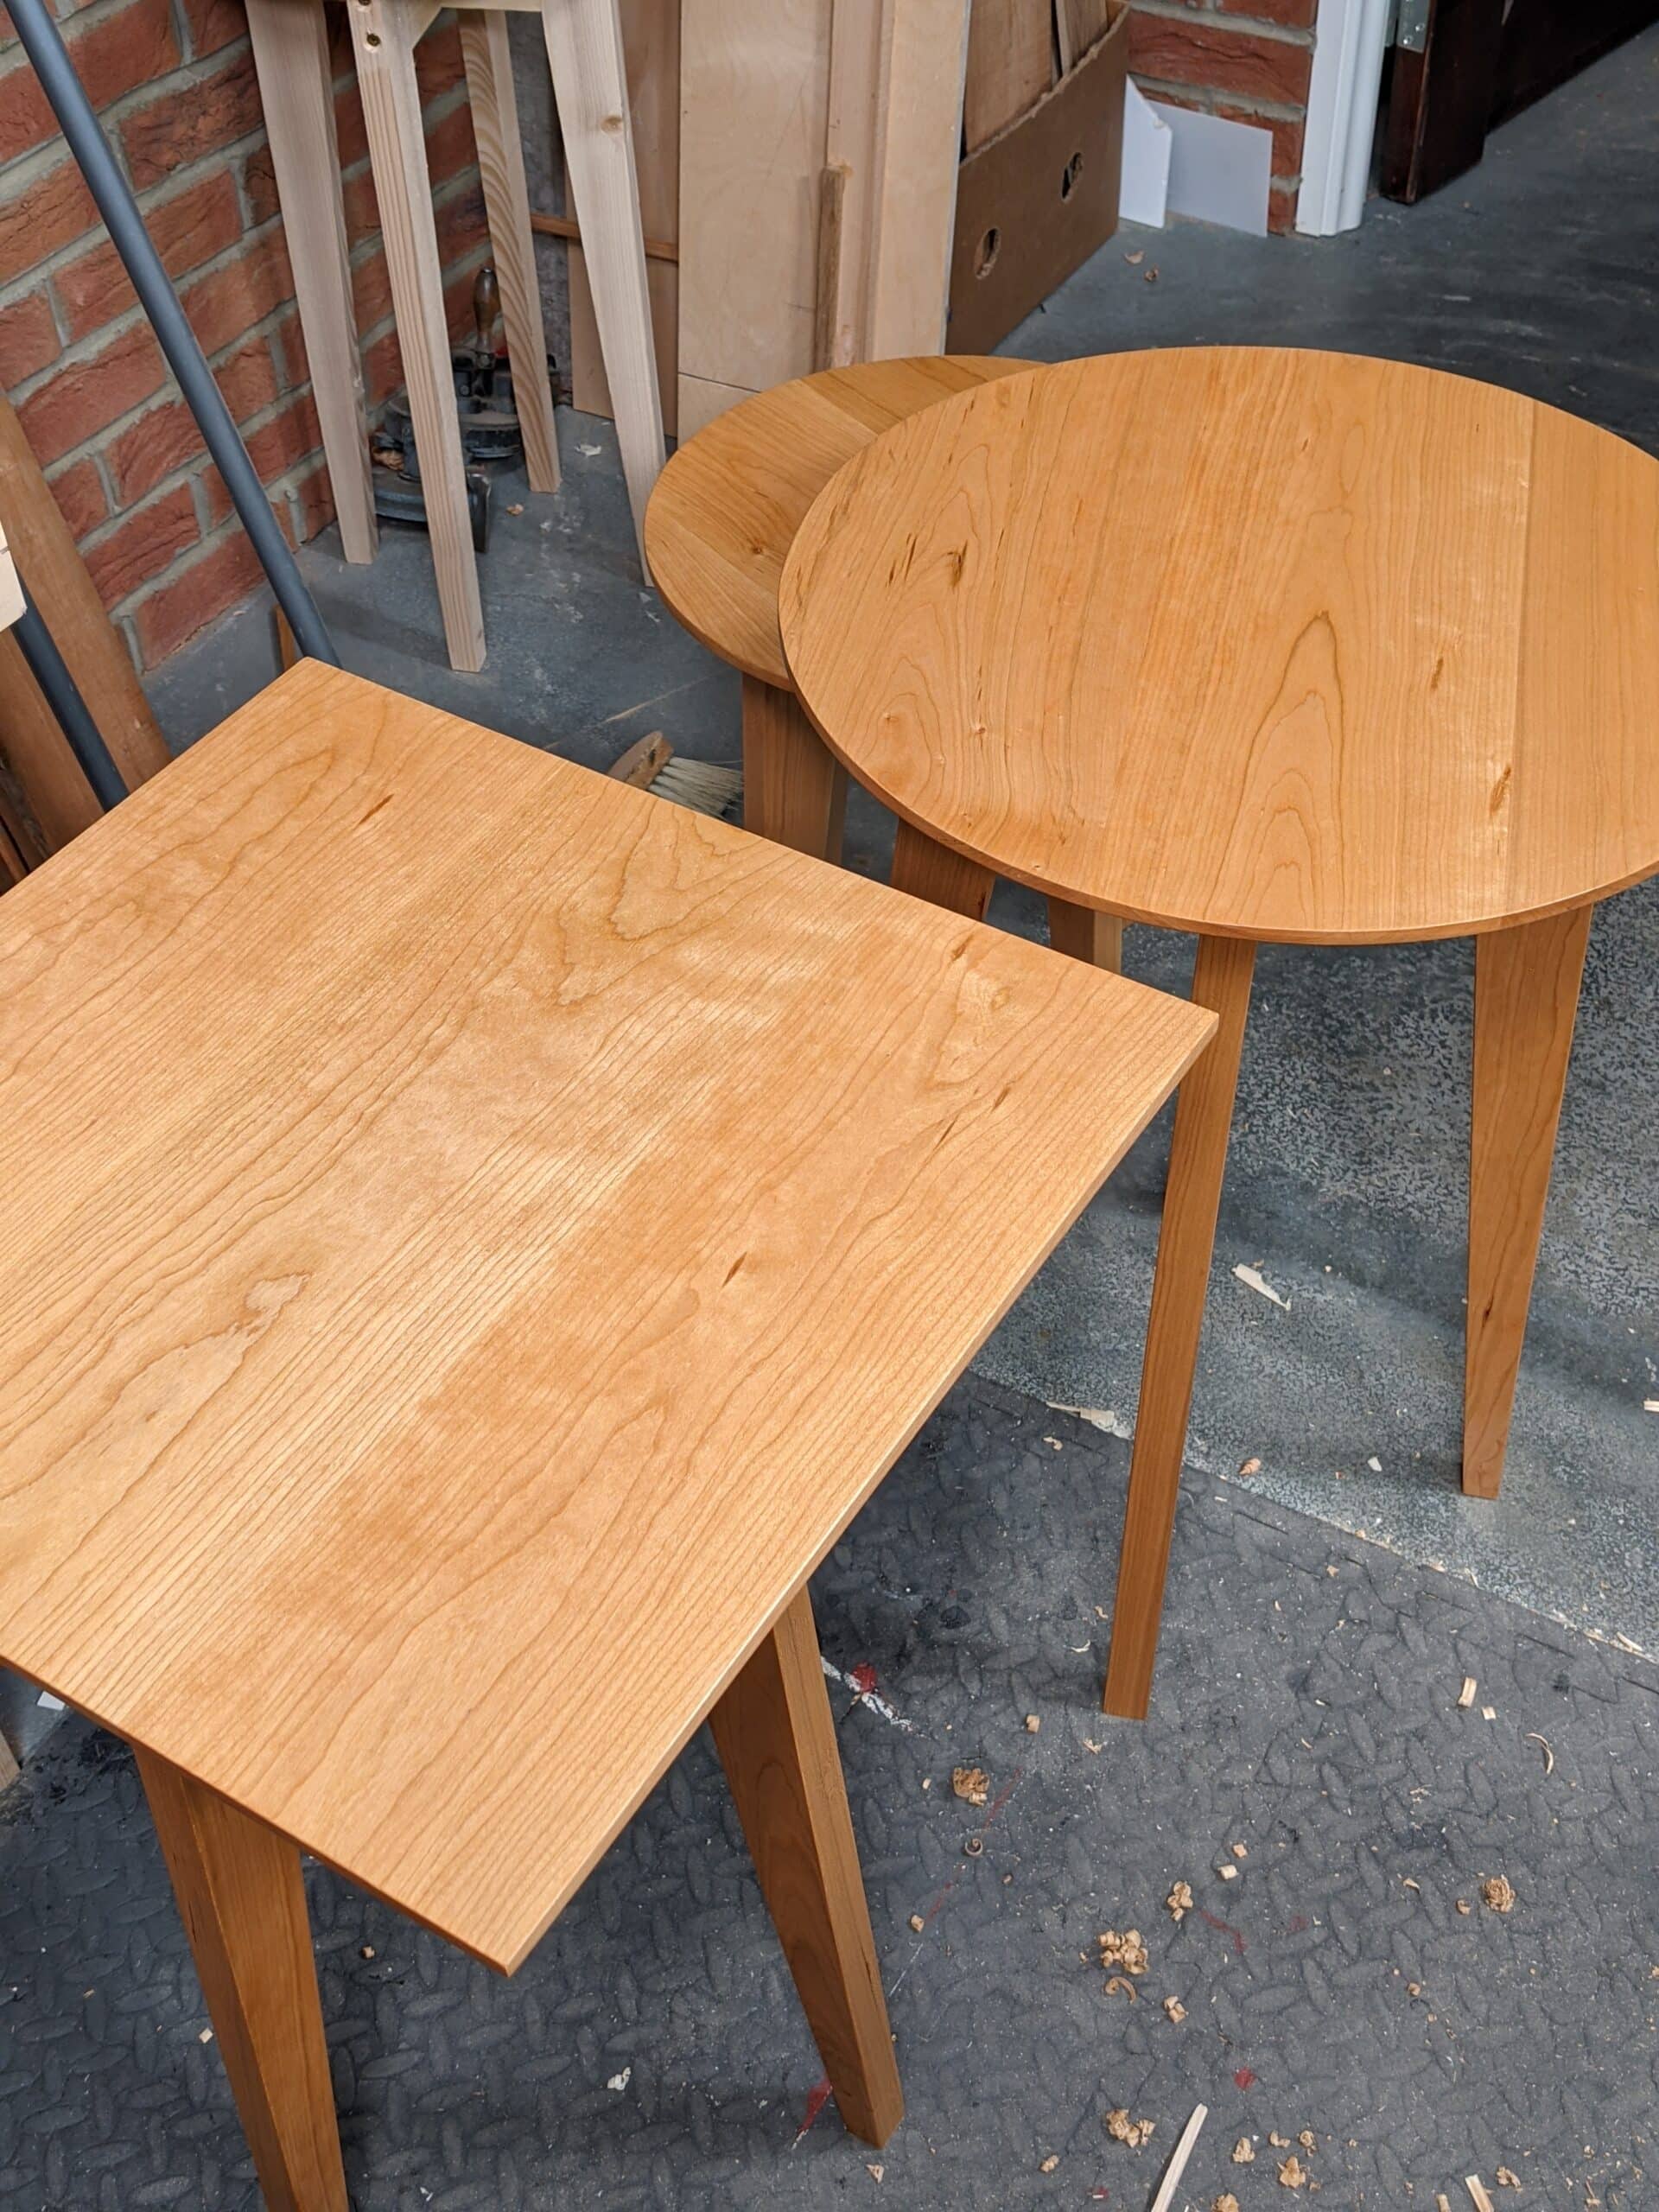
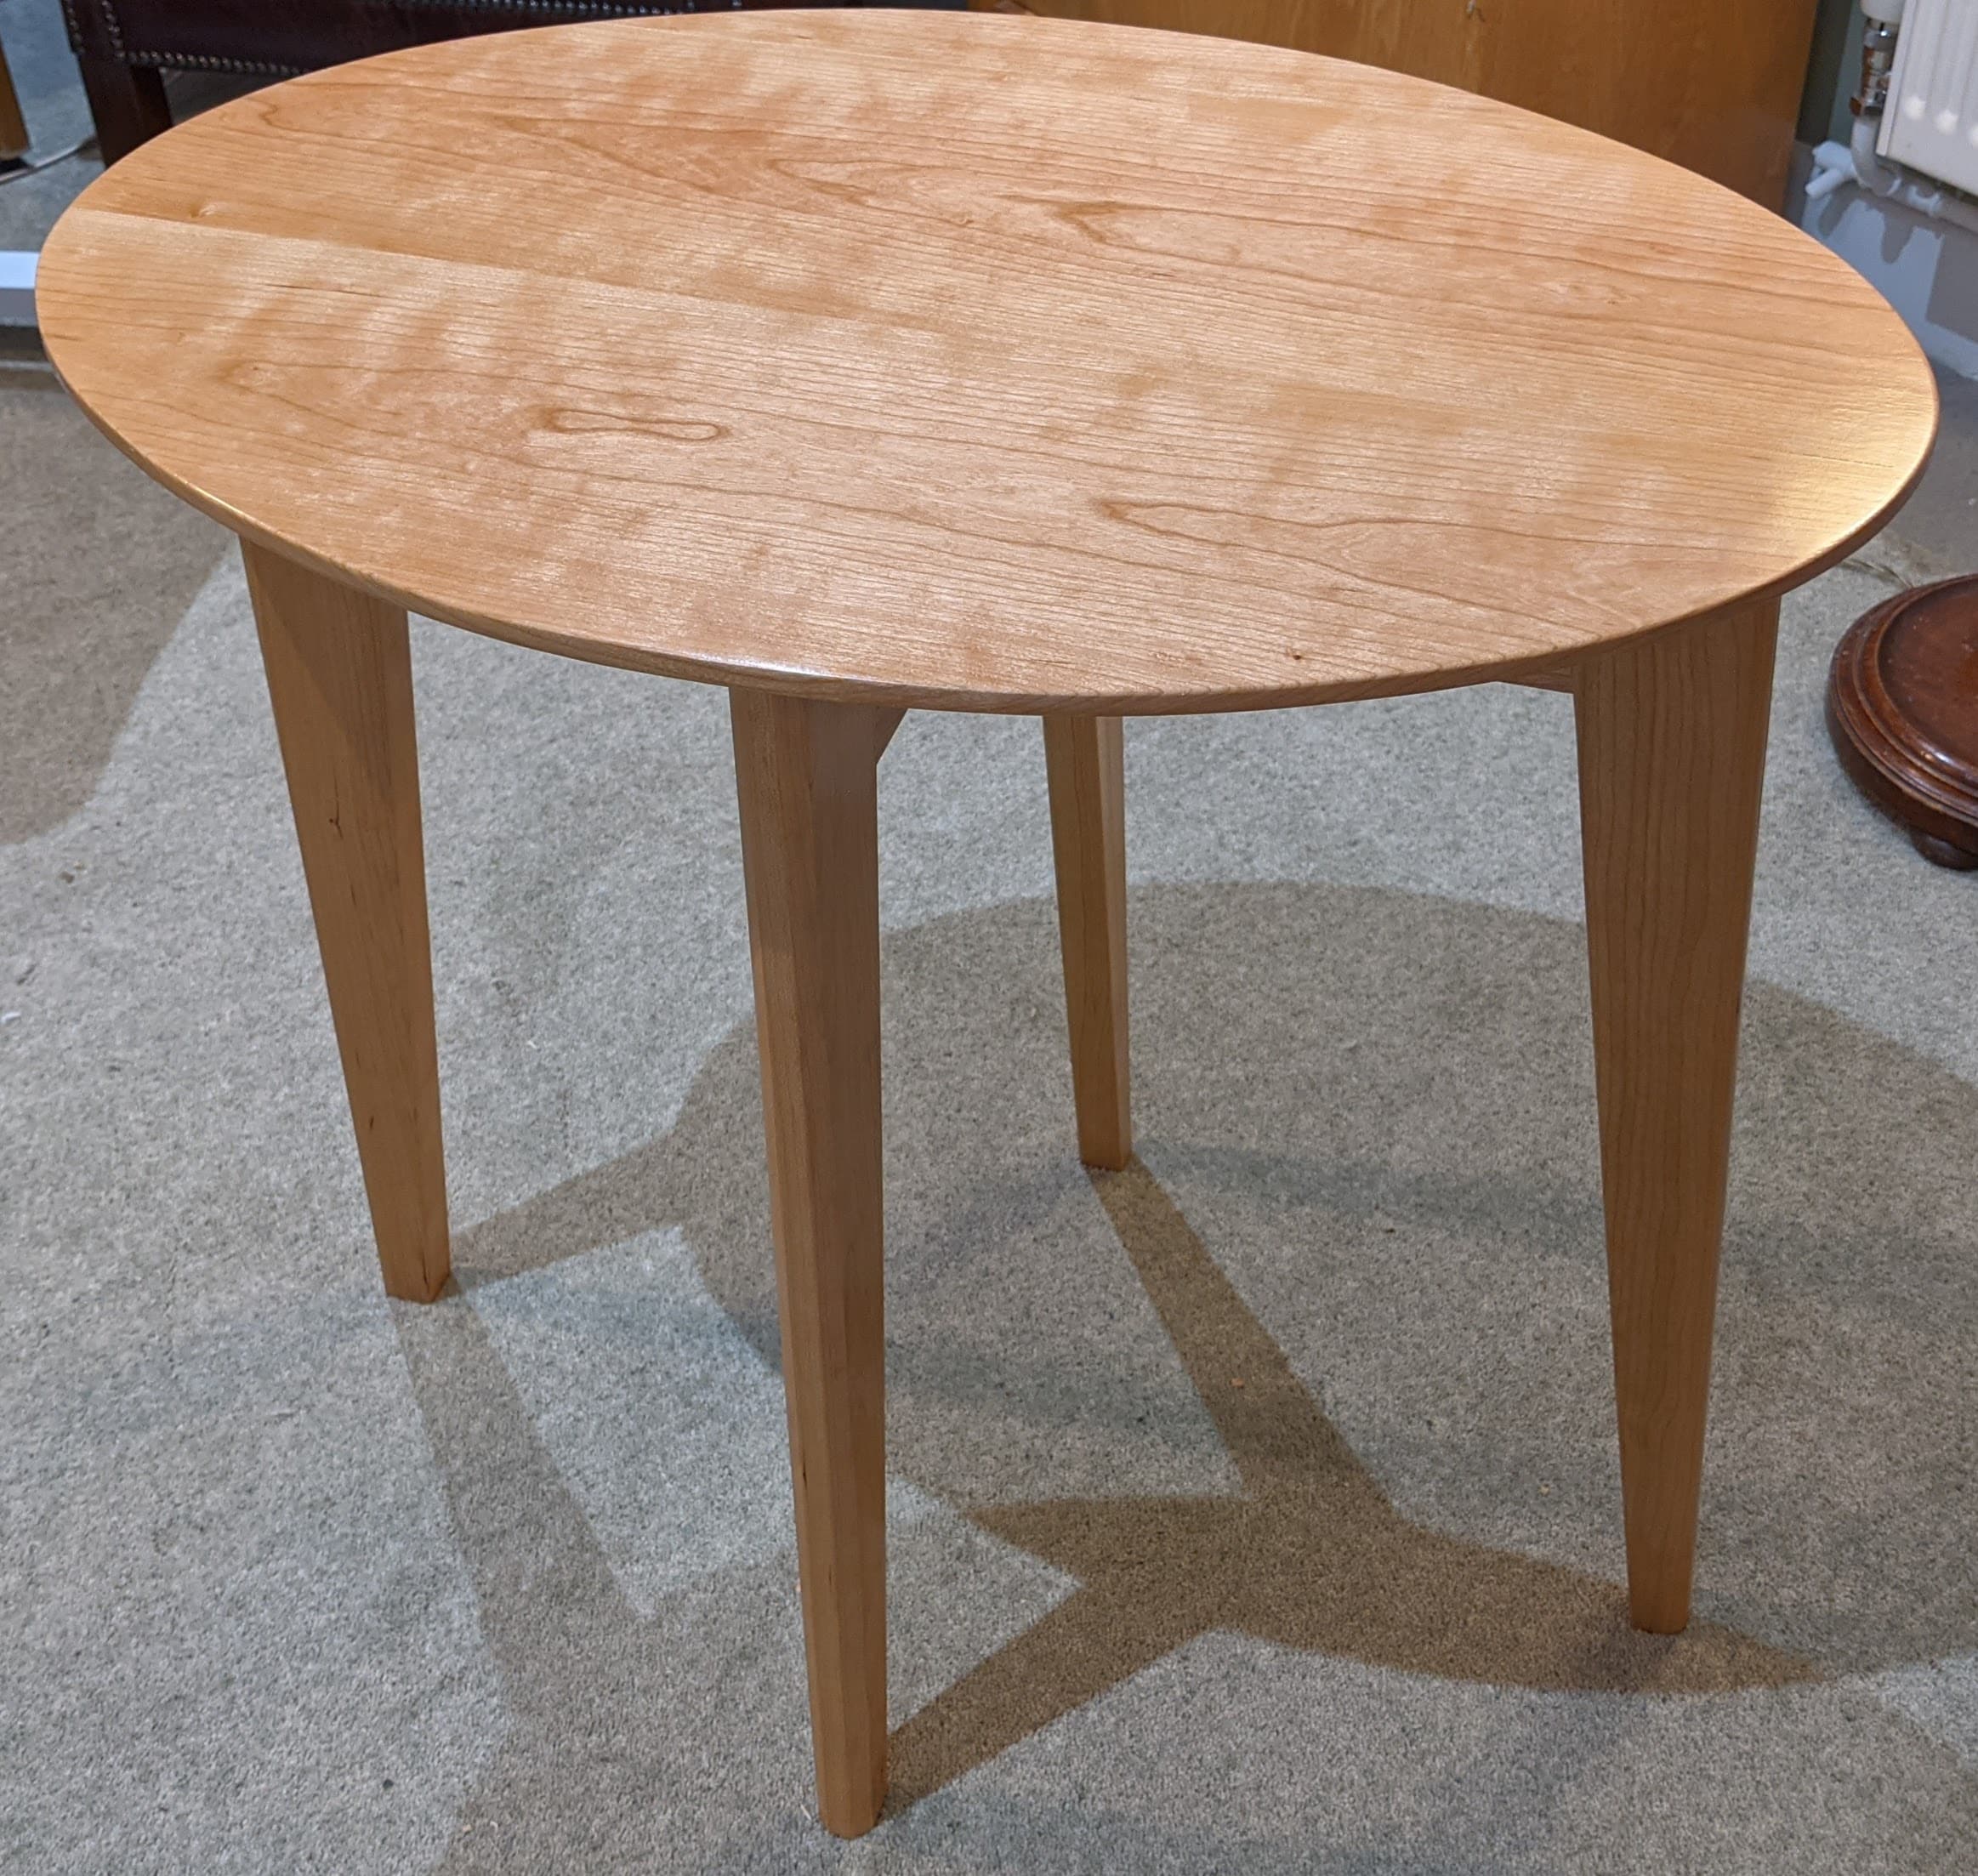
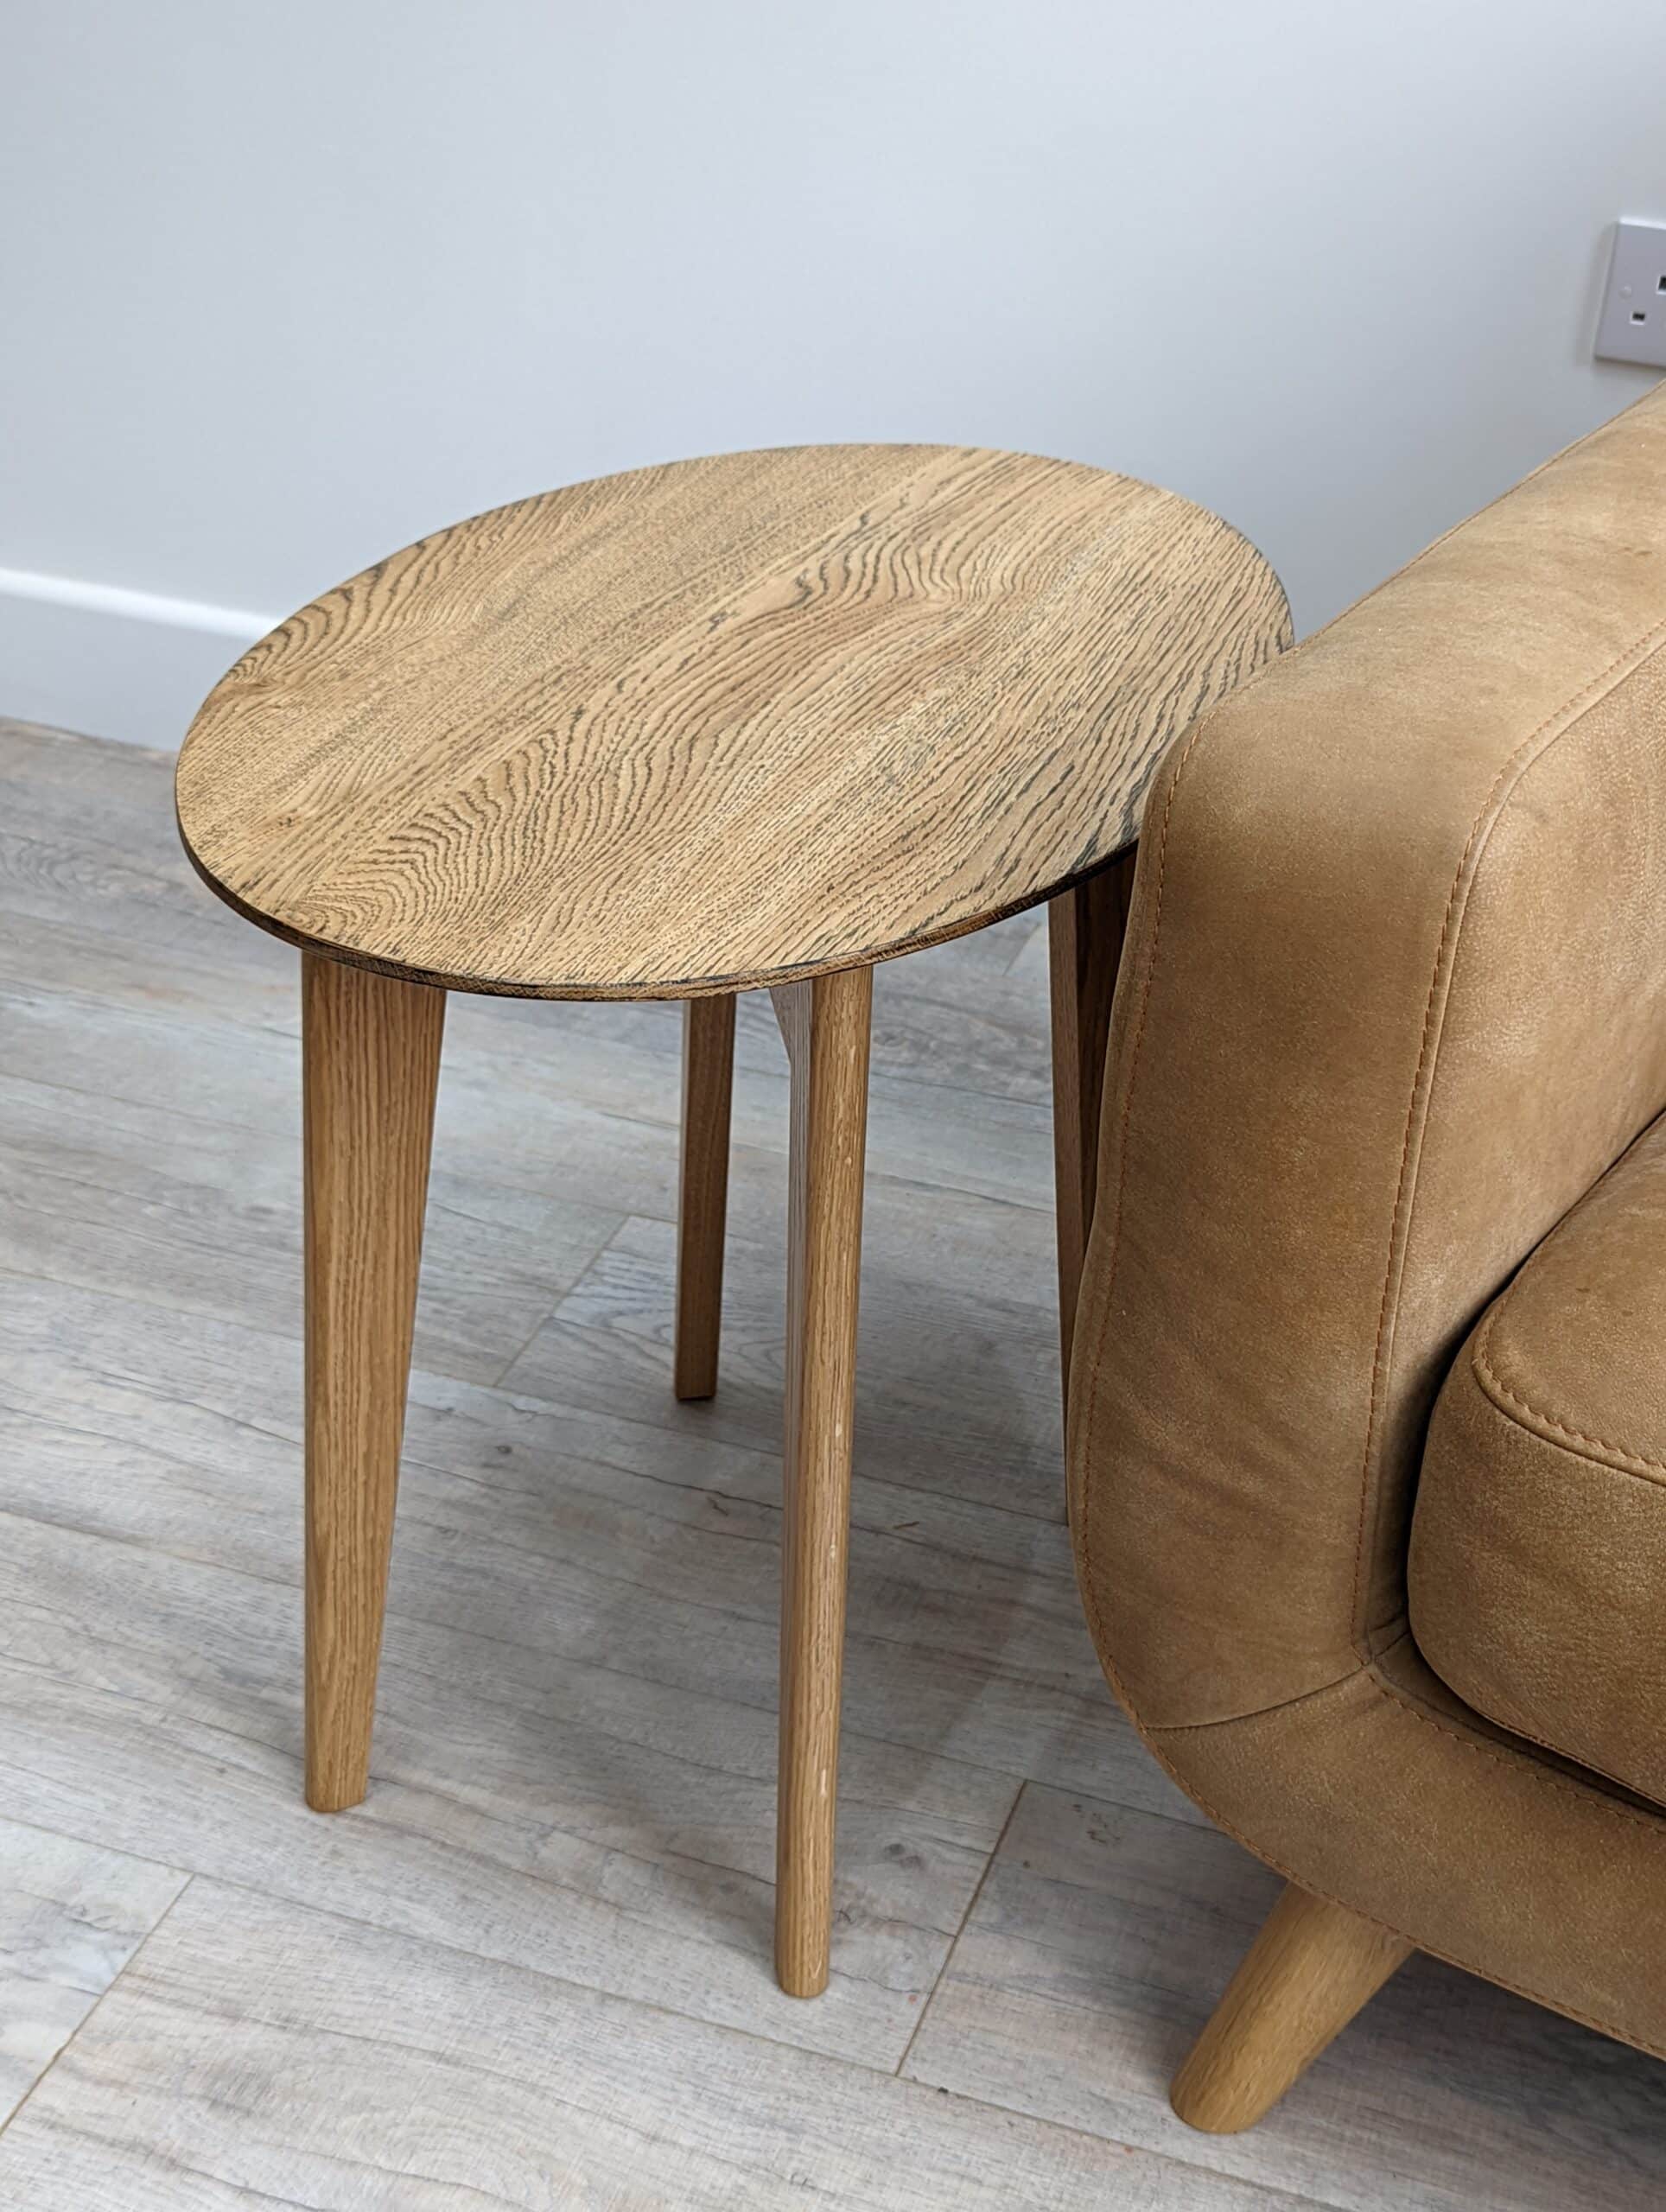
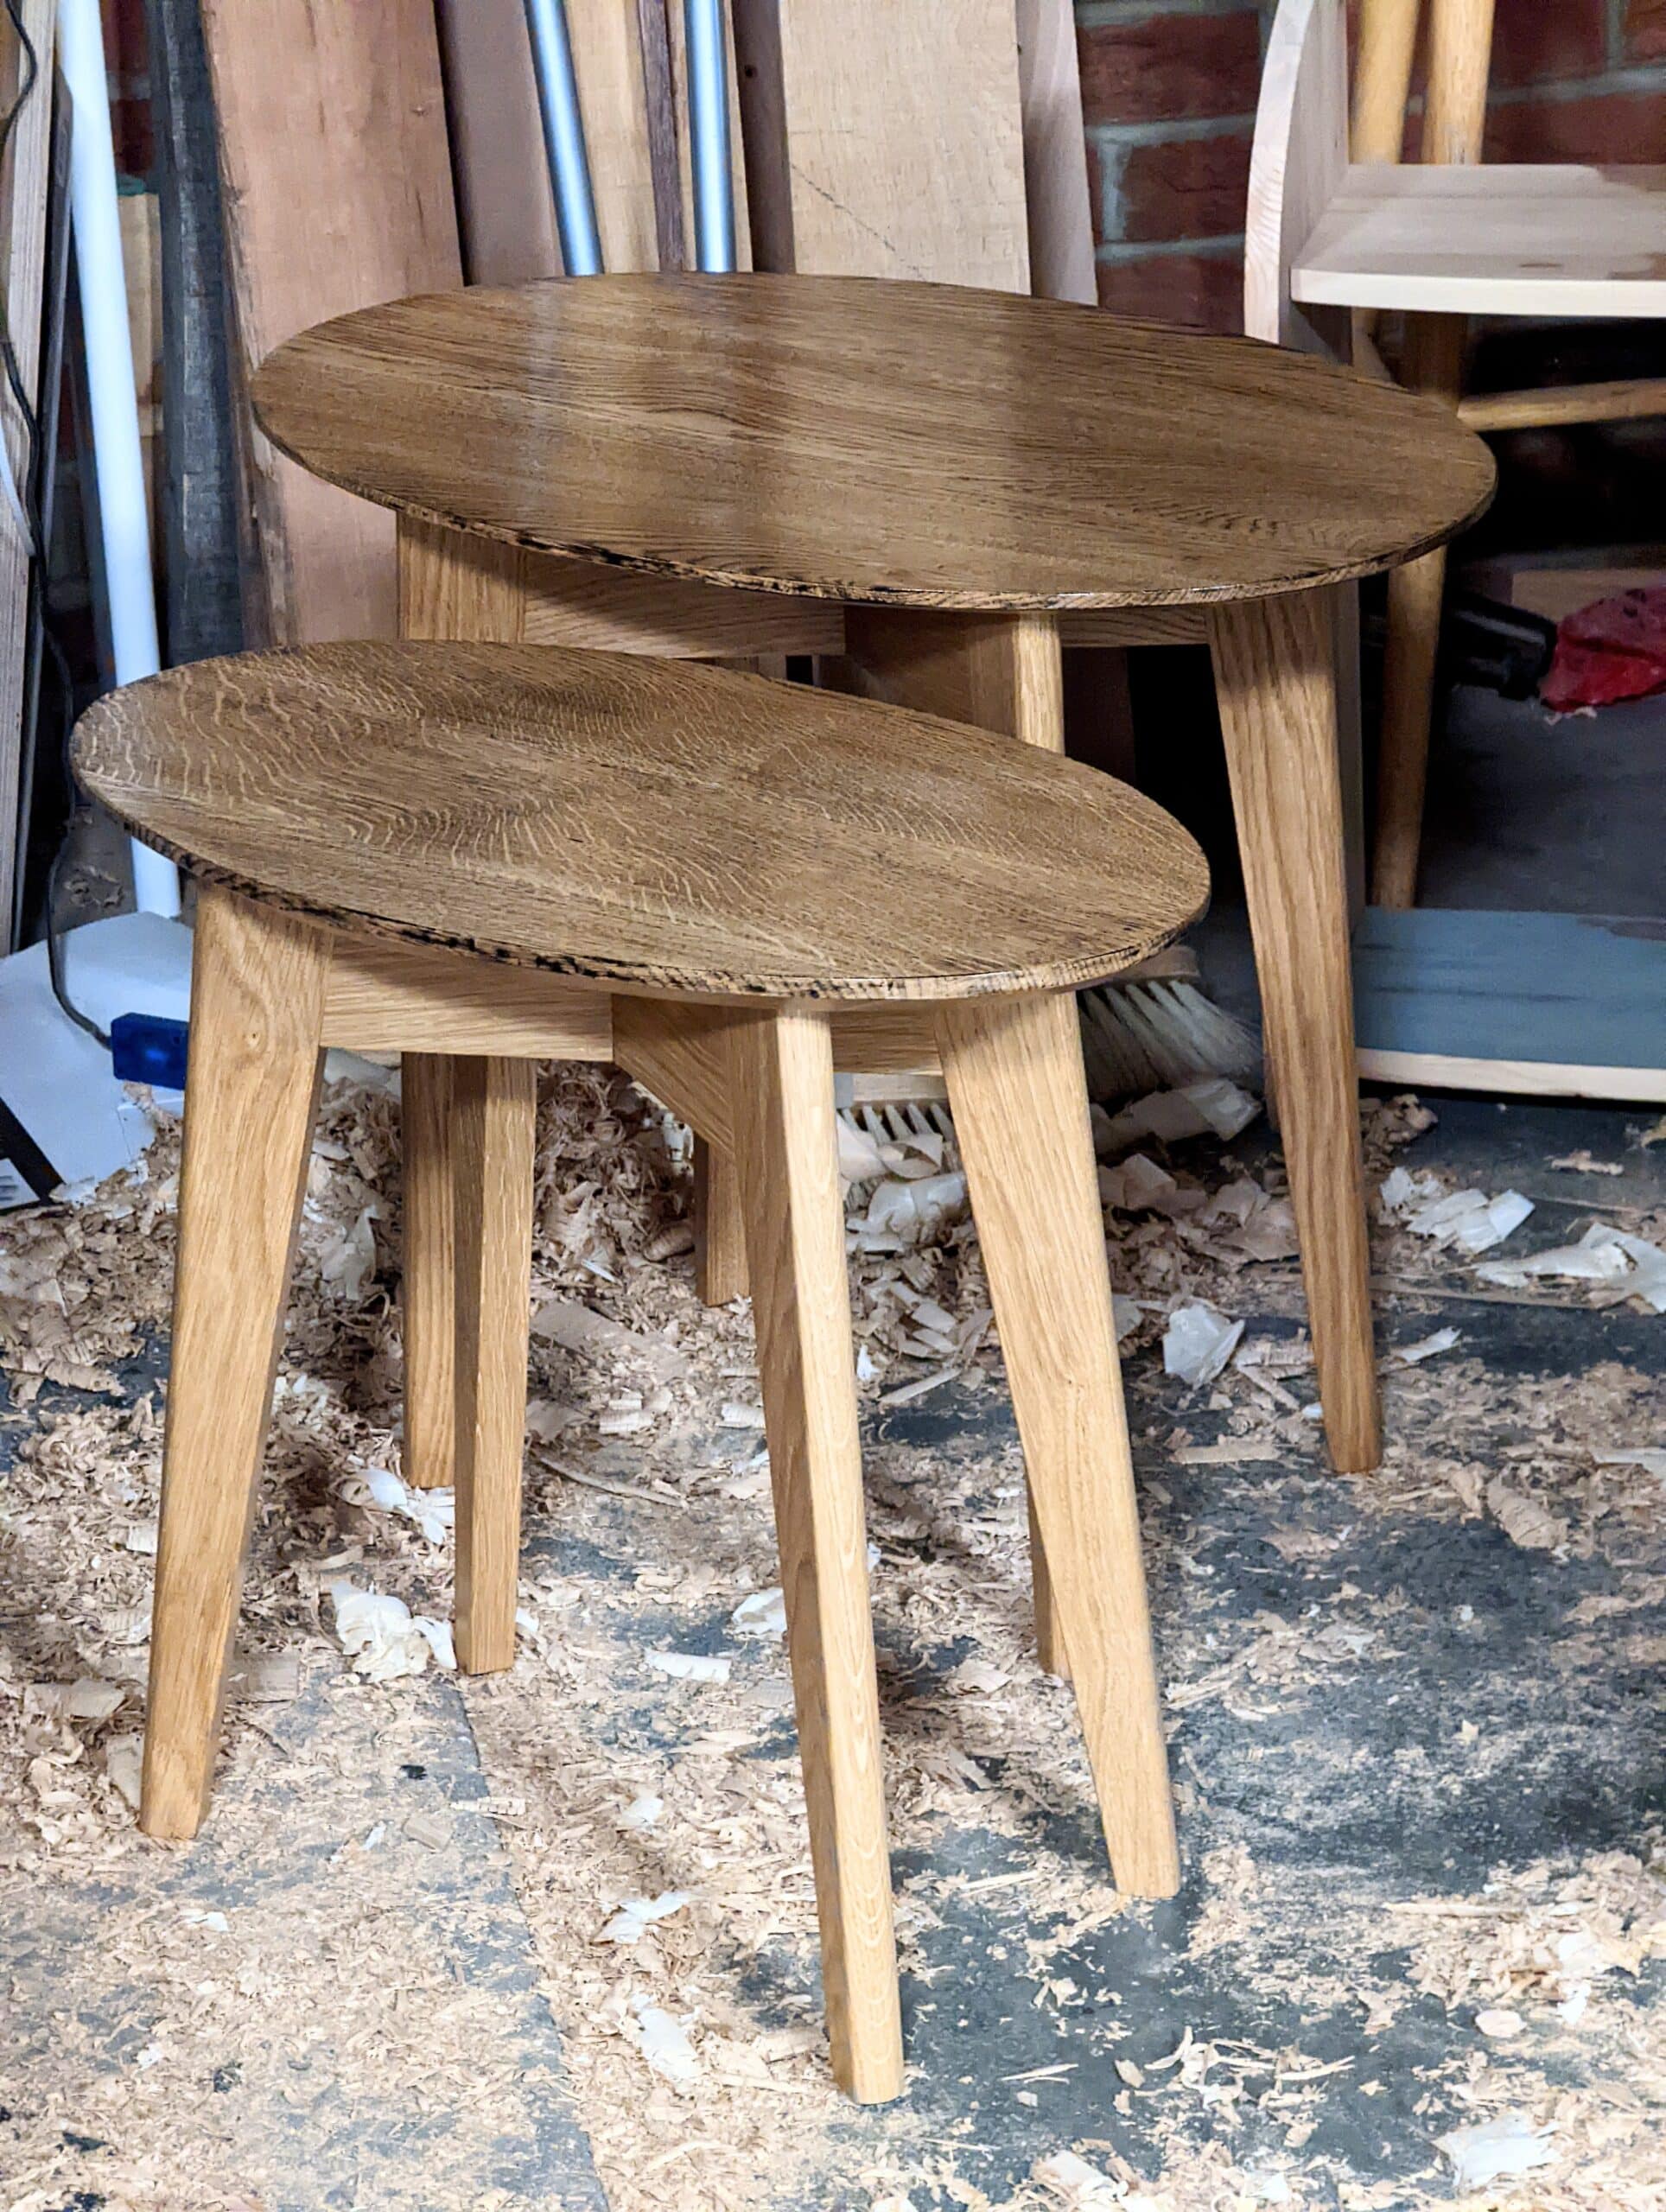
Small, occasional tables can take as long as larger ones and here is somewhere you might lose out if you just make one. I would always gang this up and make a small batch for this and other rooms. That’s mostly if I was selling my work or if I wanted to maximise my efficiency time-wise. In other words, it might take me two days to make one small table but more likely three in just over two days. Currently, I have six in the house. They are square, round and elliptical but the work is the same with only minor adjustments needed to accommodate the shape of the tops. I have three in the living room. Making a batch would likely average out at around six hours apiece. I would sell these for $400 apiece. They are well worth this. I’ll say three days just to be sure. I used these to show different construction elements including the geometry for laying out the cut lines to follow. There are many ways to lay out ellipses be they two nails in a trammel or a piece of string limiting both axes. Tables like this are especially useful. From chairside to bedside to outside on the patio.
Of course, It may have taken me 11 months to have everything in place but the actual time spent in building is the more important factor because, of course, my day involves many other things like designing router planes, spending time teaching my granddaughter to use hand tools and such that also came in 2021. I actually made four of the rocking chairs and then prototypes of the other pieces. The prototyping is less necessary in the ordinary days of my making but I do it to help us in the video side of things. It perhaps sometimes caters to the impossible shots that might otherwise move too fast for them to get focussed on an aspect that’s needed.
So, we have 31 days to make $11,000 so far so we are looking at $354 a day minus material costs. Now as a full-time maker, I had zero device tolerance. Mostly because they didn’t exist in my world. Watching modern makers fresh from college in an environment where the makers rented space I was shocked at how much time was spent staring at screens and tapping keys and how little time was spent at the bench with wood in the vise. I recall about 75% on screens and 25% making. A total imbalance propagated by educators gave these makers the impression that part-time was a deserved right and that they would be able to make it with this false impression. You could if the work on the computer was establishing some other element to be involved in the making. Perhaps an employee maker, CNC equipment, premade or bought-in components like fastenings, pocket hole stuff for hiding screws, etc.
January 2022
The dining room table is an easy make but I added awkward things to increase strength and rigidity as a design element and something I wanted. A dining table, even though perhaps less work than the coffee table, will command a higher price. $3,000 is a payable amount for a good design in an eight-seater dining table in oak or any hardwood. Usually, I would allow three days for the frame joinery and then a day for the tabletop glue-up, cutting to size and clean-up. Scrape and clean up ready for finishing the whole and then a three-coat finish would usually take a day. The table was delivered January 22nd 2022.
As an afterthought, remember that it will take almost the same time to make a four-seater dining table as a six or an eight-seater. The joinery usually remains the same so most of the extra work is in the tabletop alone. You can save a lot of time and energy by buying your wood planed foursquare so all you have left to do is glue up and light scraping.
Chairs are something else. Making one is time-consuming and designing a new one all the more. This design came together after three prototypes were abandoned. I changed my mind for different reasons and finally ended up with something I liked. Each one is a three-day project but batch production makes things more structured and organised so I calculate two days per chair. I ended up making nine chairs altogether plus my abandoned versions. I always sold dining chairs in Texas for $1,500. They are time-consuming and for a unique and distinctive design, $1,500 is not too much to ask. So, in a five-day week that’s two and a half chairs. $3,750.

In the end, I felt pleased about my performance in making. The satisfaction of radical design is immeasurable. Until the chairs are round the table the table looks lost and meaningless as does the whole dining room. when the chairs go in it all comes together.
Now I hasten to add here that you can do this too and you can do it with the self-same tools and equipment I did which is mostly, mostly, almost all, with about ten hand tools plus a few others that are not so much essential but convenient. The only machine I used for these pieces in the house so far was a 16″ bandsaw to resaw through significantly wide stock. That won’t change for me. You can also consider getting your wood pre-planed or even milled to size without recrimination for me if you want to. I see nothing wrong with that and there can be a dozen good reasons for doing so too.
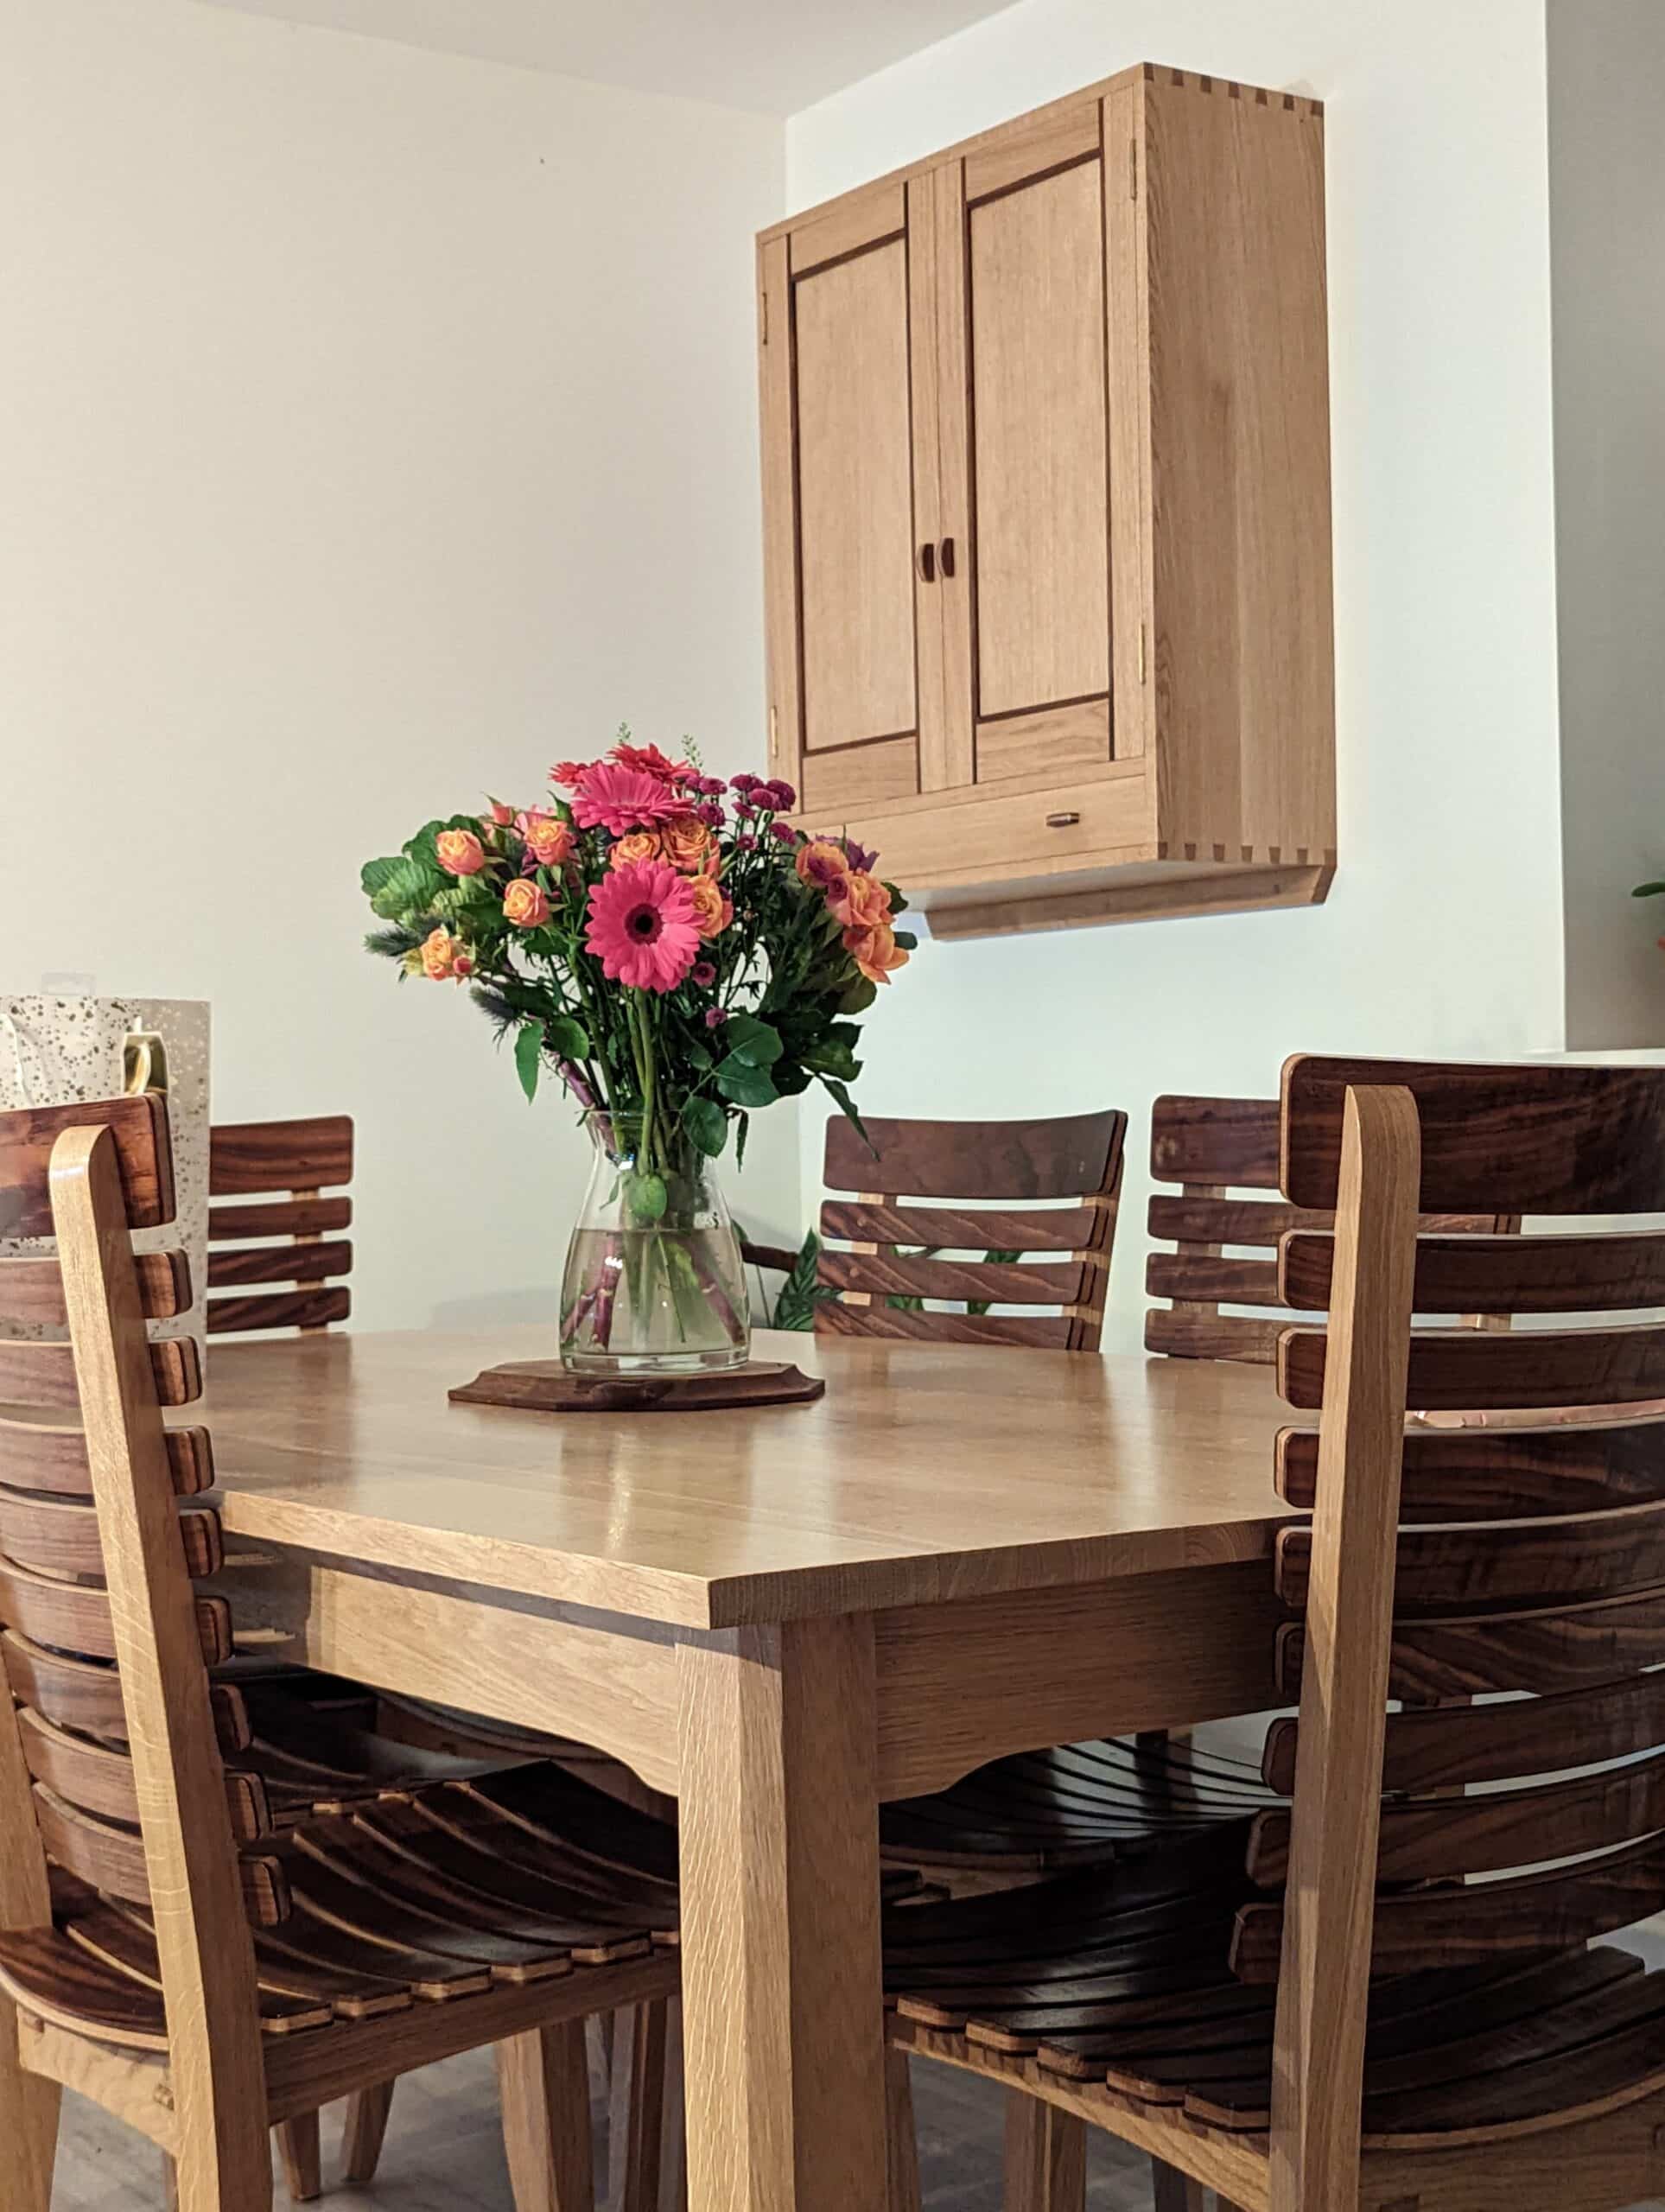
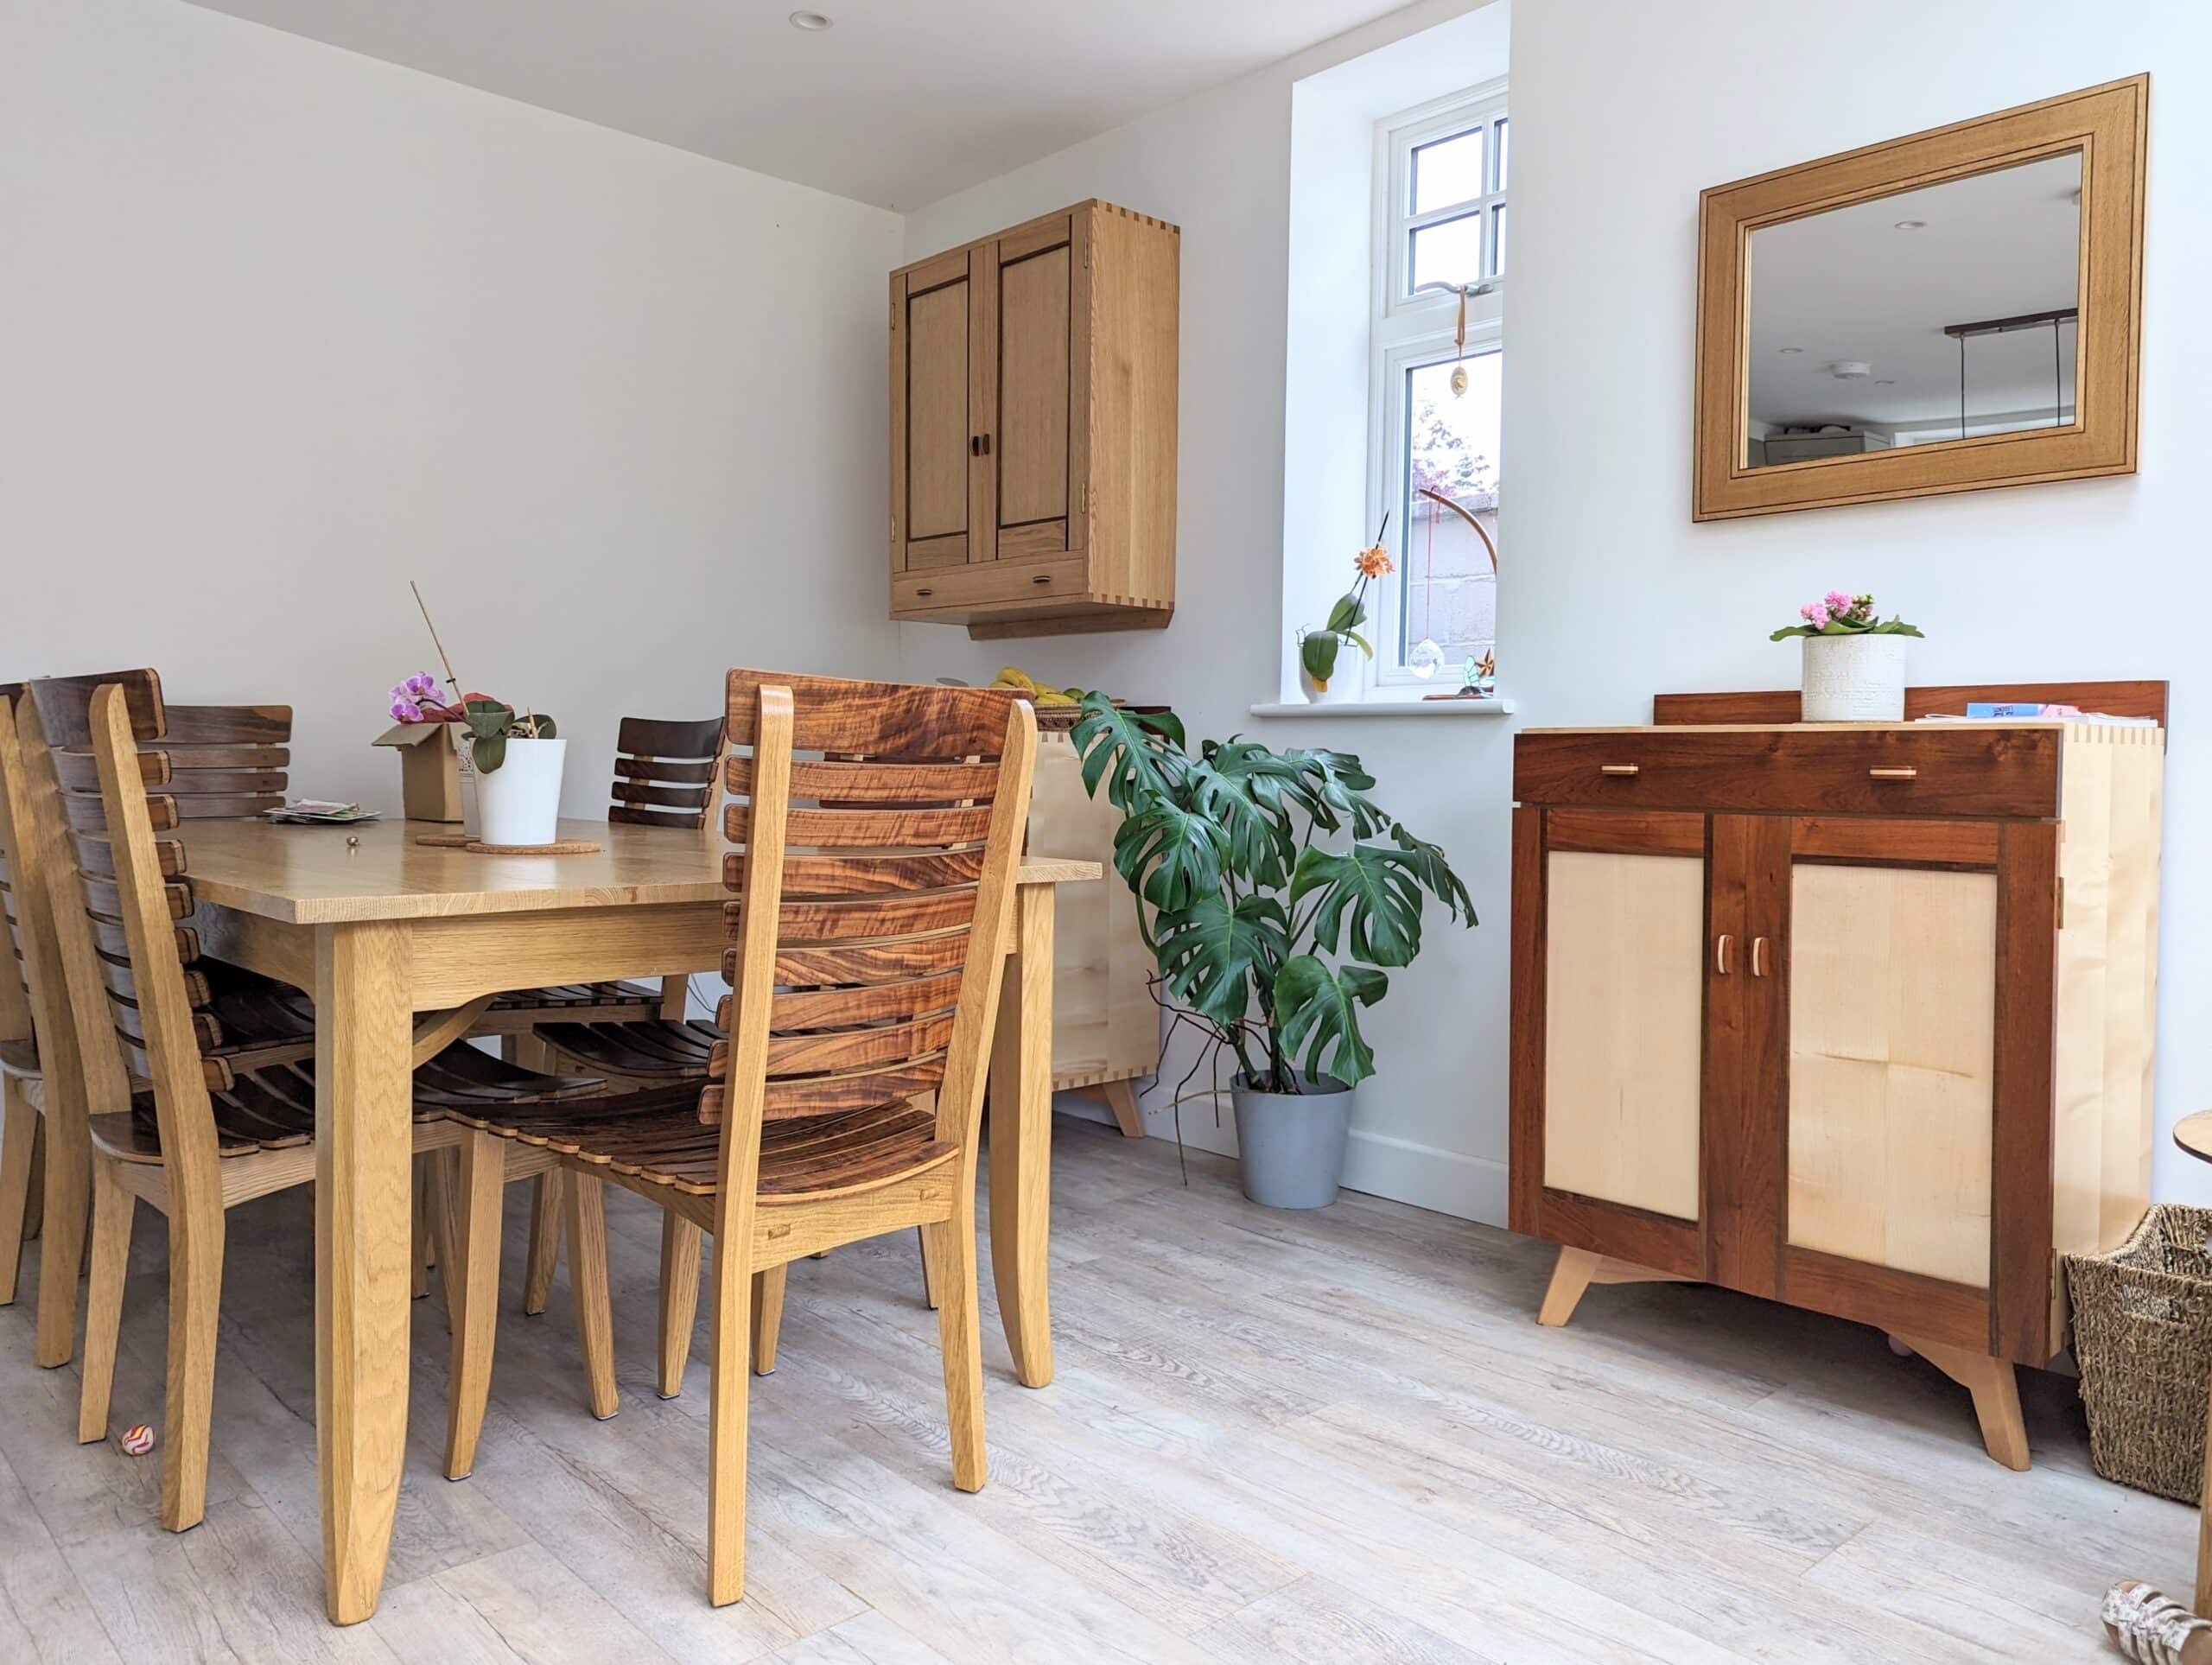
Two other more complex pieces fleshed out the dining kitchen area. The wall cupboard (above) and the two sideboards. The wall cupboard came as two units in oak. I made the original prototype in oak simply because it was so much work I thought I would like one in my garage workspace to keep my 20 years’ worth of journals safely together.
This section of making cabinets is more my cabinet-making course in that it is forming the main cabinets with door- and drawer-making included. For the wall-hung piece, I chose oak for its traditional use in furniture making and as a wood that lives worldwide on all of the continents. It’s a pleasing wood to work with, planes silky smooth and scrapes well too if there is awkward grain. These types of cabinets are time-consuming to make. The wall-hung version is a good two weeks of hand tool woodworking, two days for the carcass, three days for door making and fitting and two days for drawer making and fitting. Cleaning up the wood beforehand is about two days and applying finish a day or so. The handles are pernickety but enhance the design. But ten days at $400 makes it prohibitively high, I think. I believe $2,500 to be reasonable though. A different wood with contrast and figuring would raise the price up to an additional $500-$1000 perhaps.
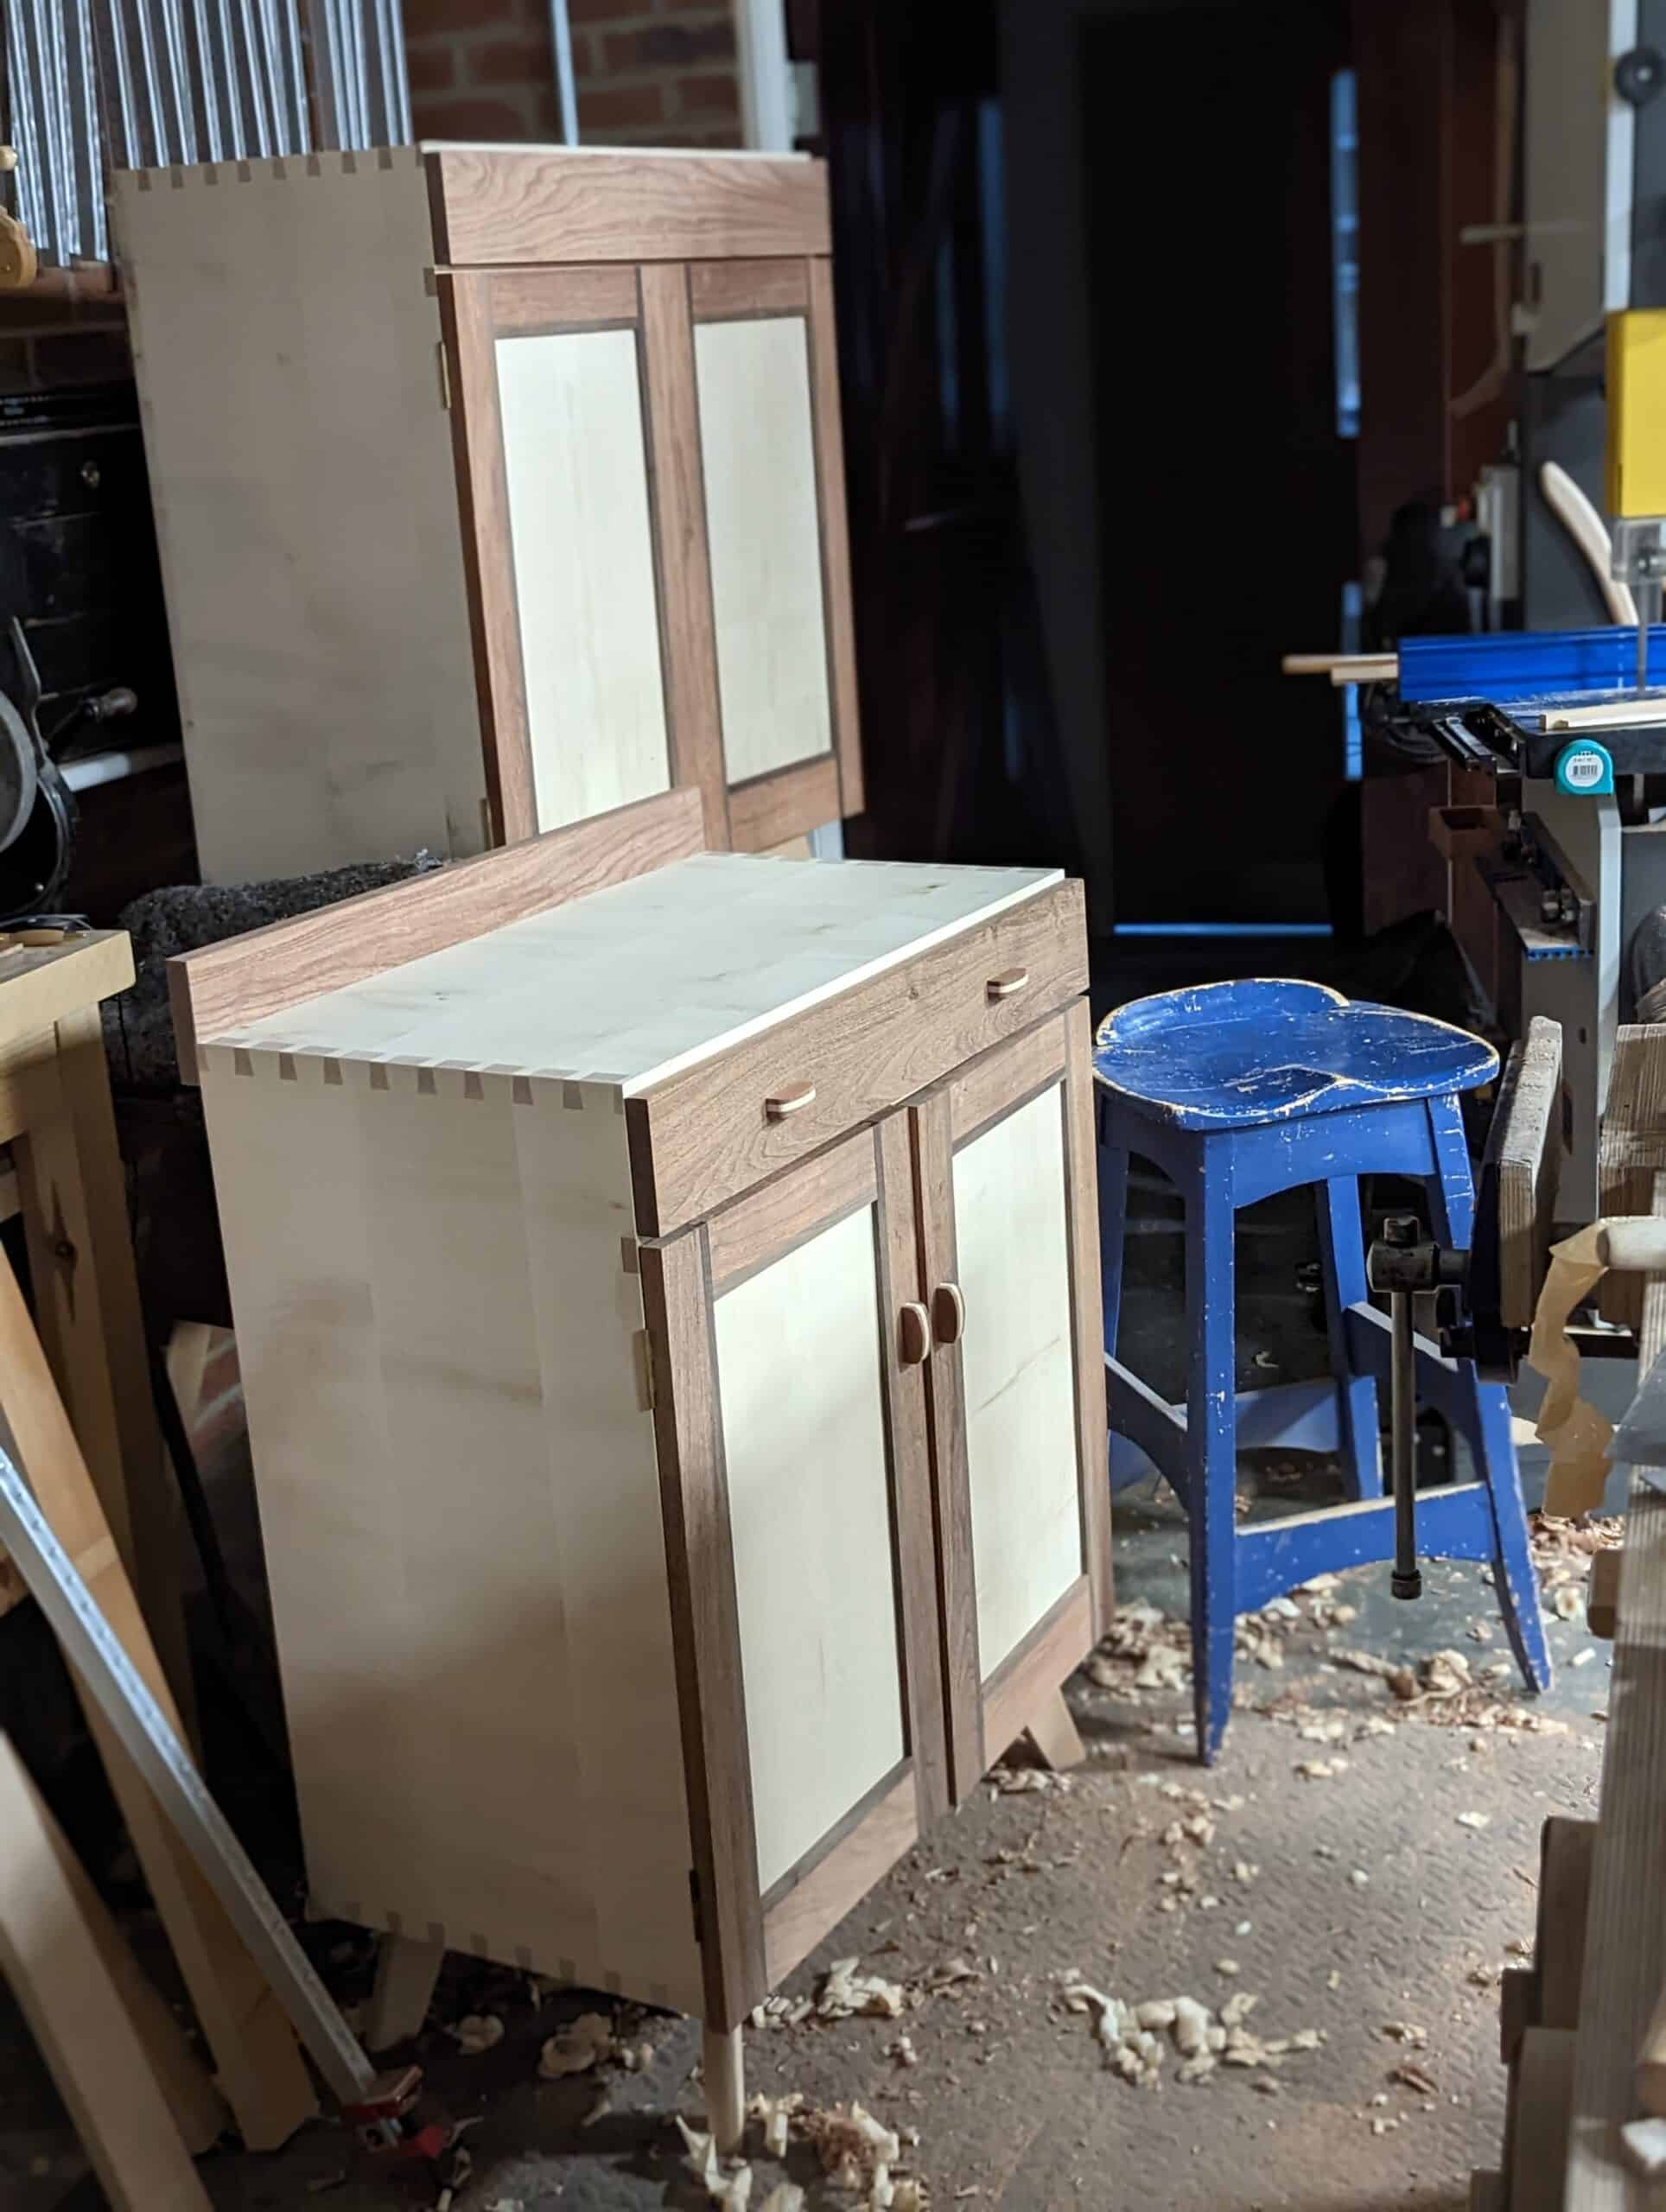
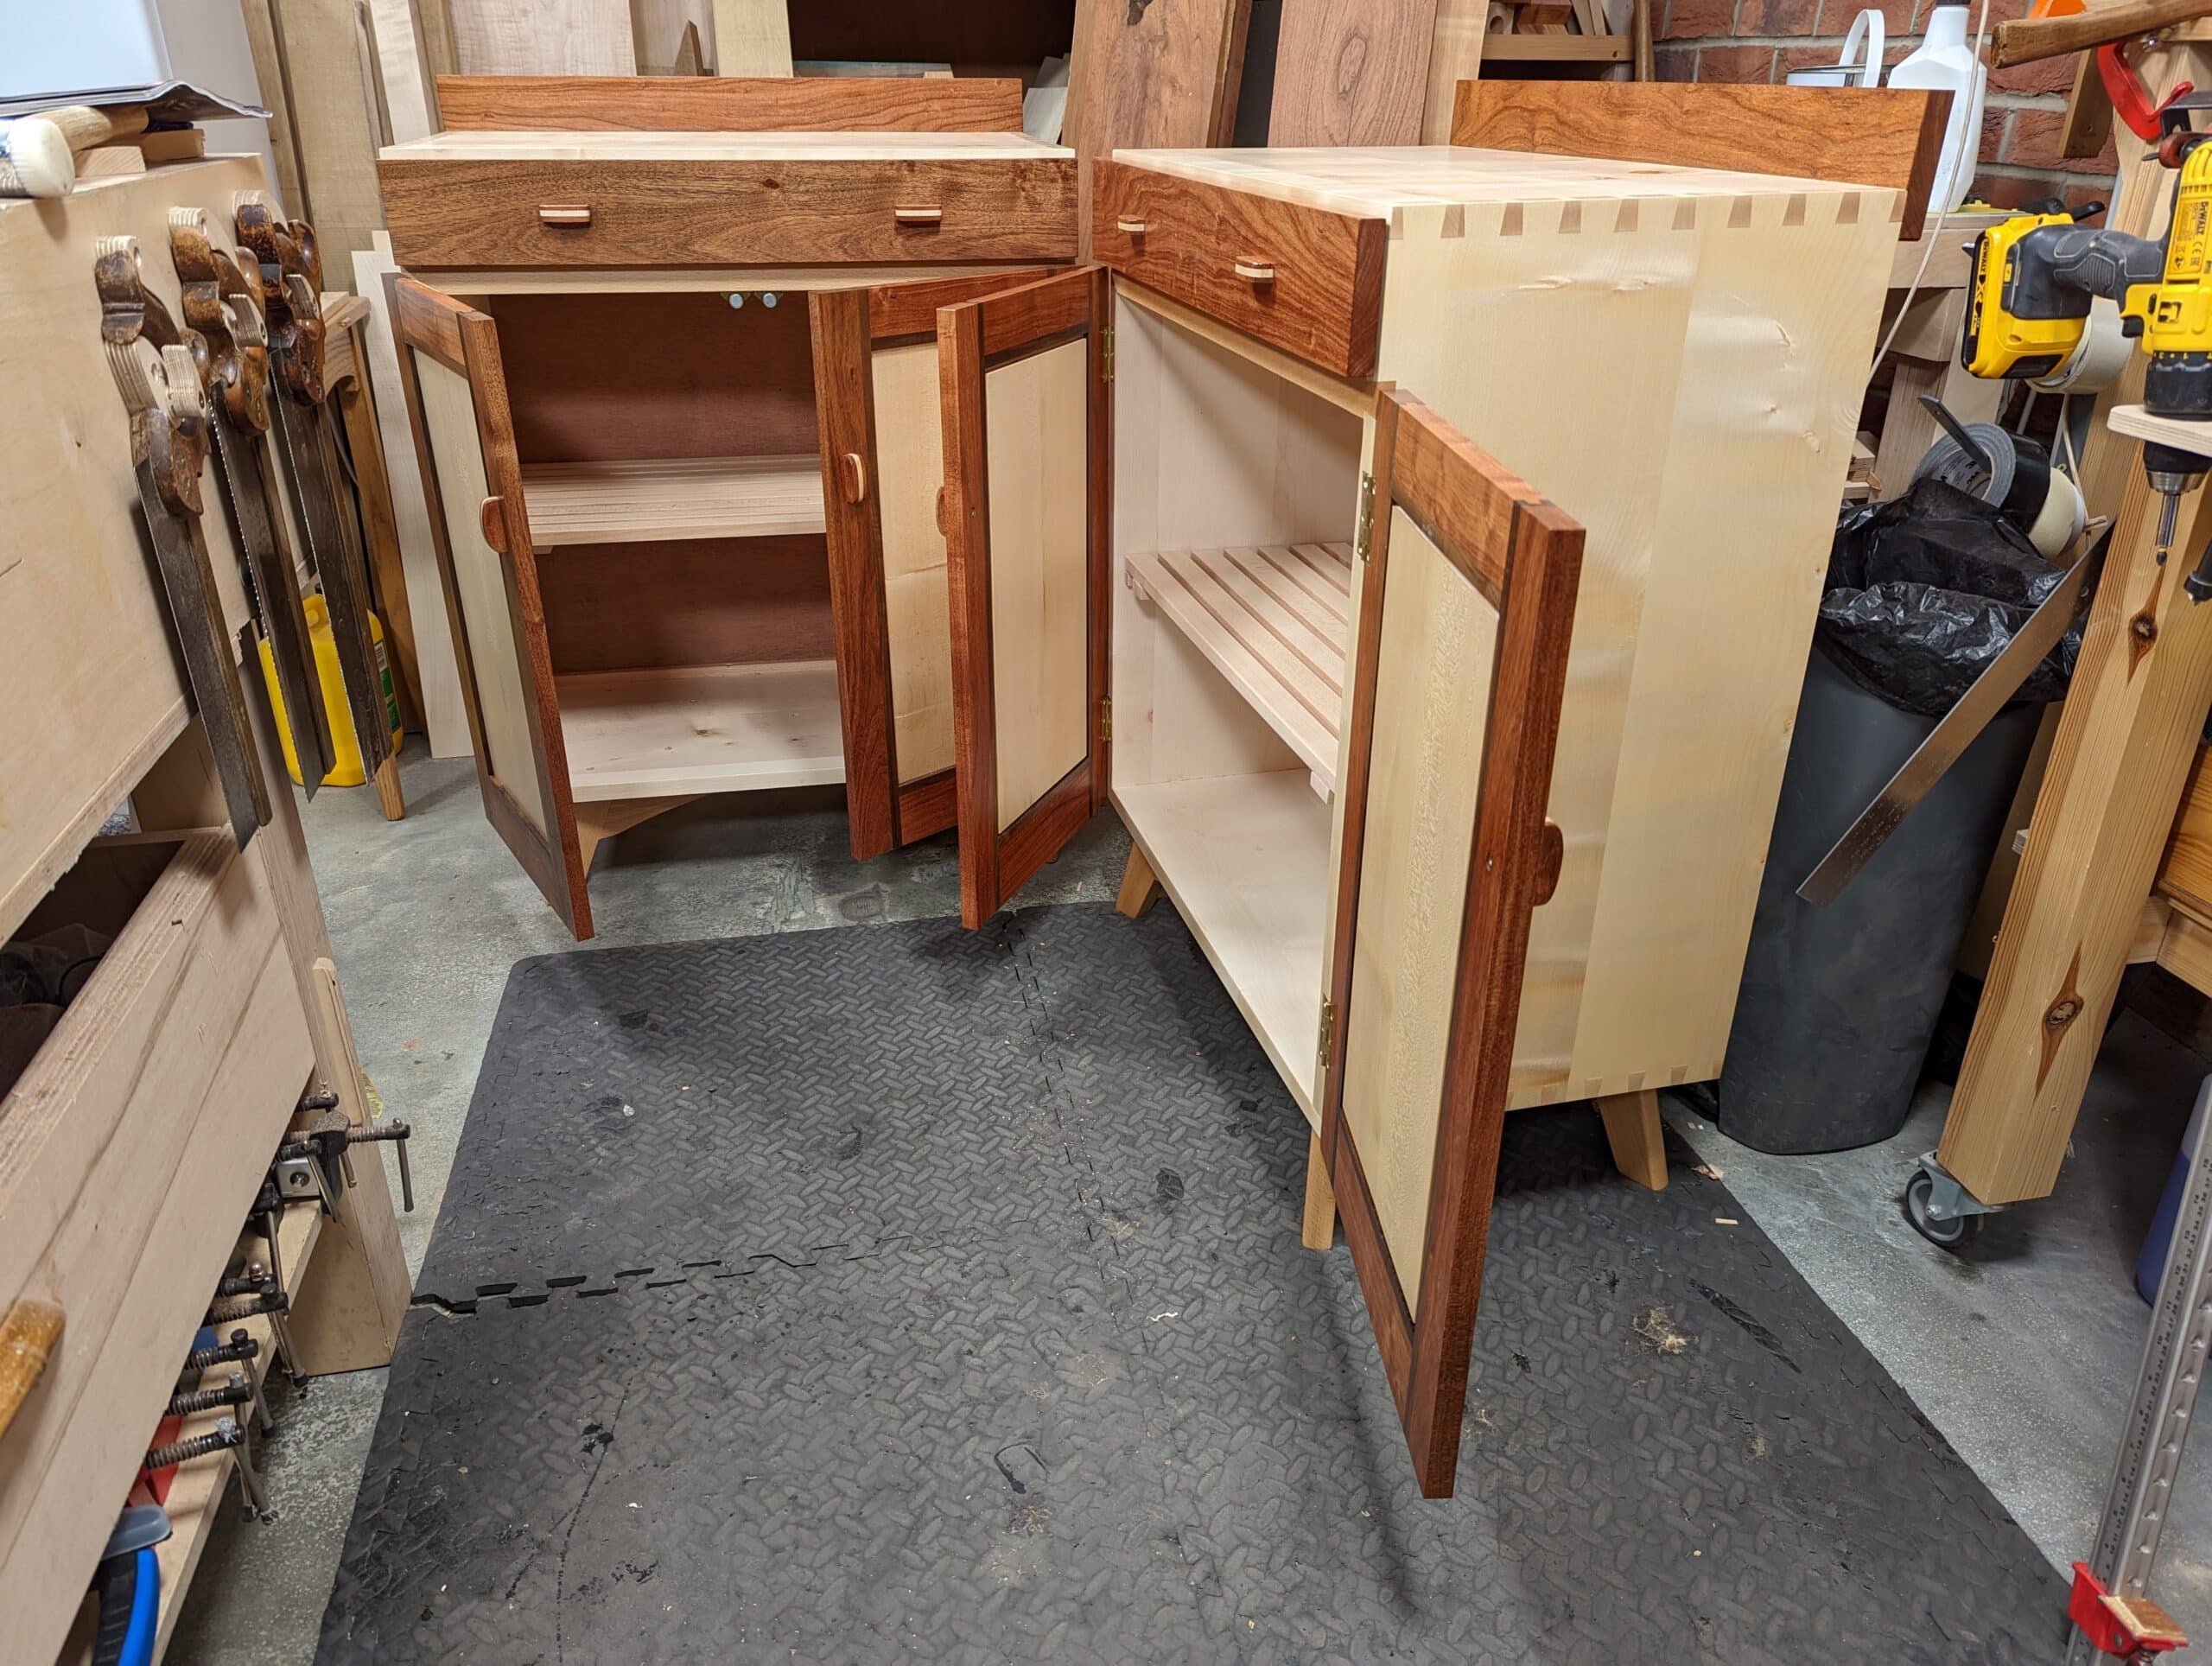
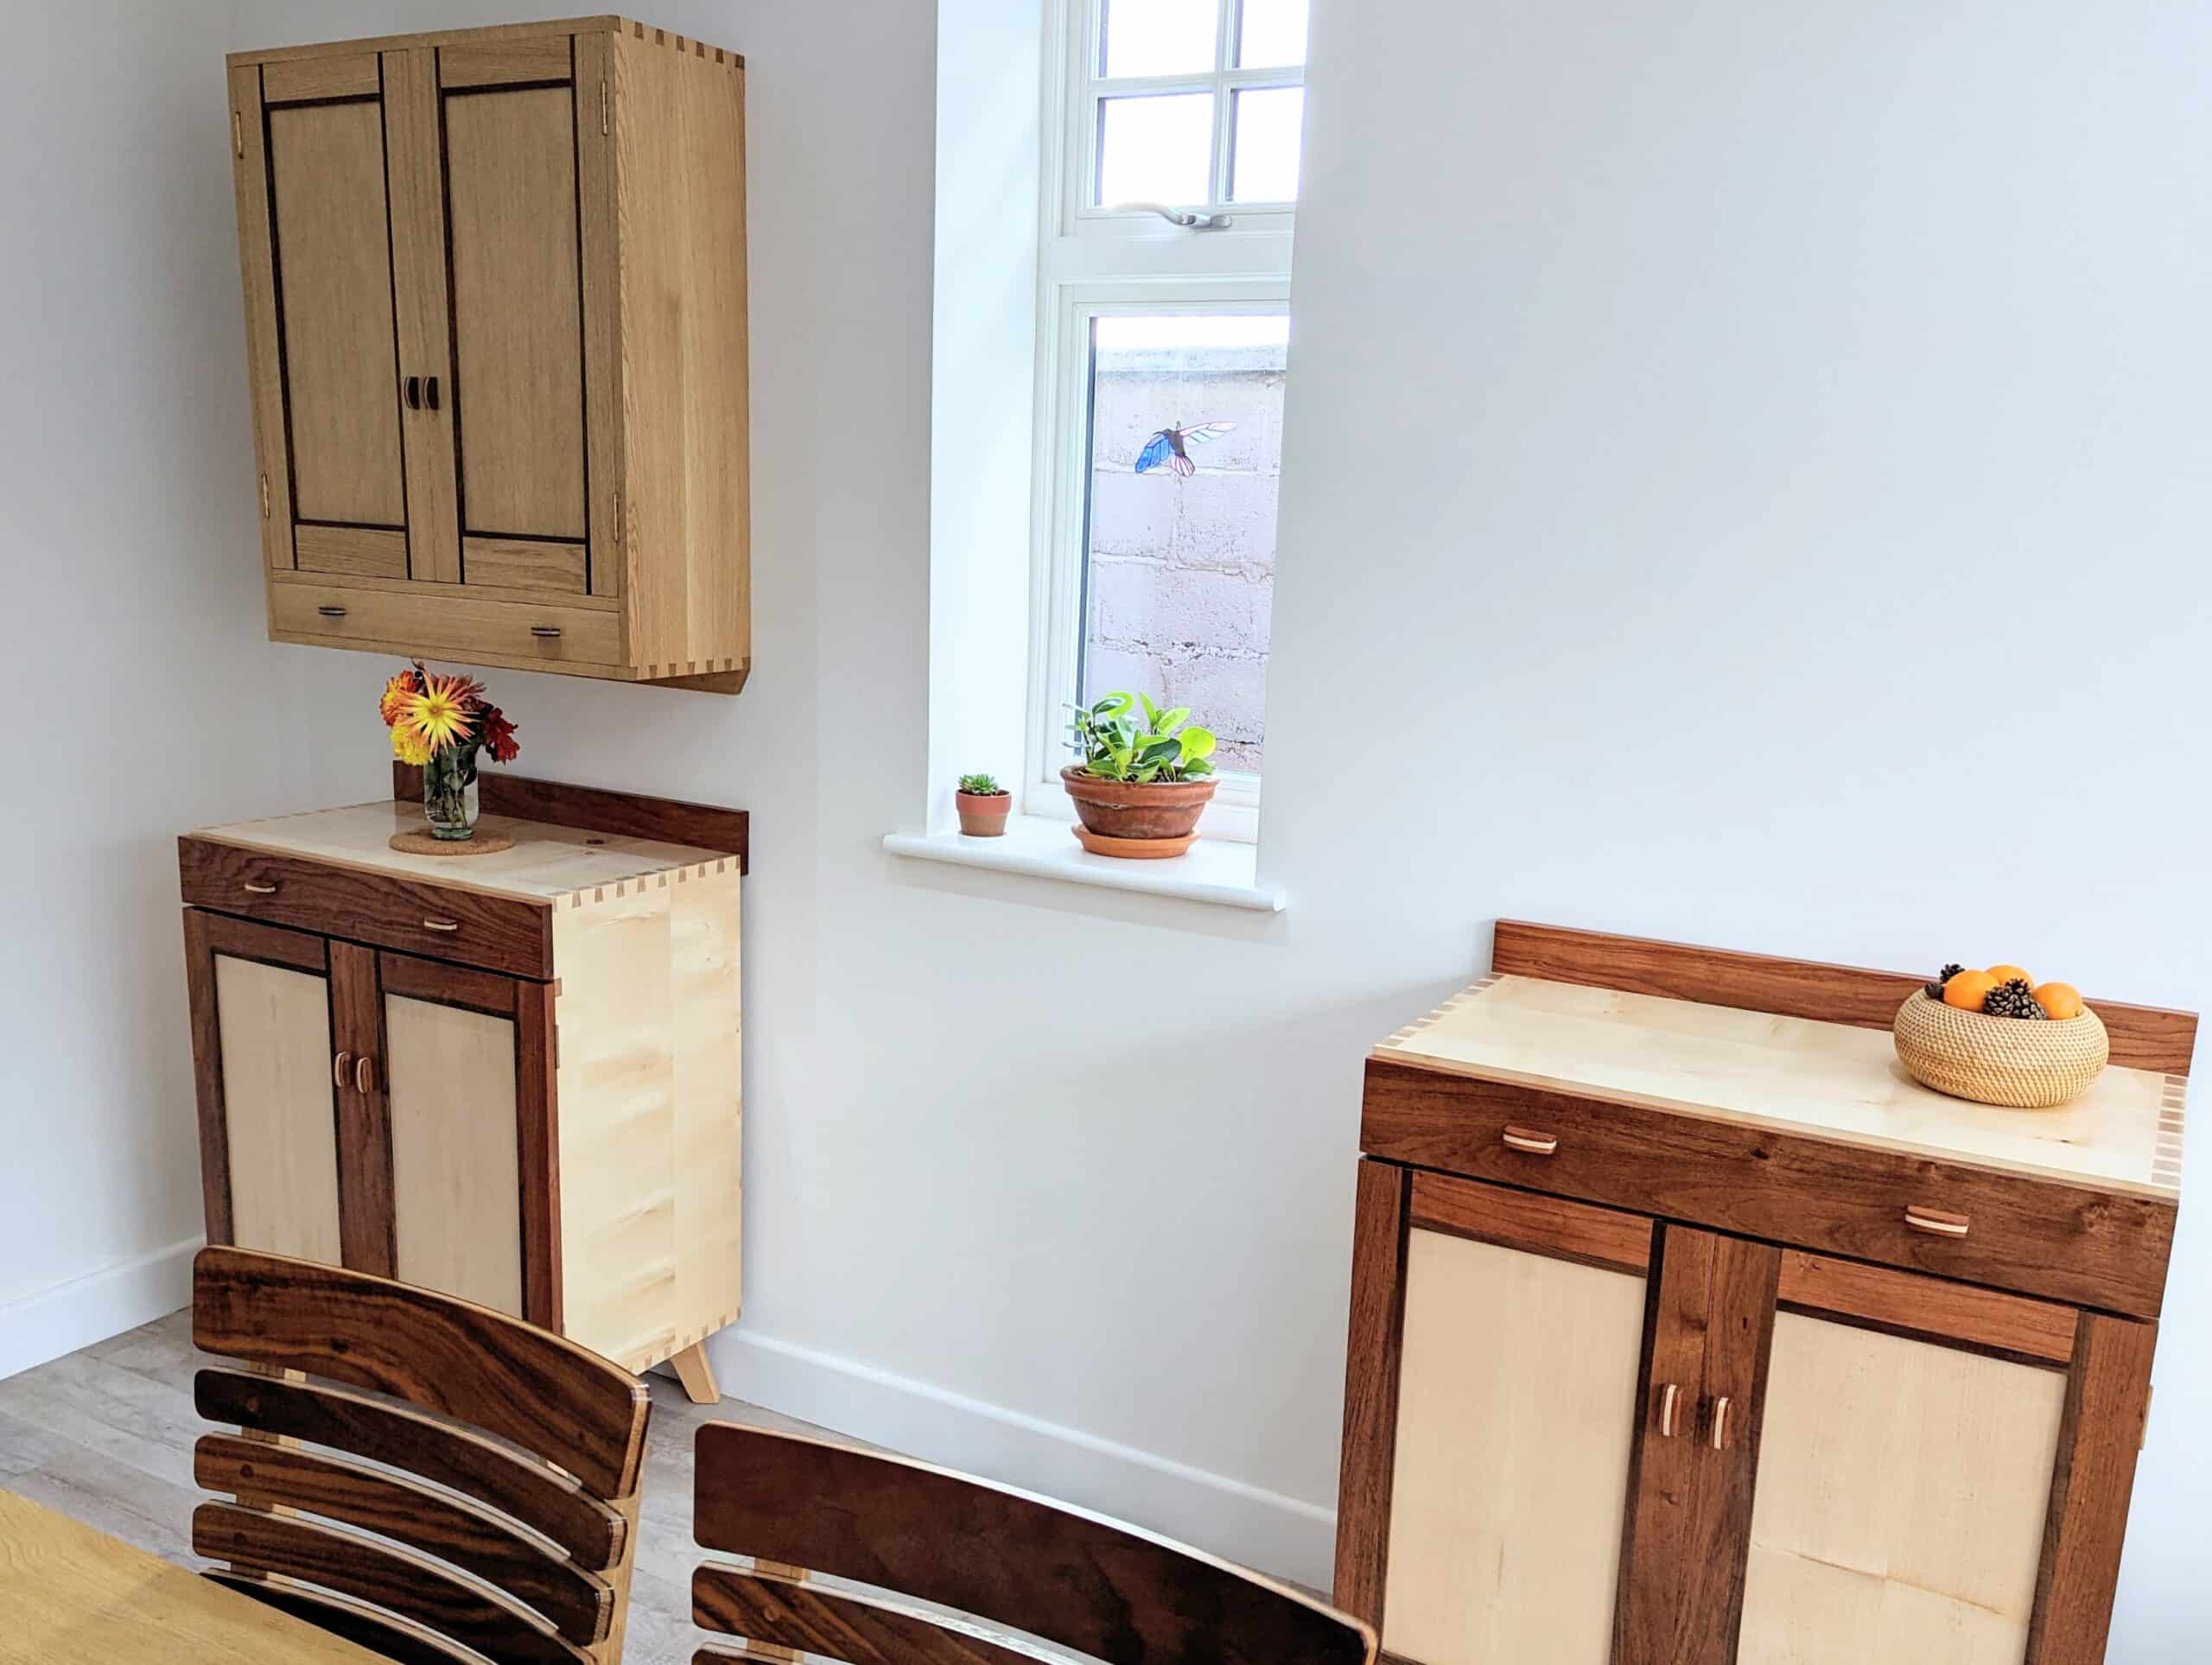
So the base unit really enhanced the overall look of the dining area. The choices of wood increase the value and improve the appearance but they would look very nice in the same oak as the other pieces. I wanted a stunning contrast and went for white with dark red. It worked for me.
I made a prototype in the same wood so that the whole could be trialled and tested for a variety of reasons. Neither of the two key woods used are at all standard. Mesquite with sycamore will be extremely rare if ever put together in this way. I am fortunate to have both in stock from years of acquisition. I want to use the mesquite up. It’s an amazing wood. The instability of sycamore and the amazing stability of mesquite somehow did it for me.
The cabinet would go anywhere in a house. I took two weeks for the second one and three for the first. Five weeks in all. I would sell these to a customer as a non-famous person for $3,000 each. To the right customer, they would sell easily enough. They cannot be compared to any other work making them highly distinctive and a focal point in a room, something people usually like in the same way artwork does. $6,000
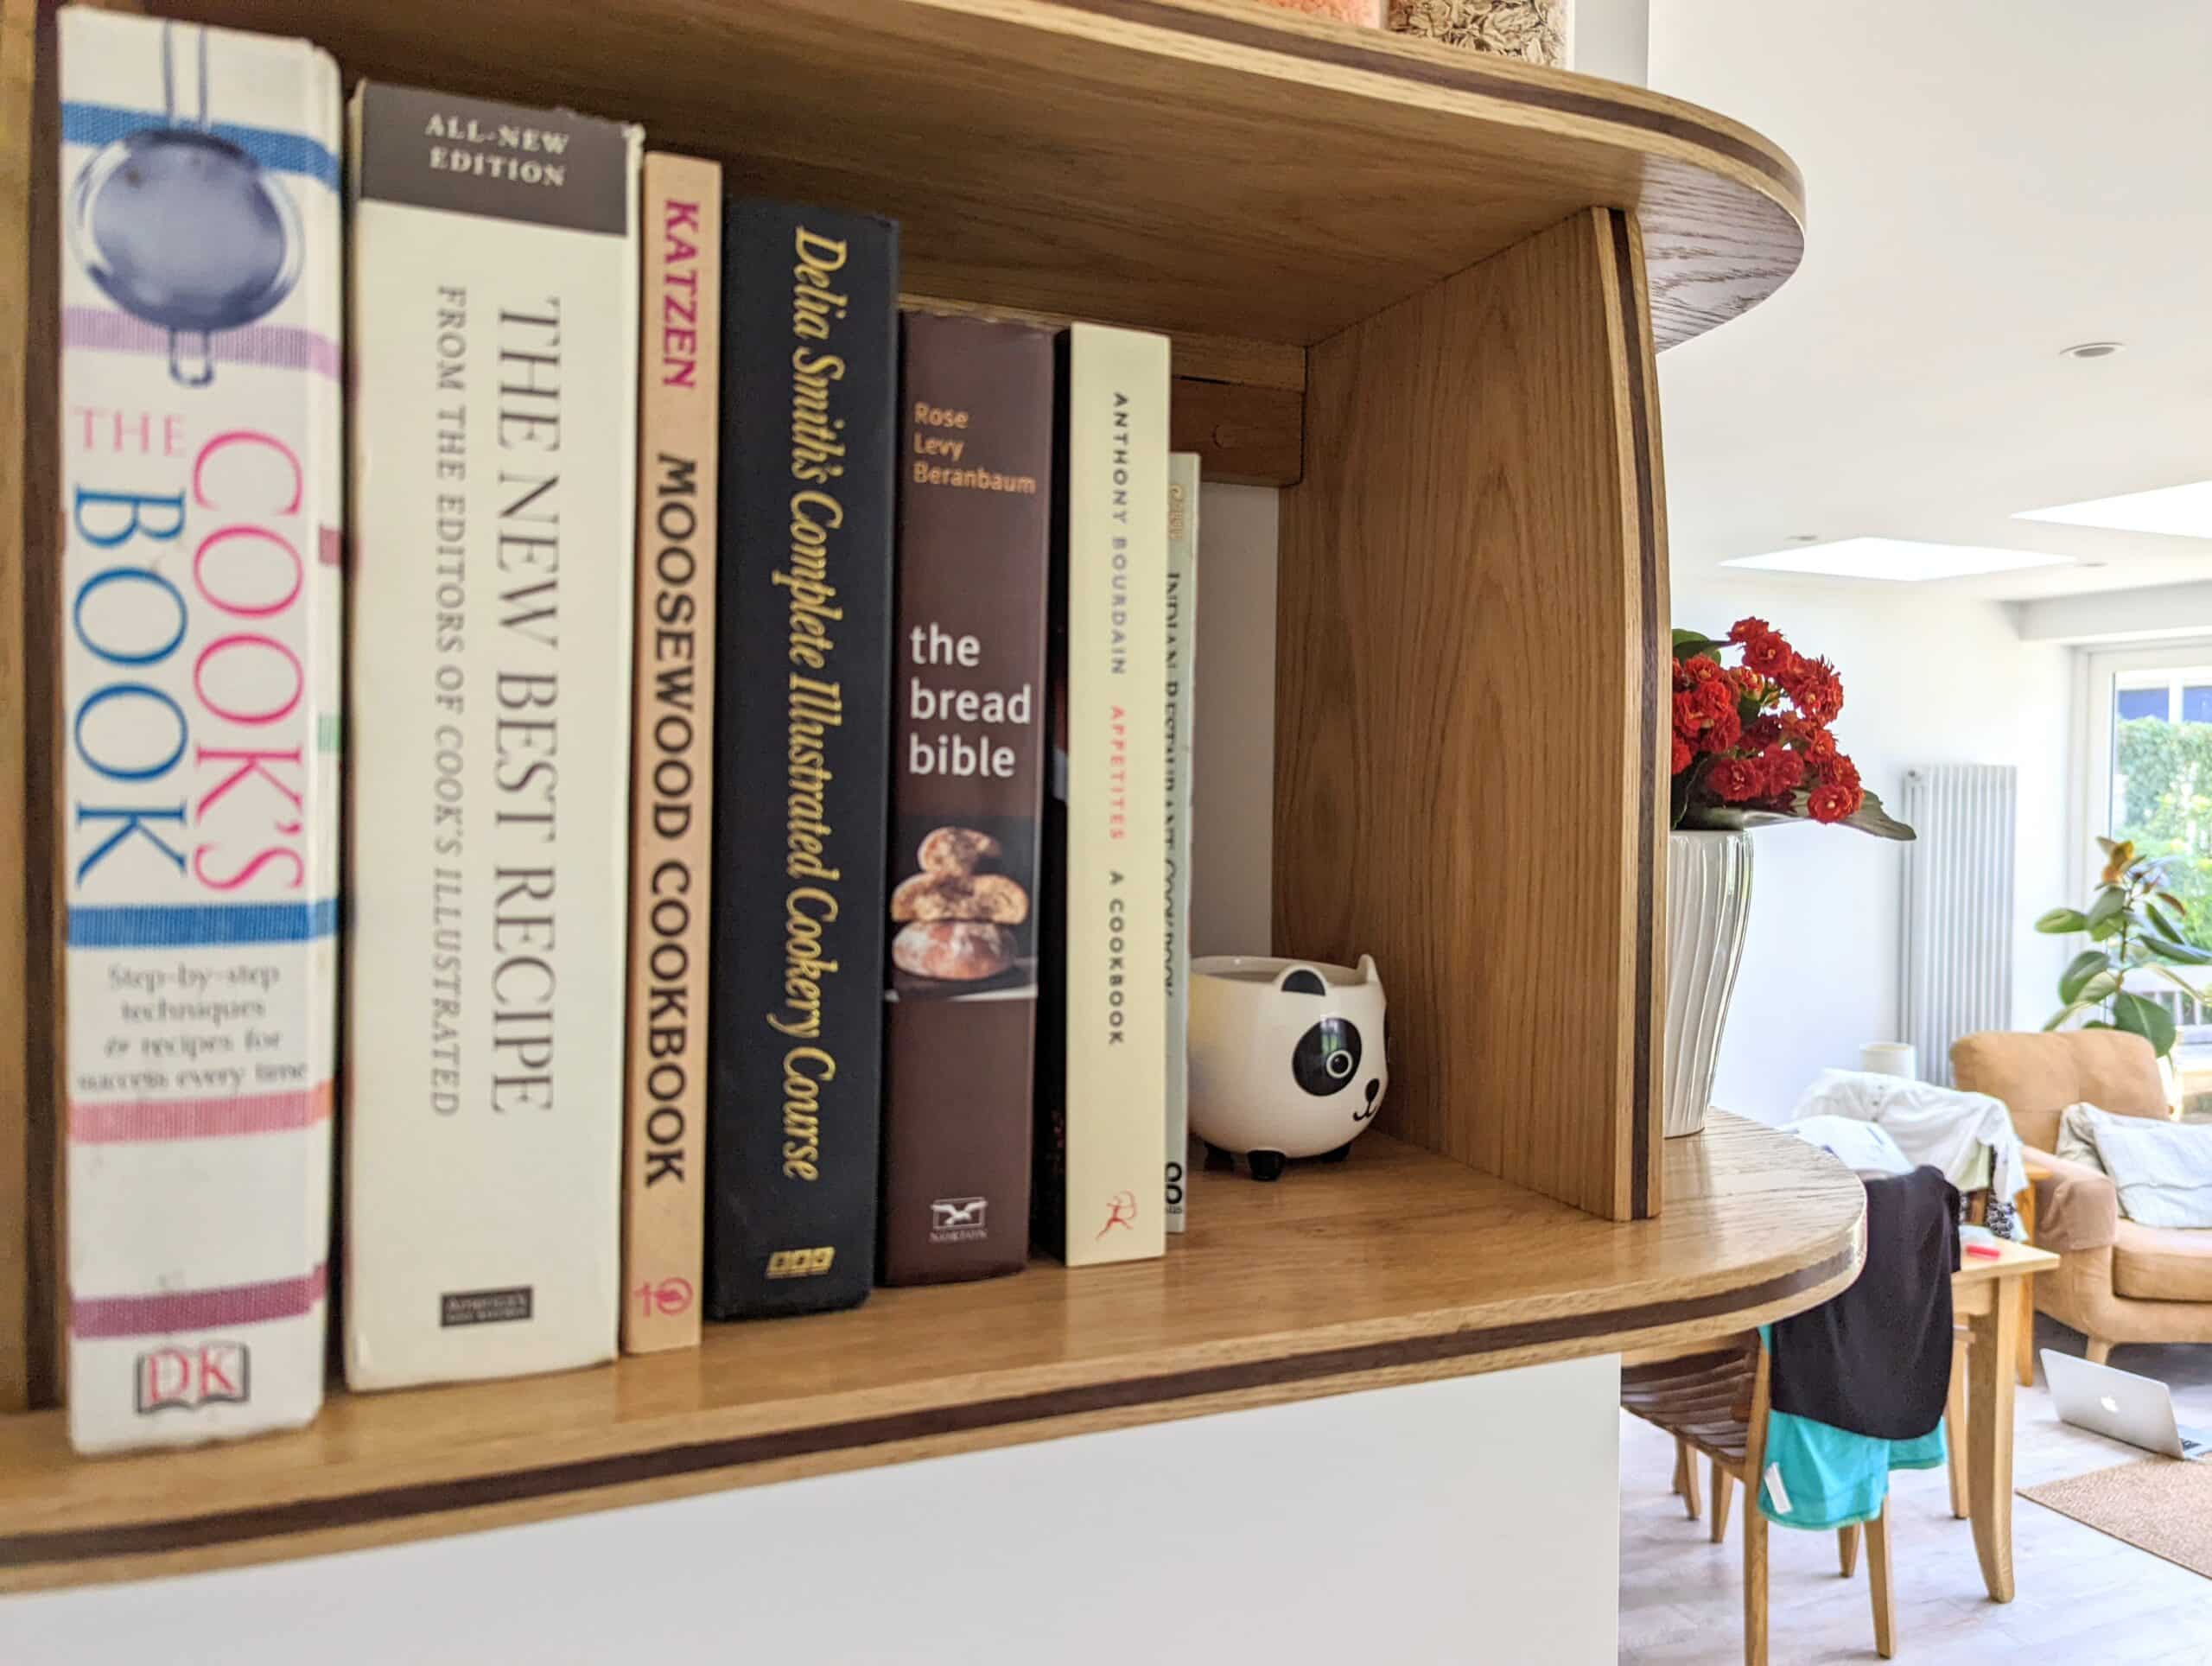
Some corners are best filled with small units be they mirrors or wall shelves. I had one corner that worked for a recipe bookshelf so I made one as an instructional for sliding dovetails. These are housing dadoes with tapered and dovetailed walls. They take some calculating but in real life back in the late 1800s they were not laid out as we might today but simply cut by eye with a tenon saw cutting the walls and also the angled aspect of the slide-in part. Hard to price this one. I added a little inlay to the edges just to add a little extra dynamic. Best part of a good day’s work but I couldn’t really charge too much for so small; a shelf unit. $150??? Some pieces you have to take a loss on.
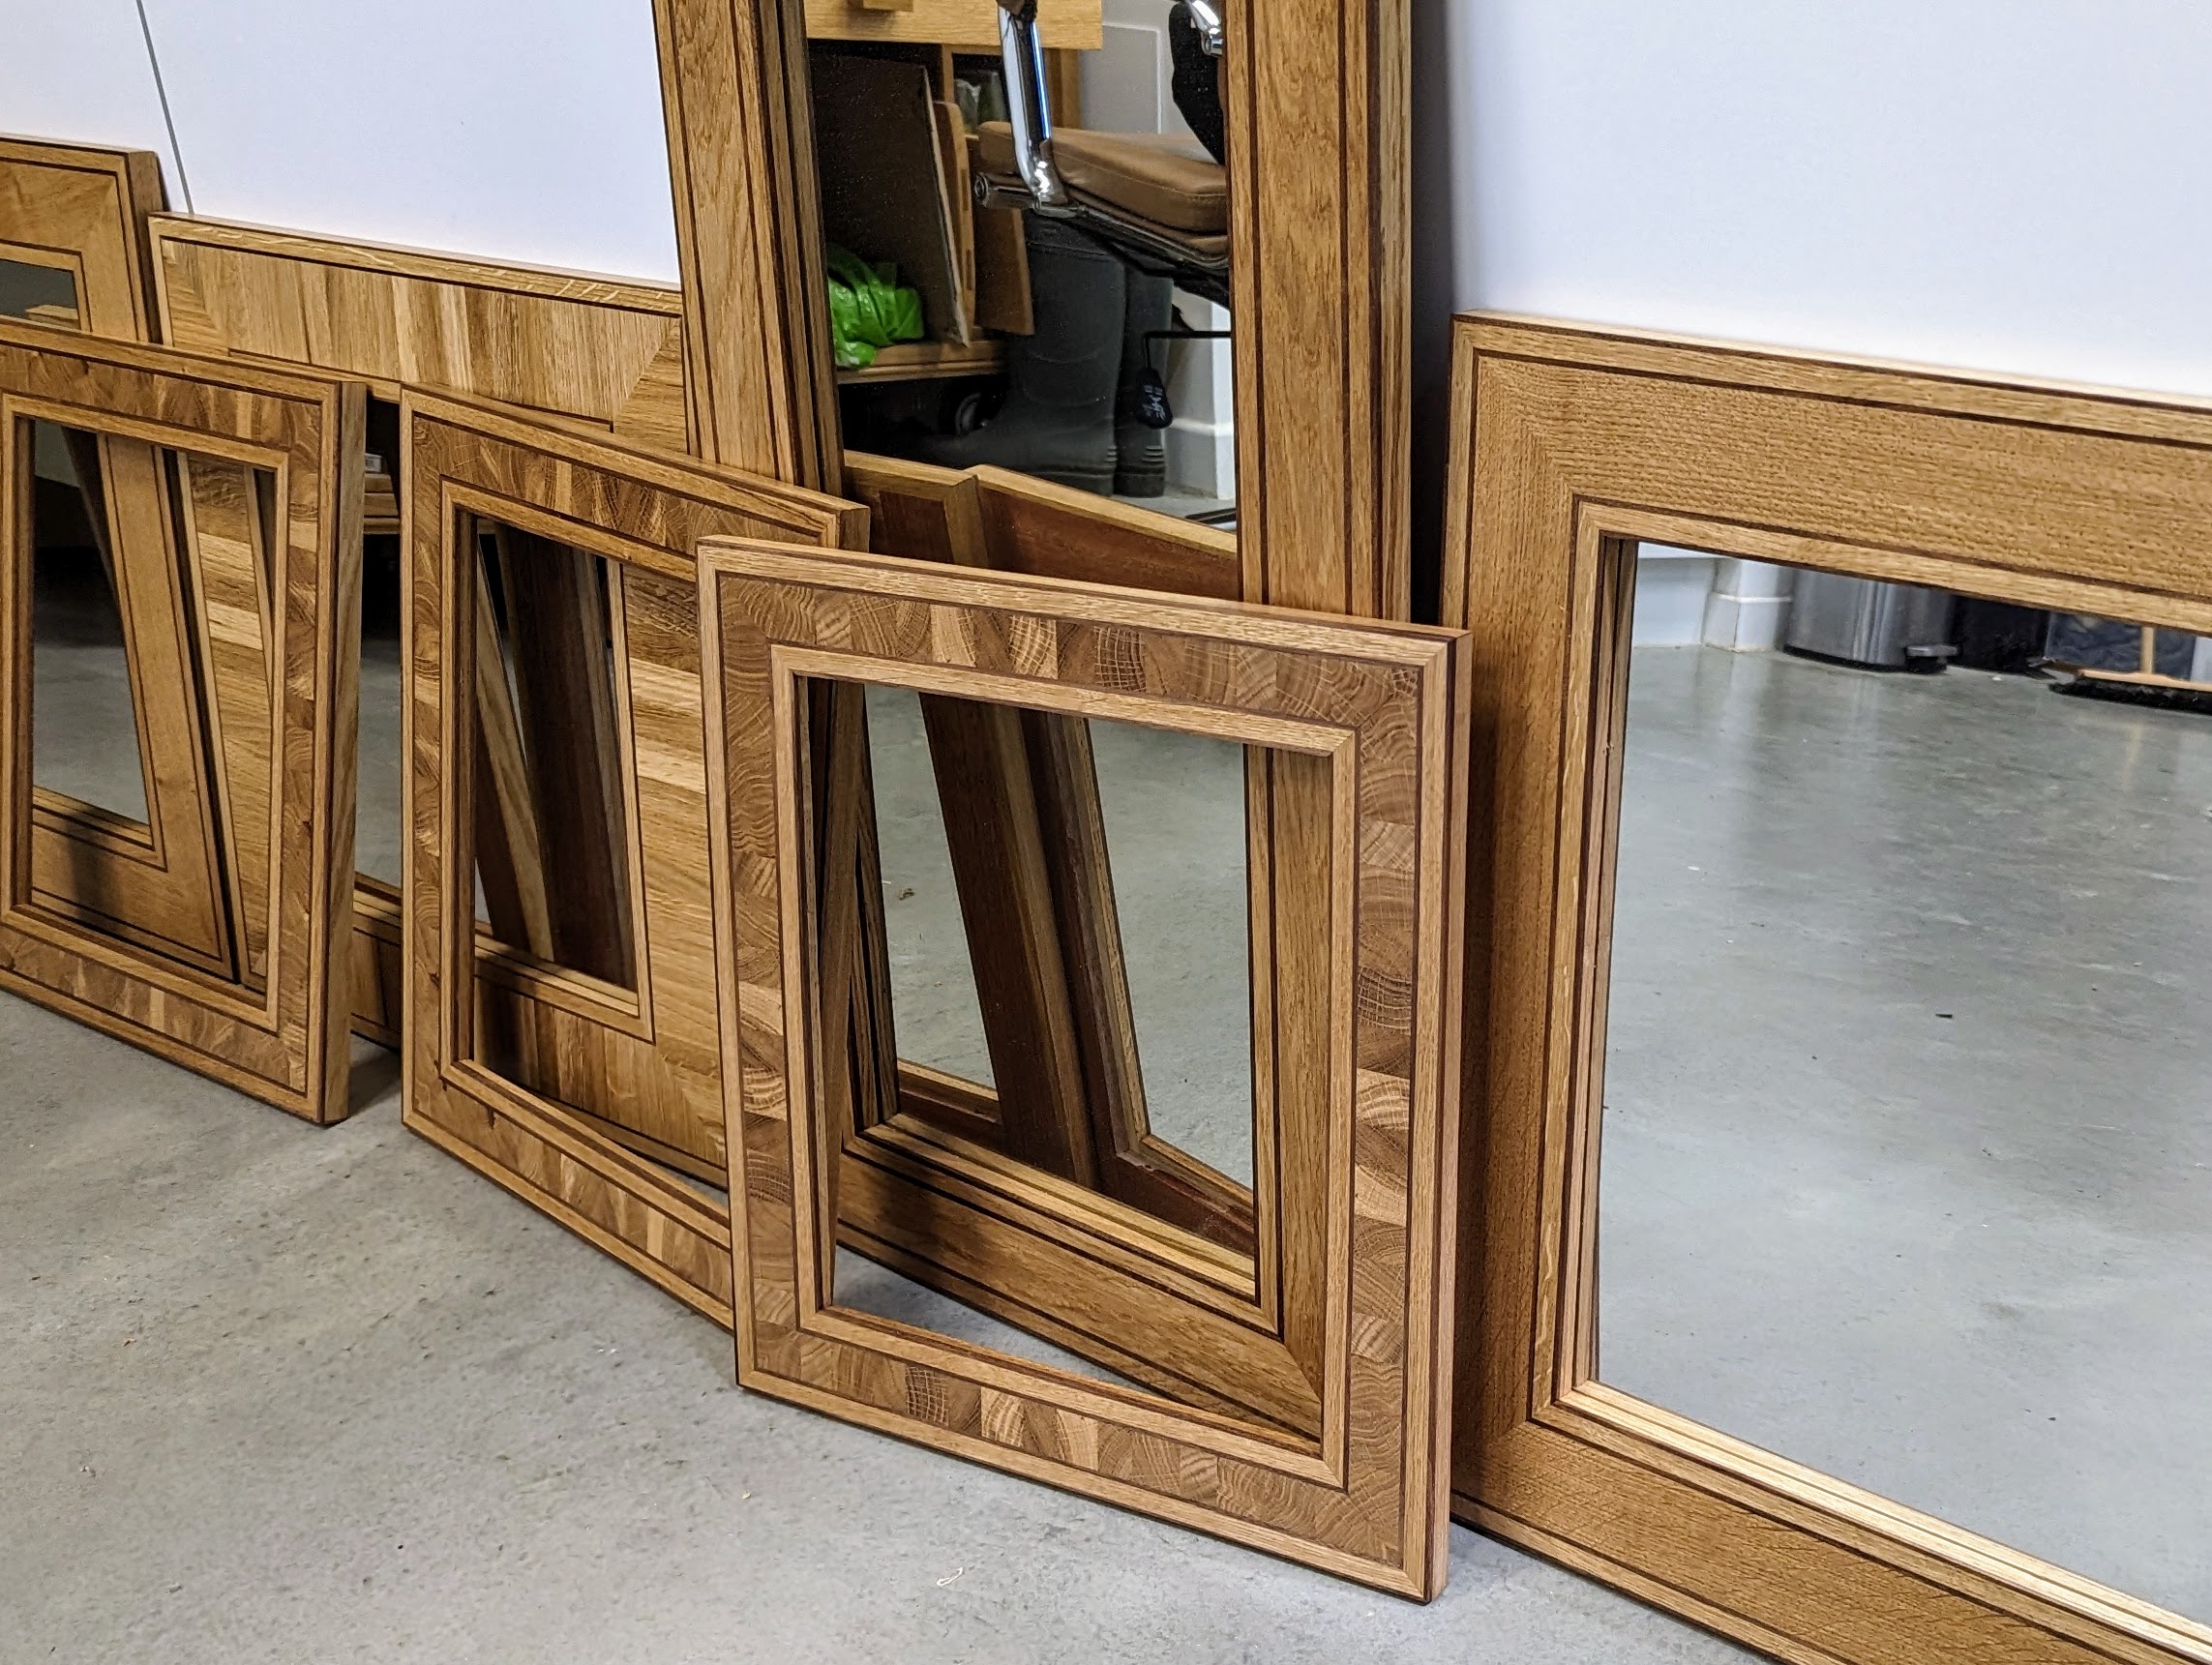
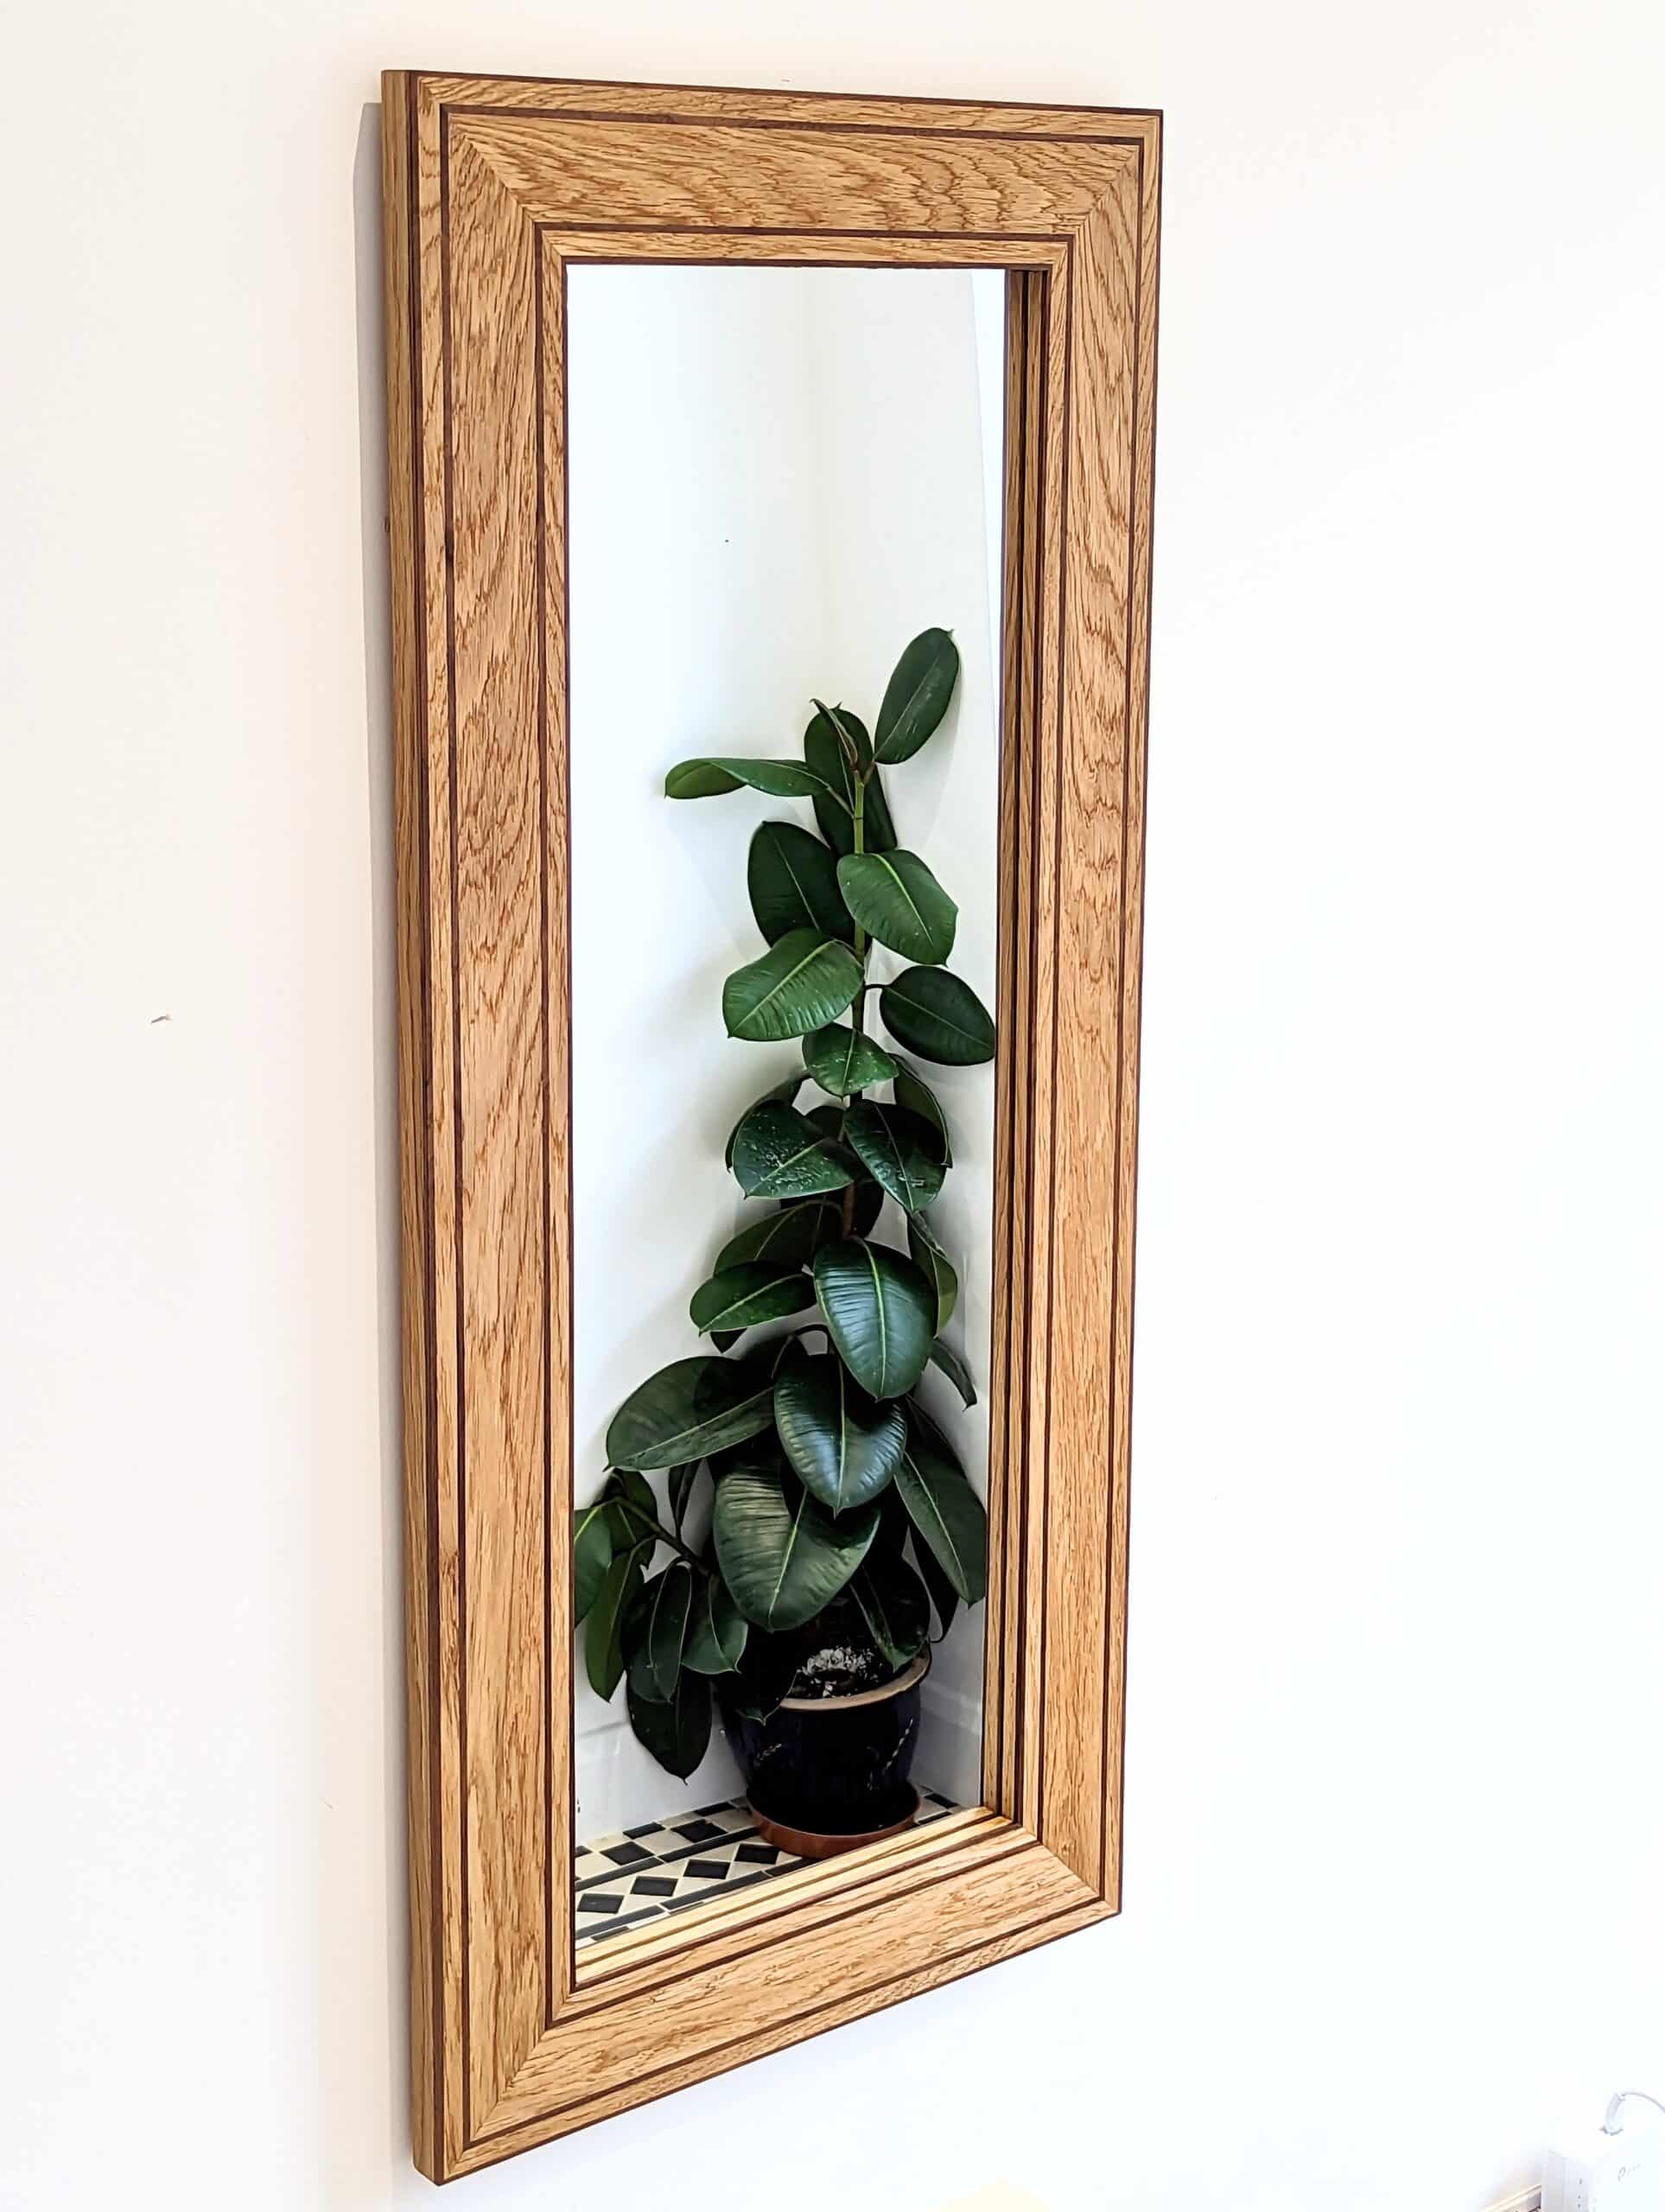
I designed my mirror frames and came up with a variety of design types using mortise and tenon joinery on the corners and then facings as a veneer of built-up contrasts. It worked really well. I have one as a mirror and three others as a cluster group of my artwork. The pieces are really well worth $150 each. That being so, $600 for three days work.
I also have two elliptical side tables in this area so $800 for these.
This totals my dining area furniture to $22,050 without the additional three chairs and the second wall cupboard. The days come out at around 60 days of work so around $360 a day less materials, etc.
The hallway is yet to become a place for hanging coats and other things but in my mirror-making spree, I made an elongated version to hang there.
I think if you take the total 90 days and put them into the 730 days of a two-year expanse the percentage of time might actually surprise you. Split these into half so 45 days or roughly a day a week.
Upstairs now
We will make furniture for two bedrooms with the first being the master bedroom. We concluded the main body of work two weeks ago and began this series with a kingsize oak bed.
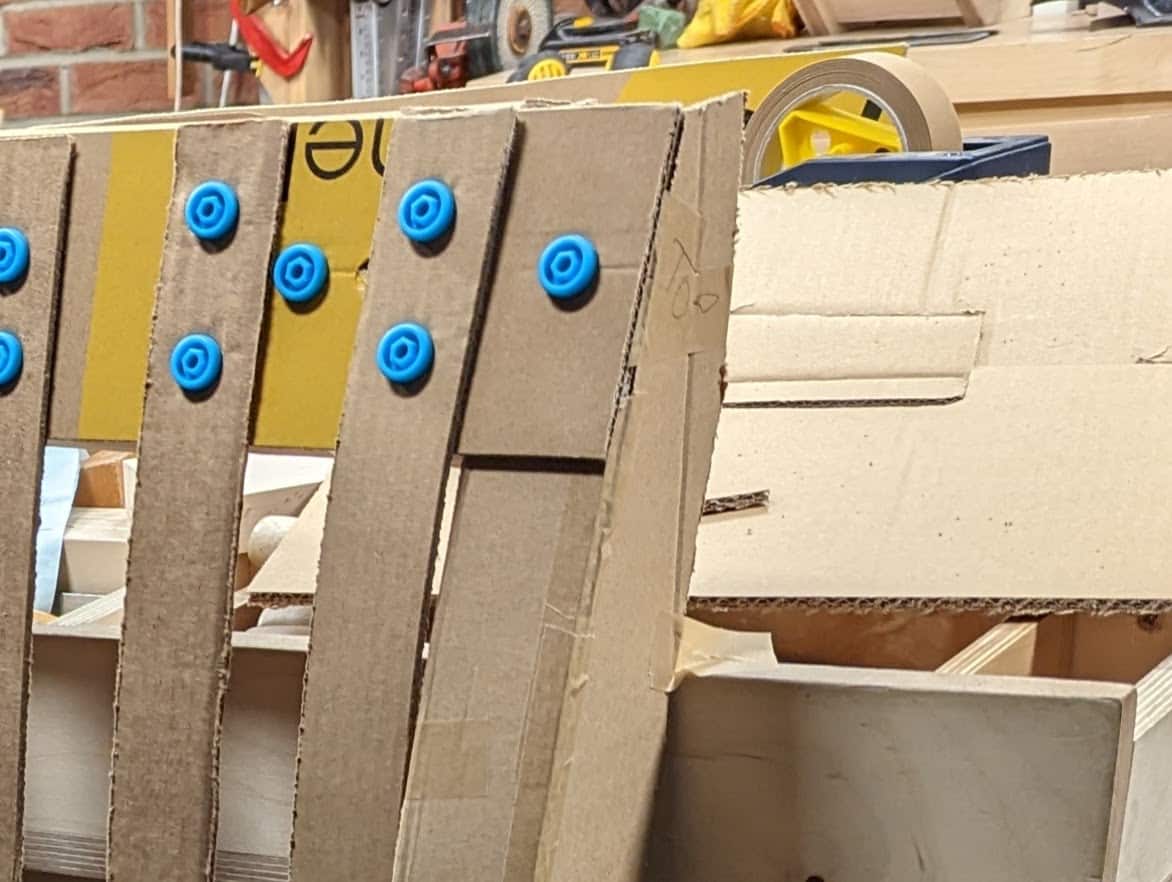
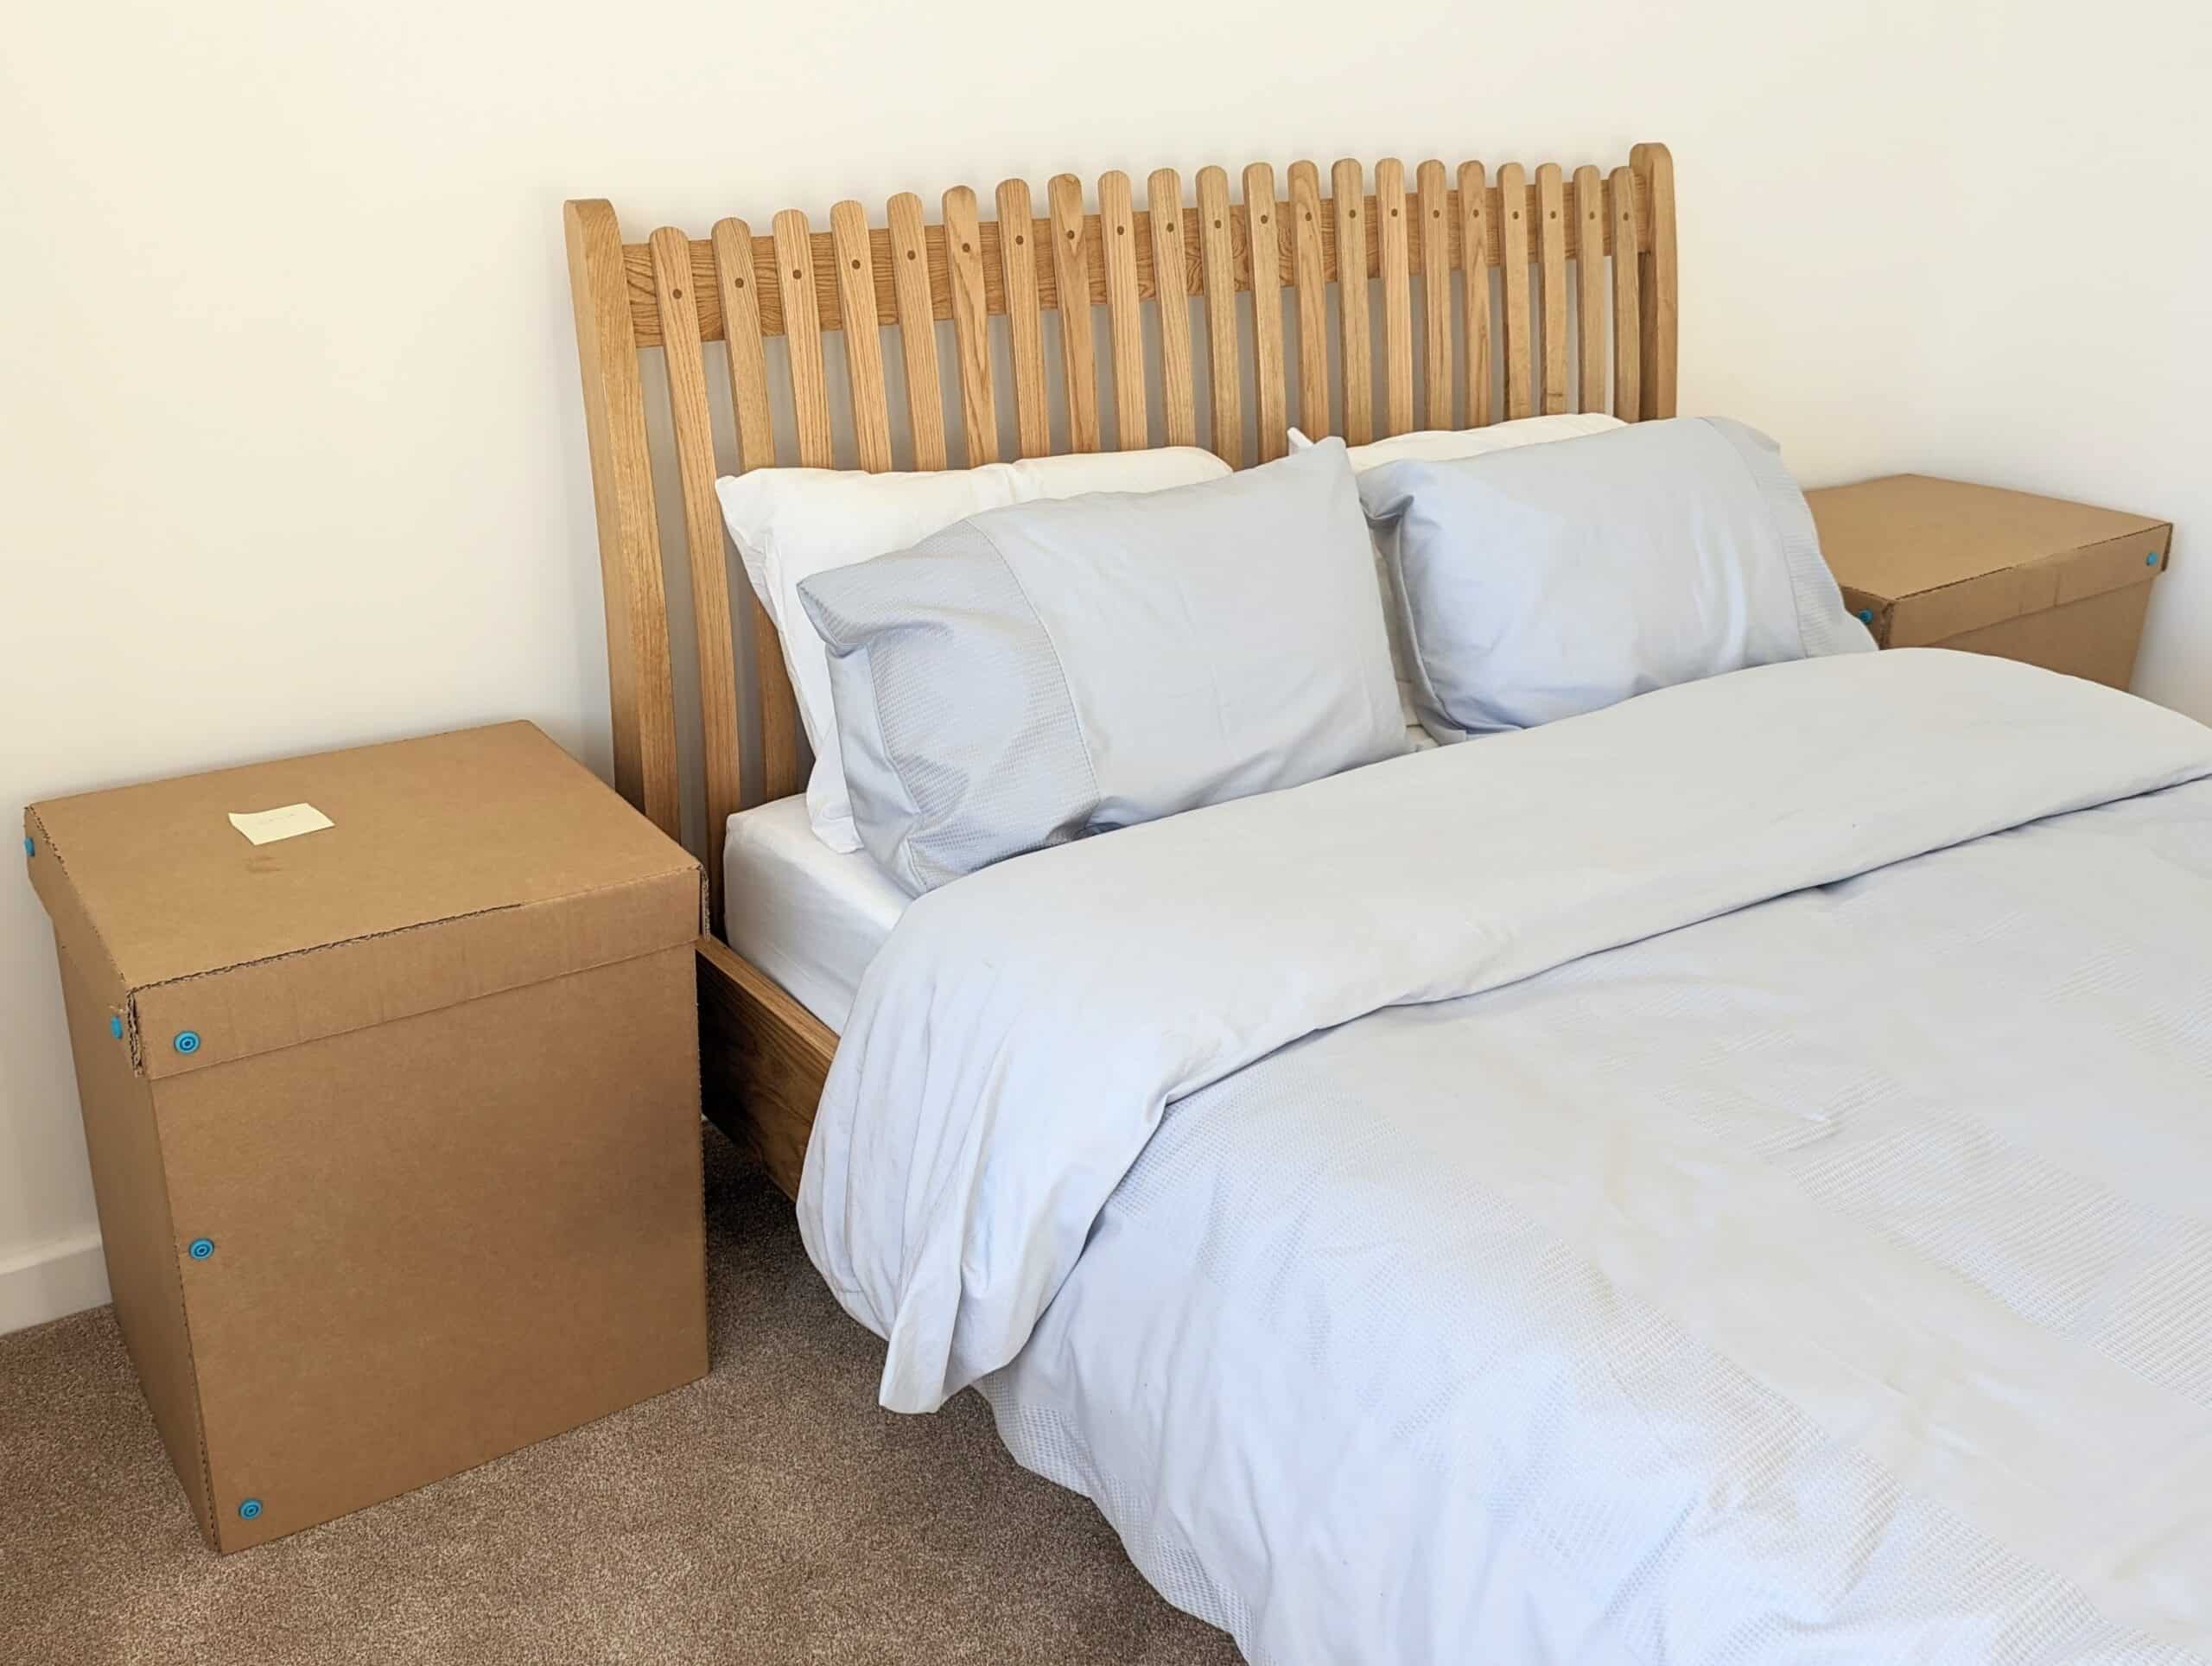
This facsimile of the bed I will ultimately make from real wood is made from corrugated cardboard boxes repurposed for temporary life as a space and placeholder. You can now see the real value of spending an hour or two on such a model to pass on the full impact so large a piece will have on a room. It’s also a great way to show your intent in the design, albeit roughly. When the team Rokesmith saw it in situ it increased their awareness of what would otherwise be arbitrary to them as visualising size and shape can be heard. Also, it’s fun to get grandkids involved if you can.
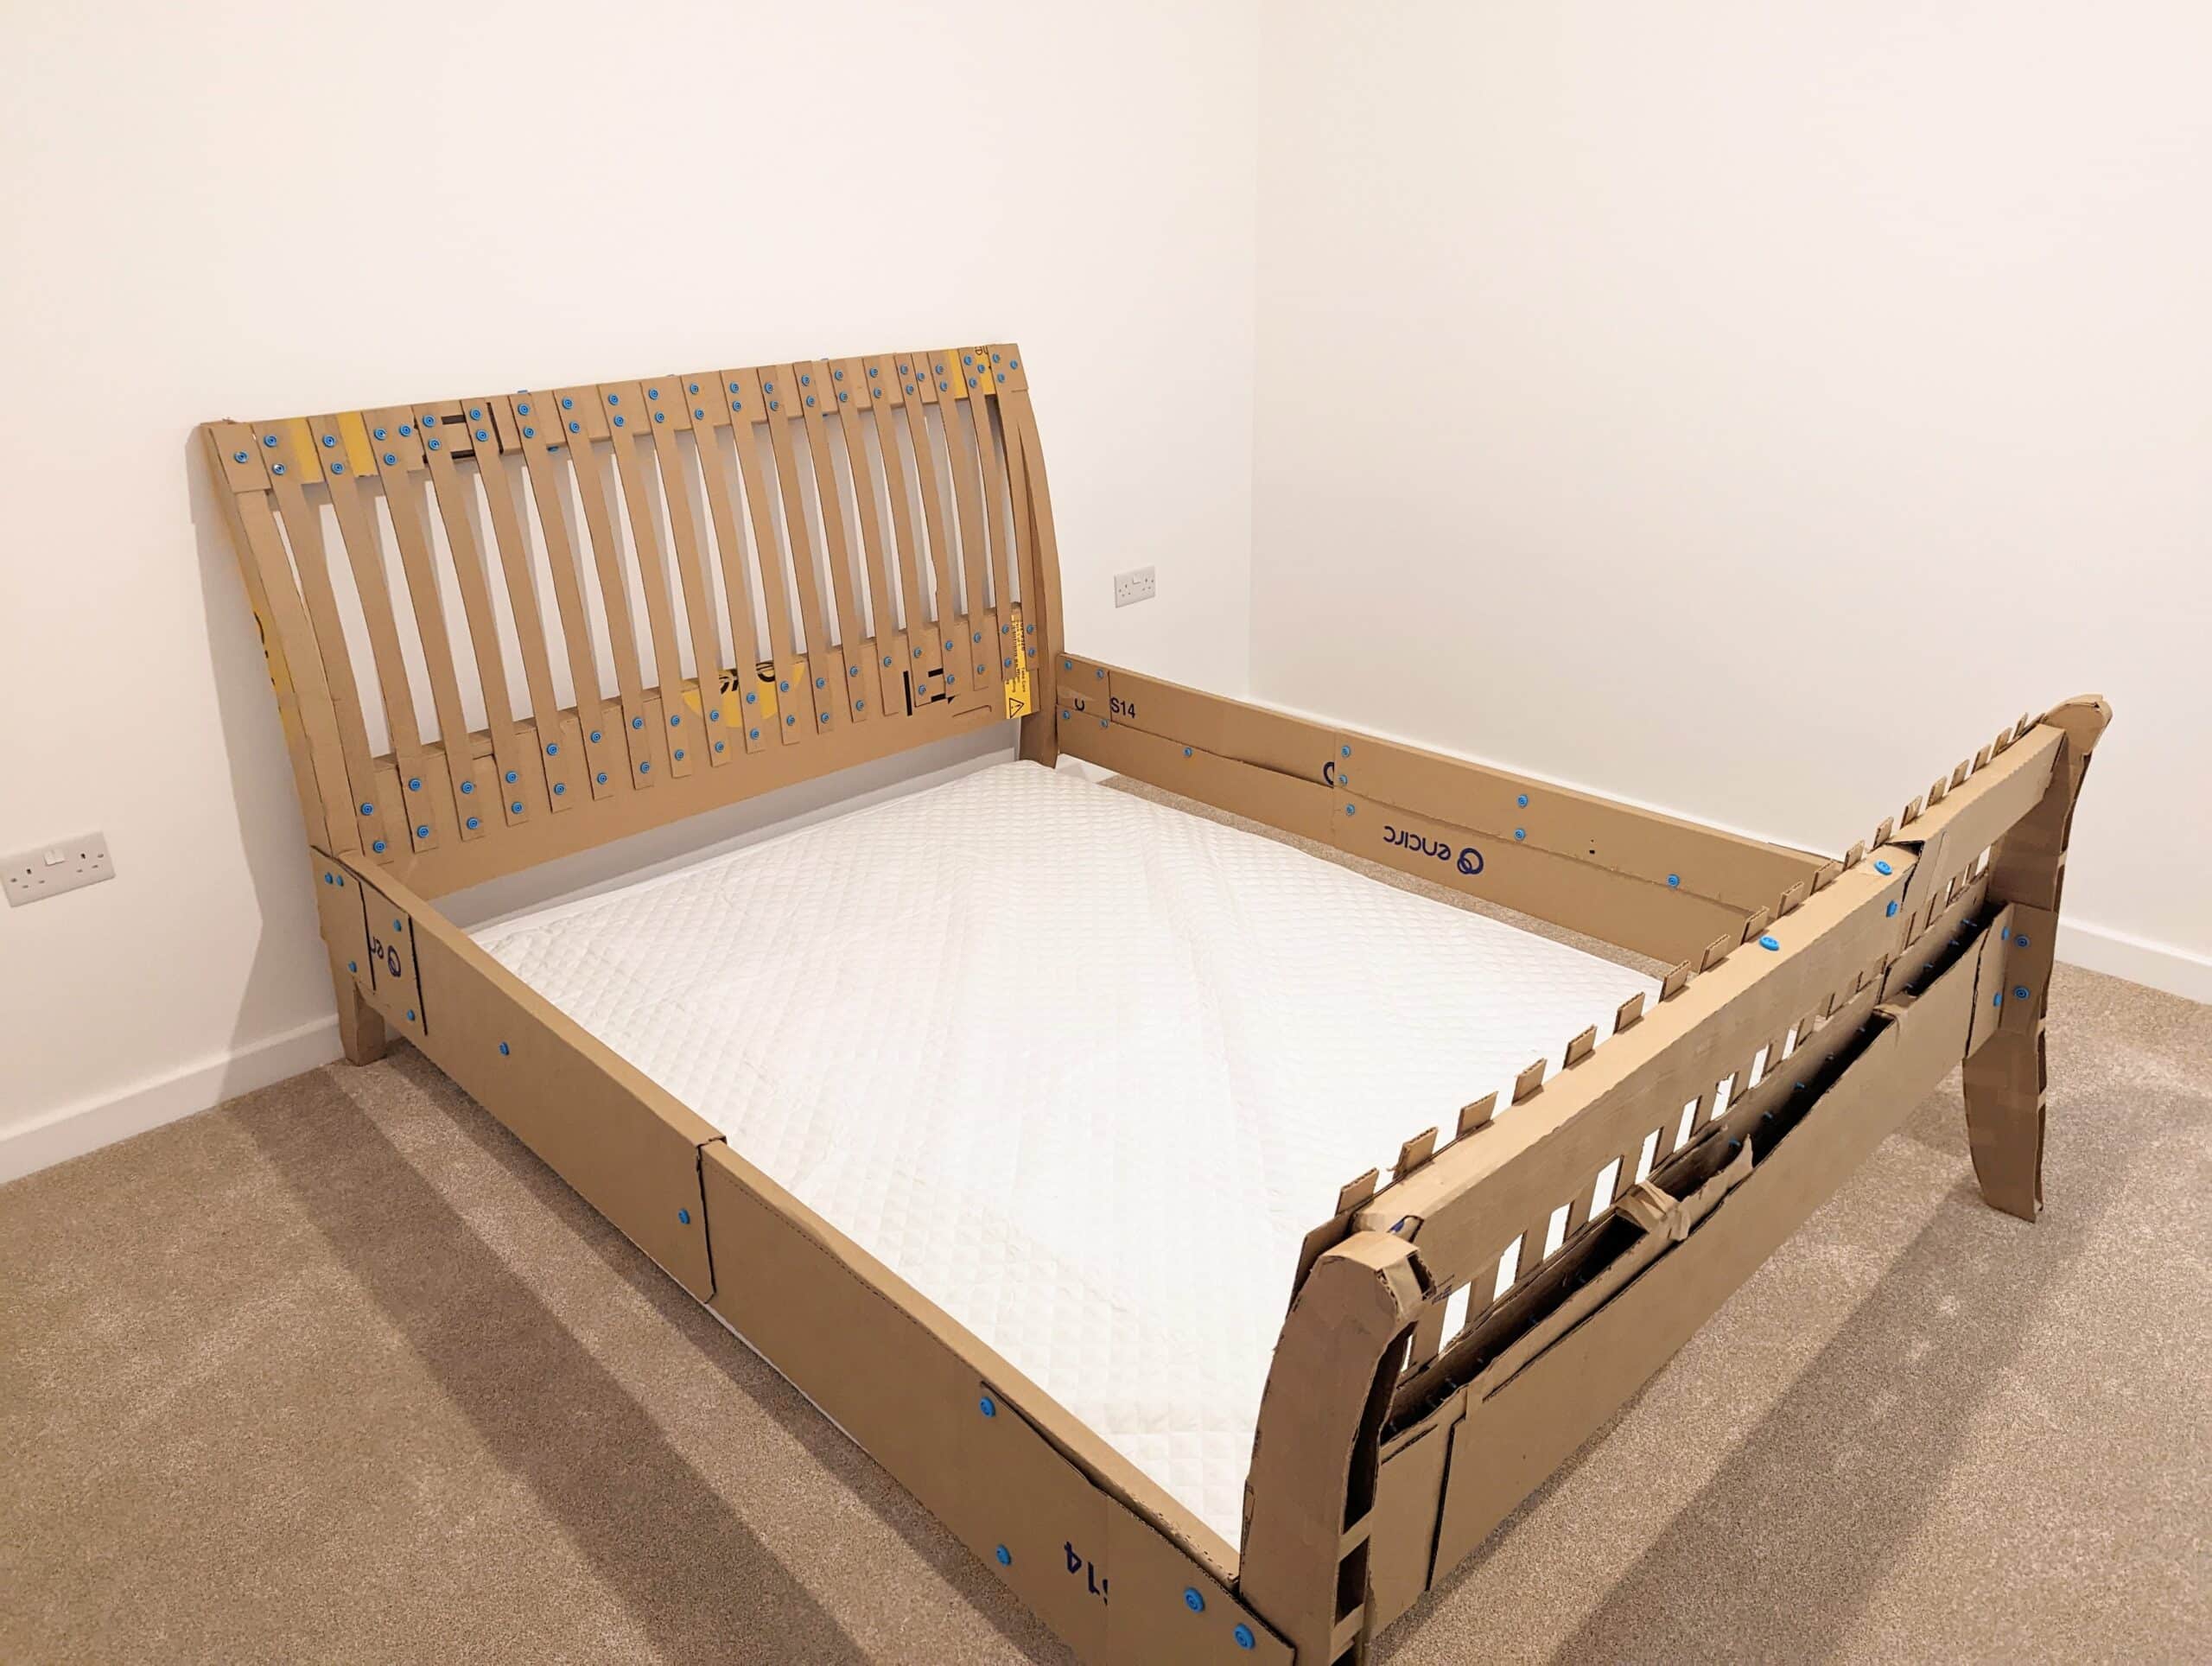
So gradually the project came together in my very limited garage space. Most of the work is on the benchtop and in the vise until the head and footboard come together as primary units. Everything else is just sticks and stems for side rails and cross bearers to hold the mattress.
I started on the 22nd of November 2022 and it took me until the 4th of January to deliver it. It took me three weeks of actual work to make the bed––15 full days. I know that the wood cost $400 this time.
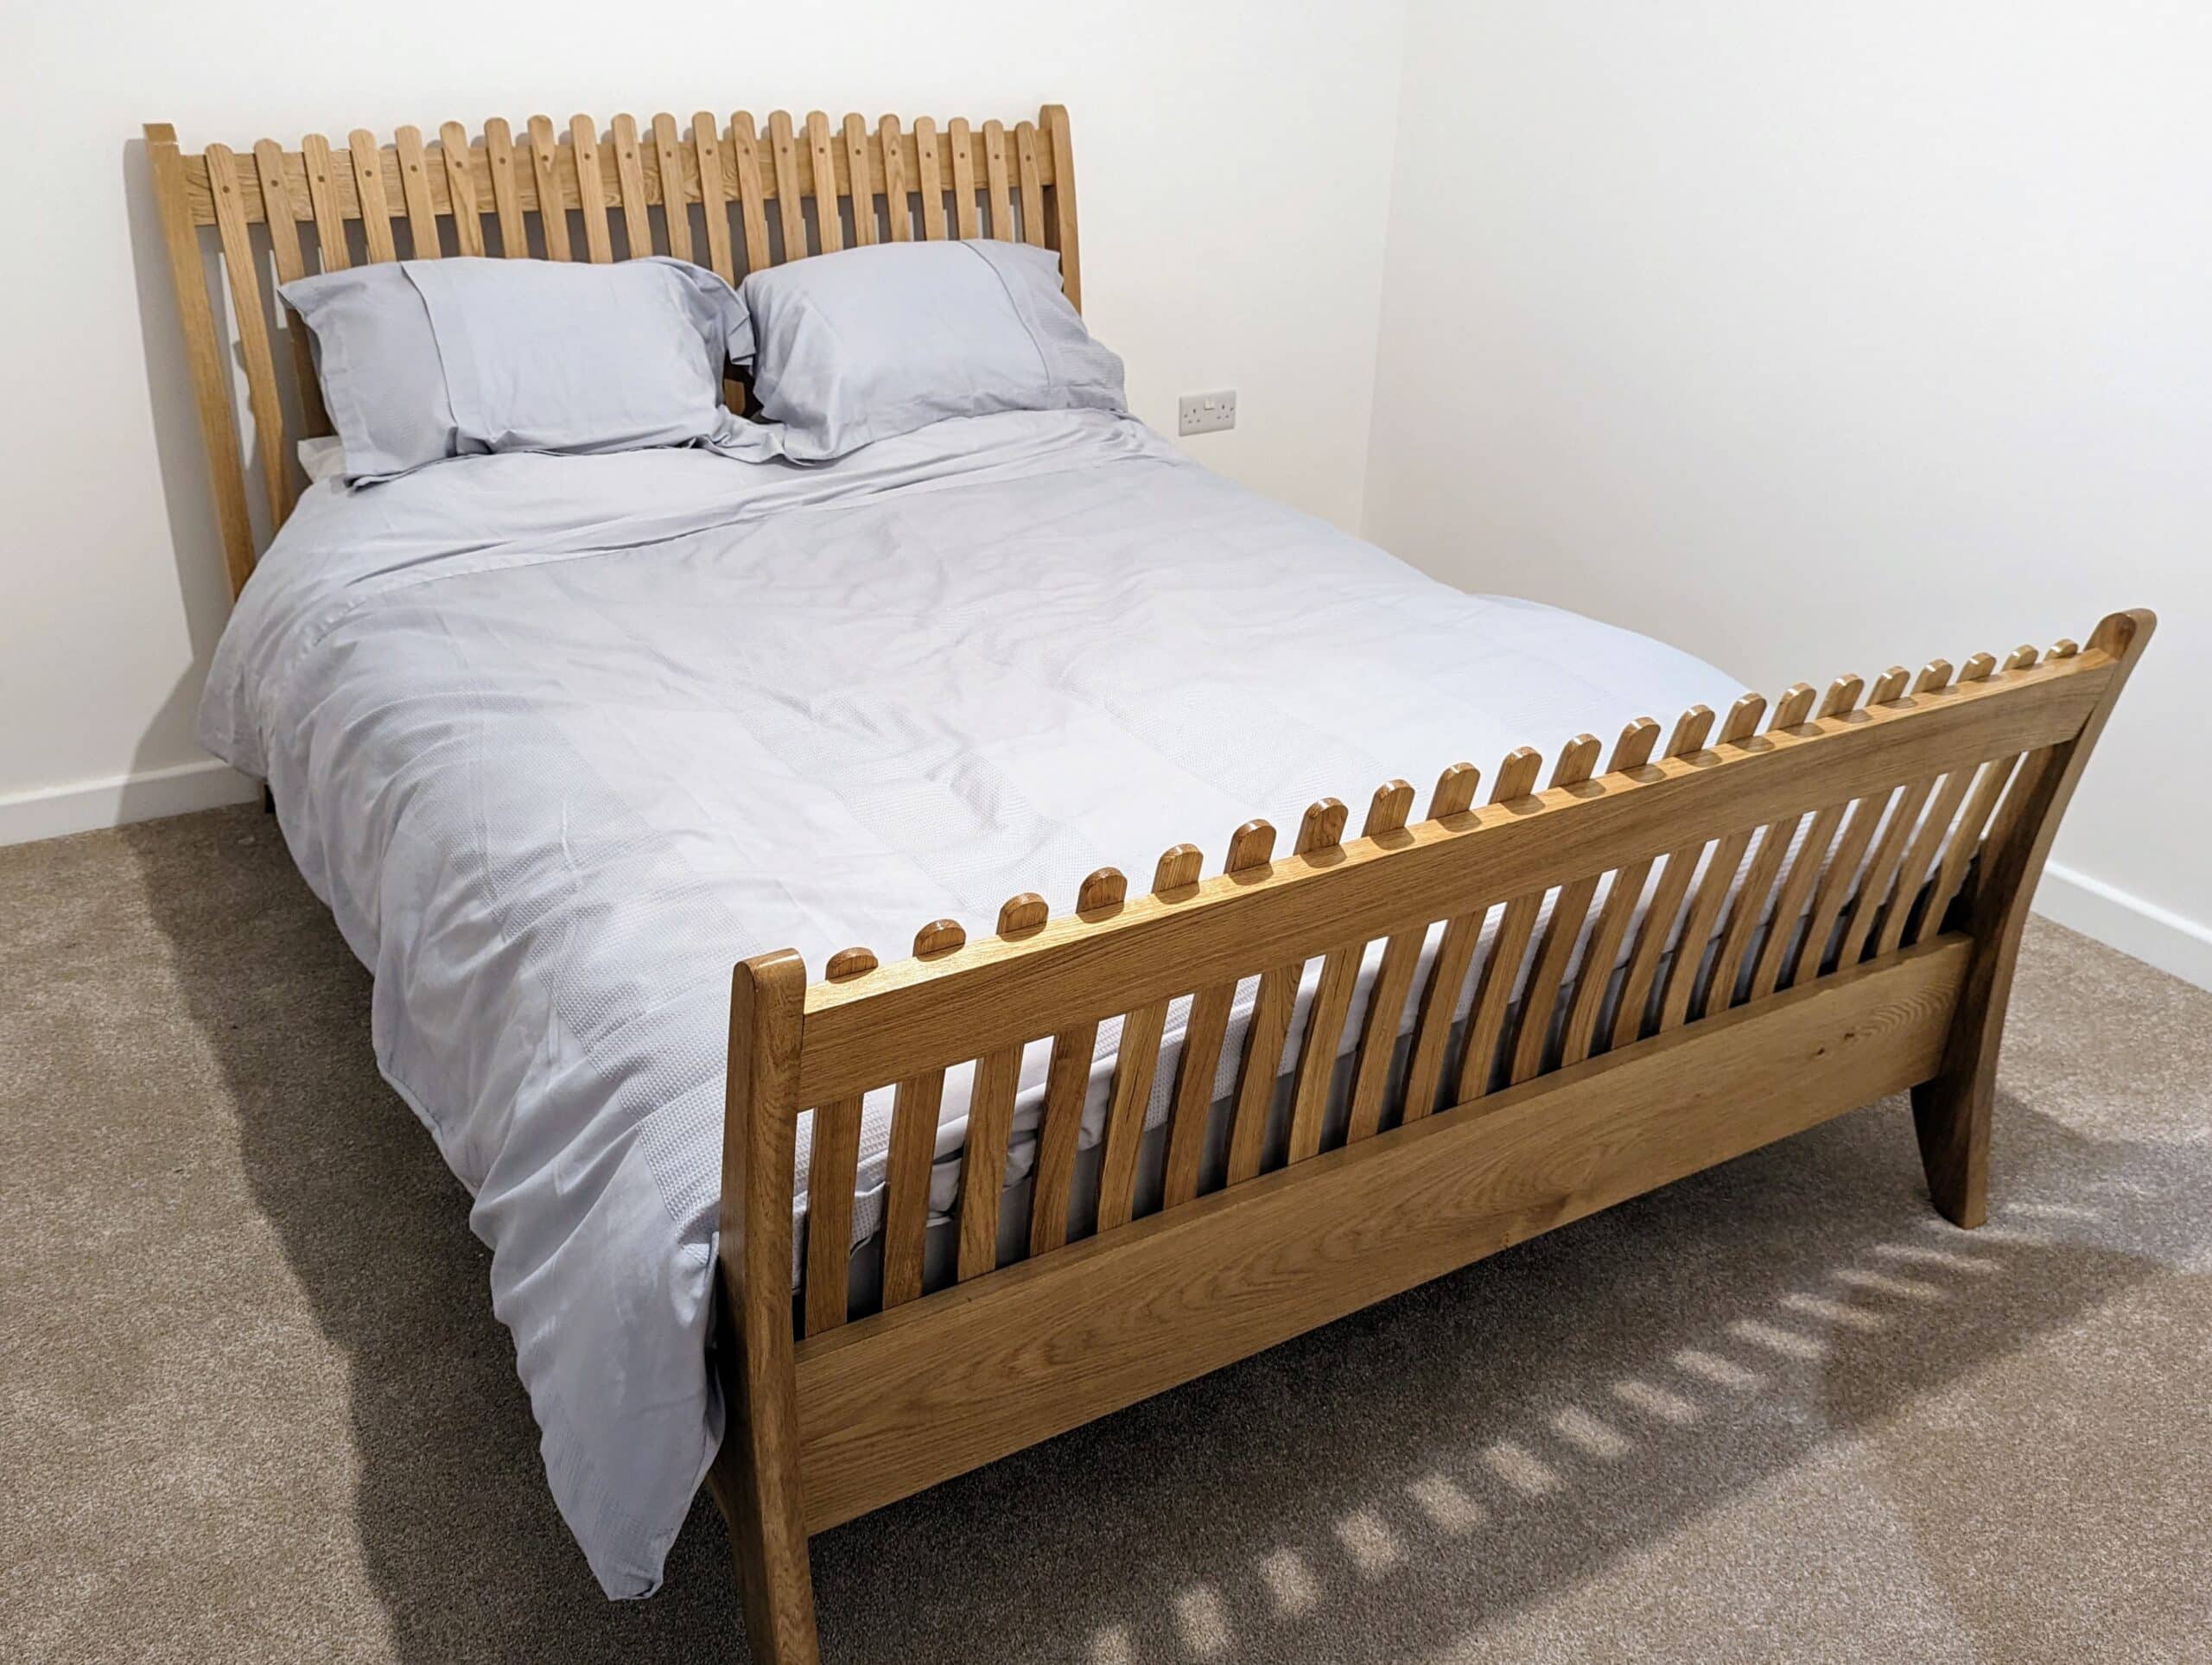
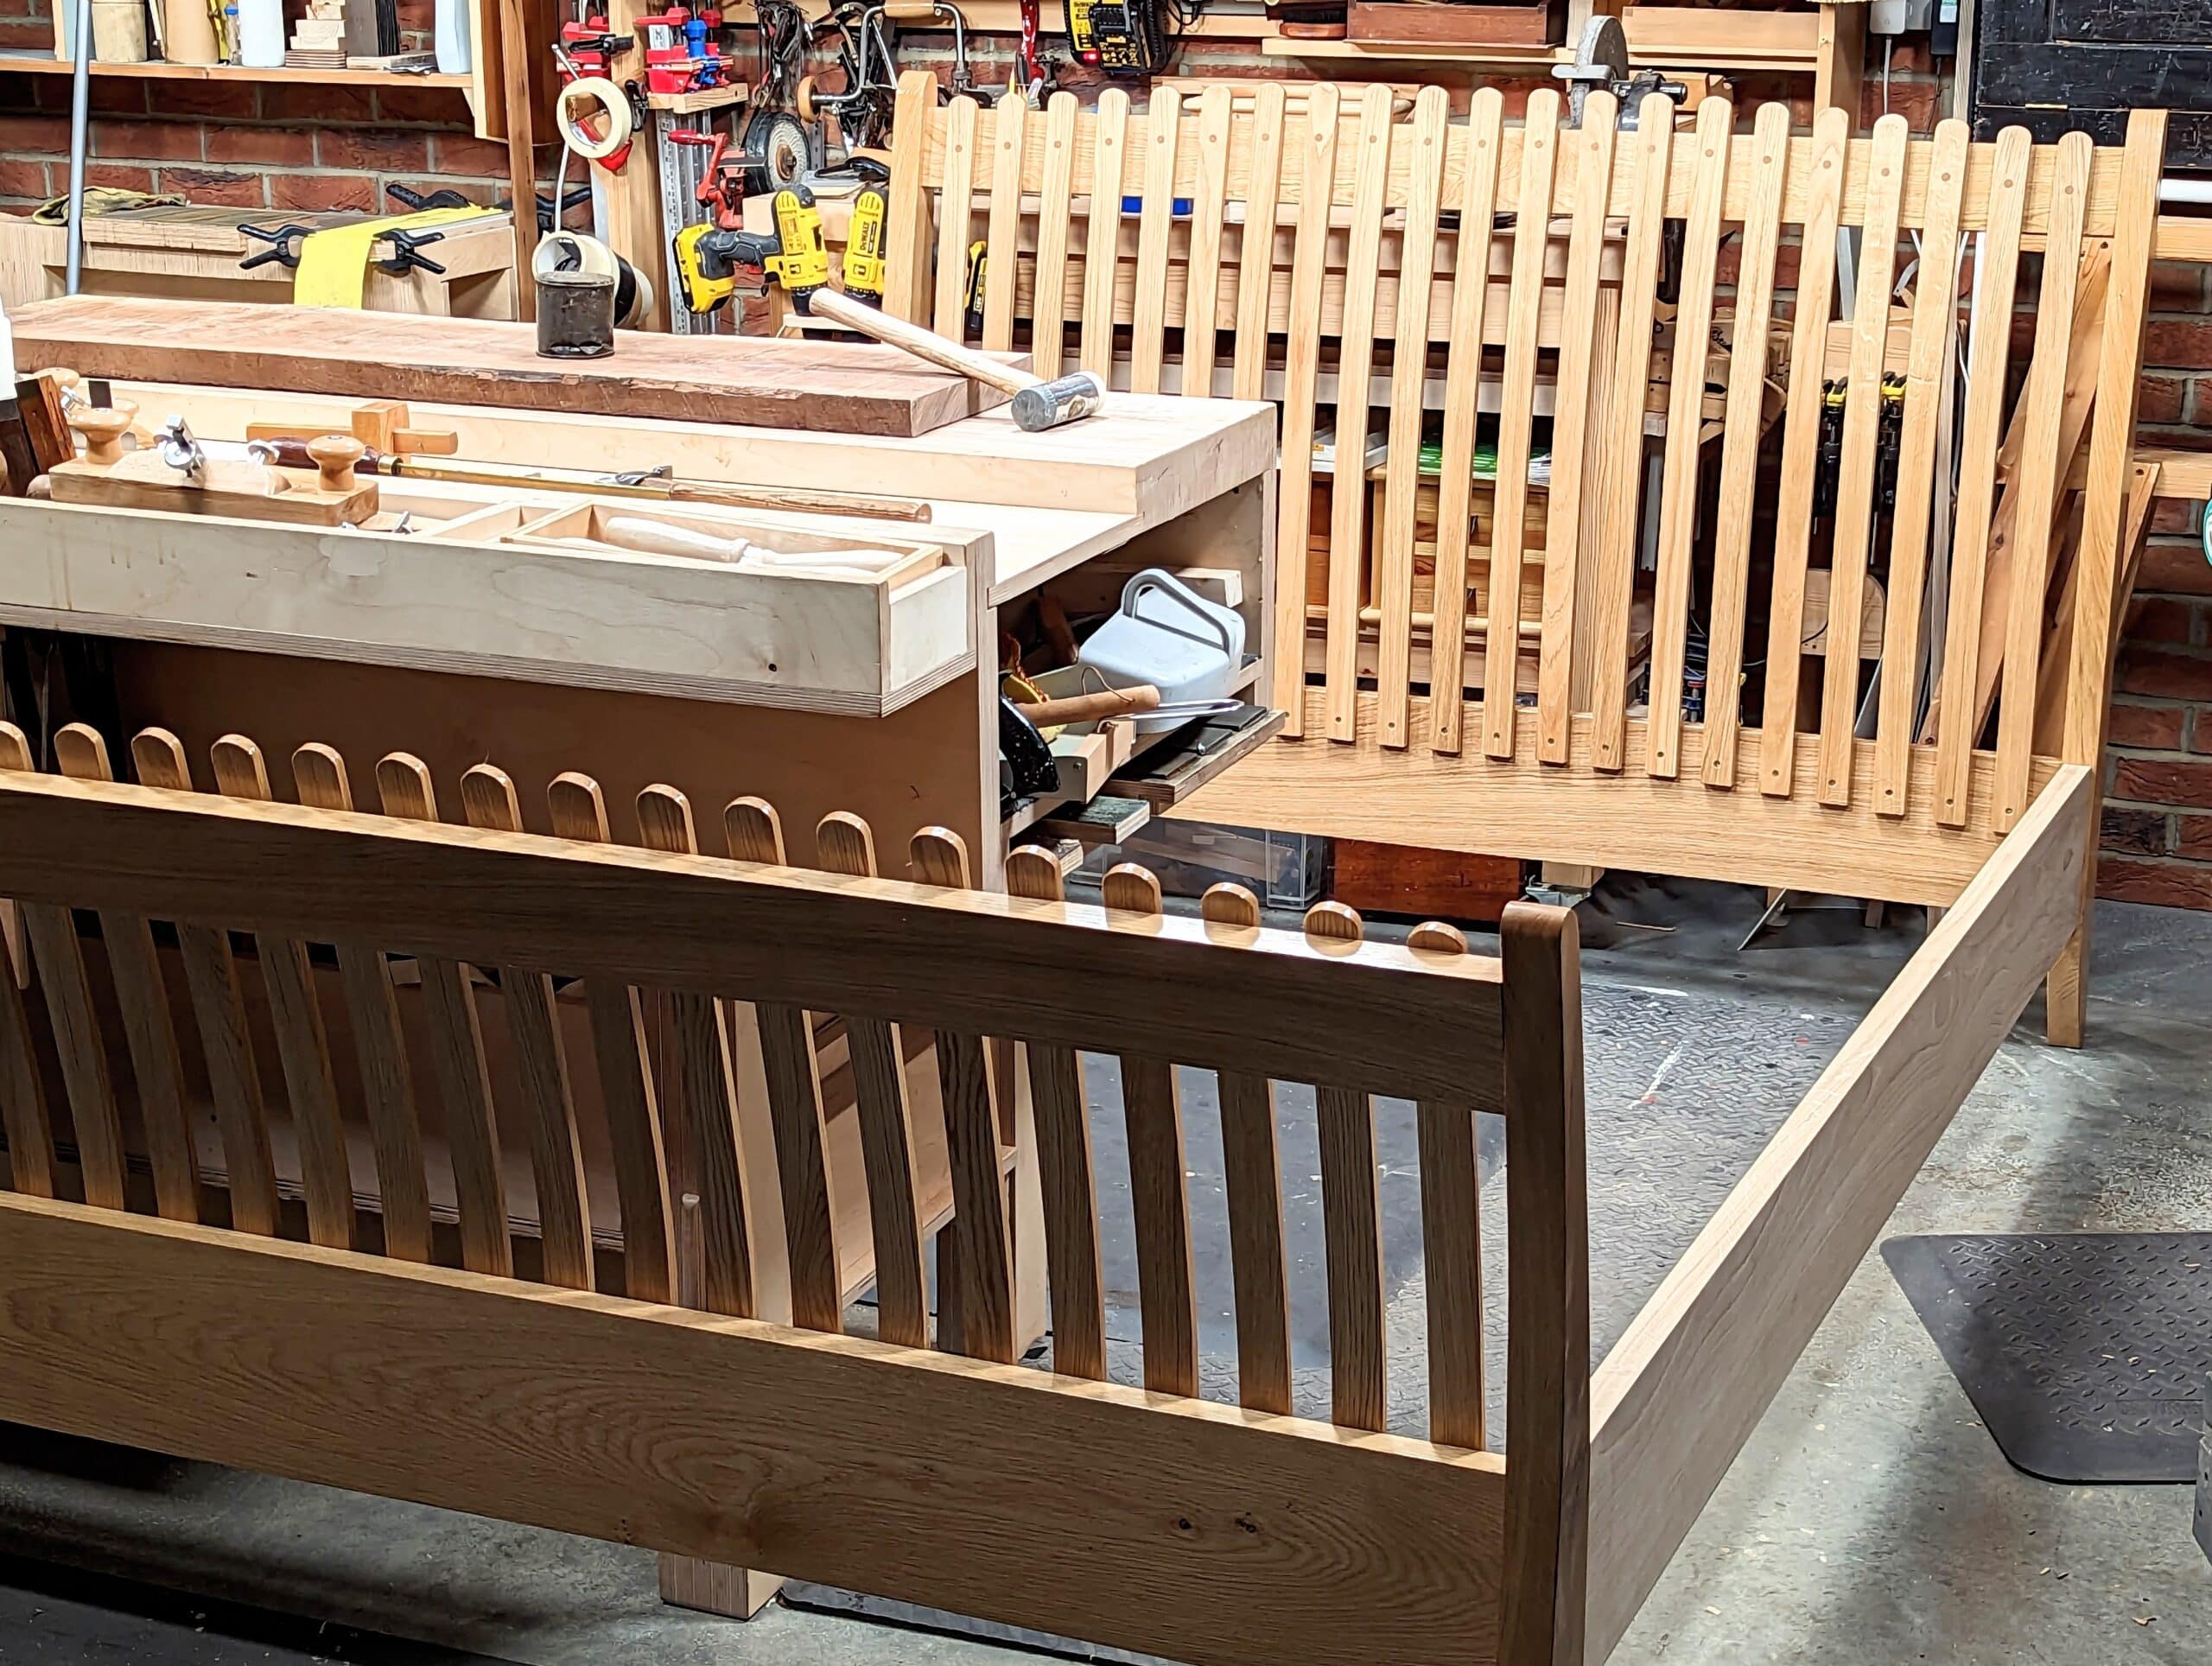
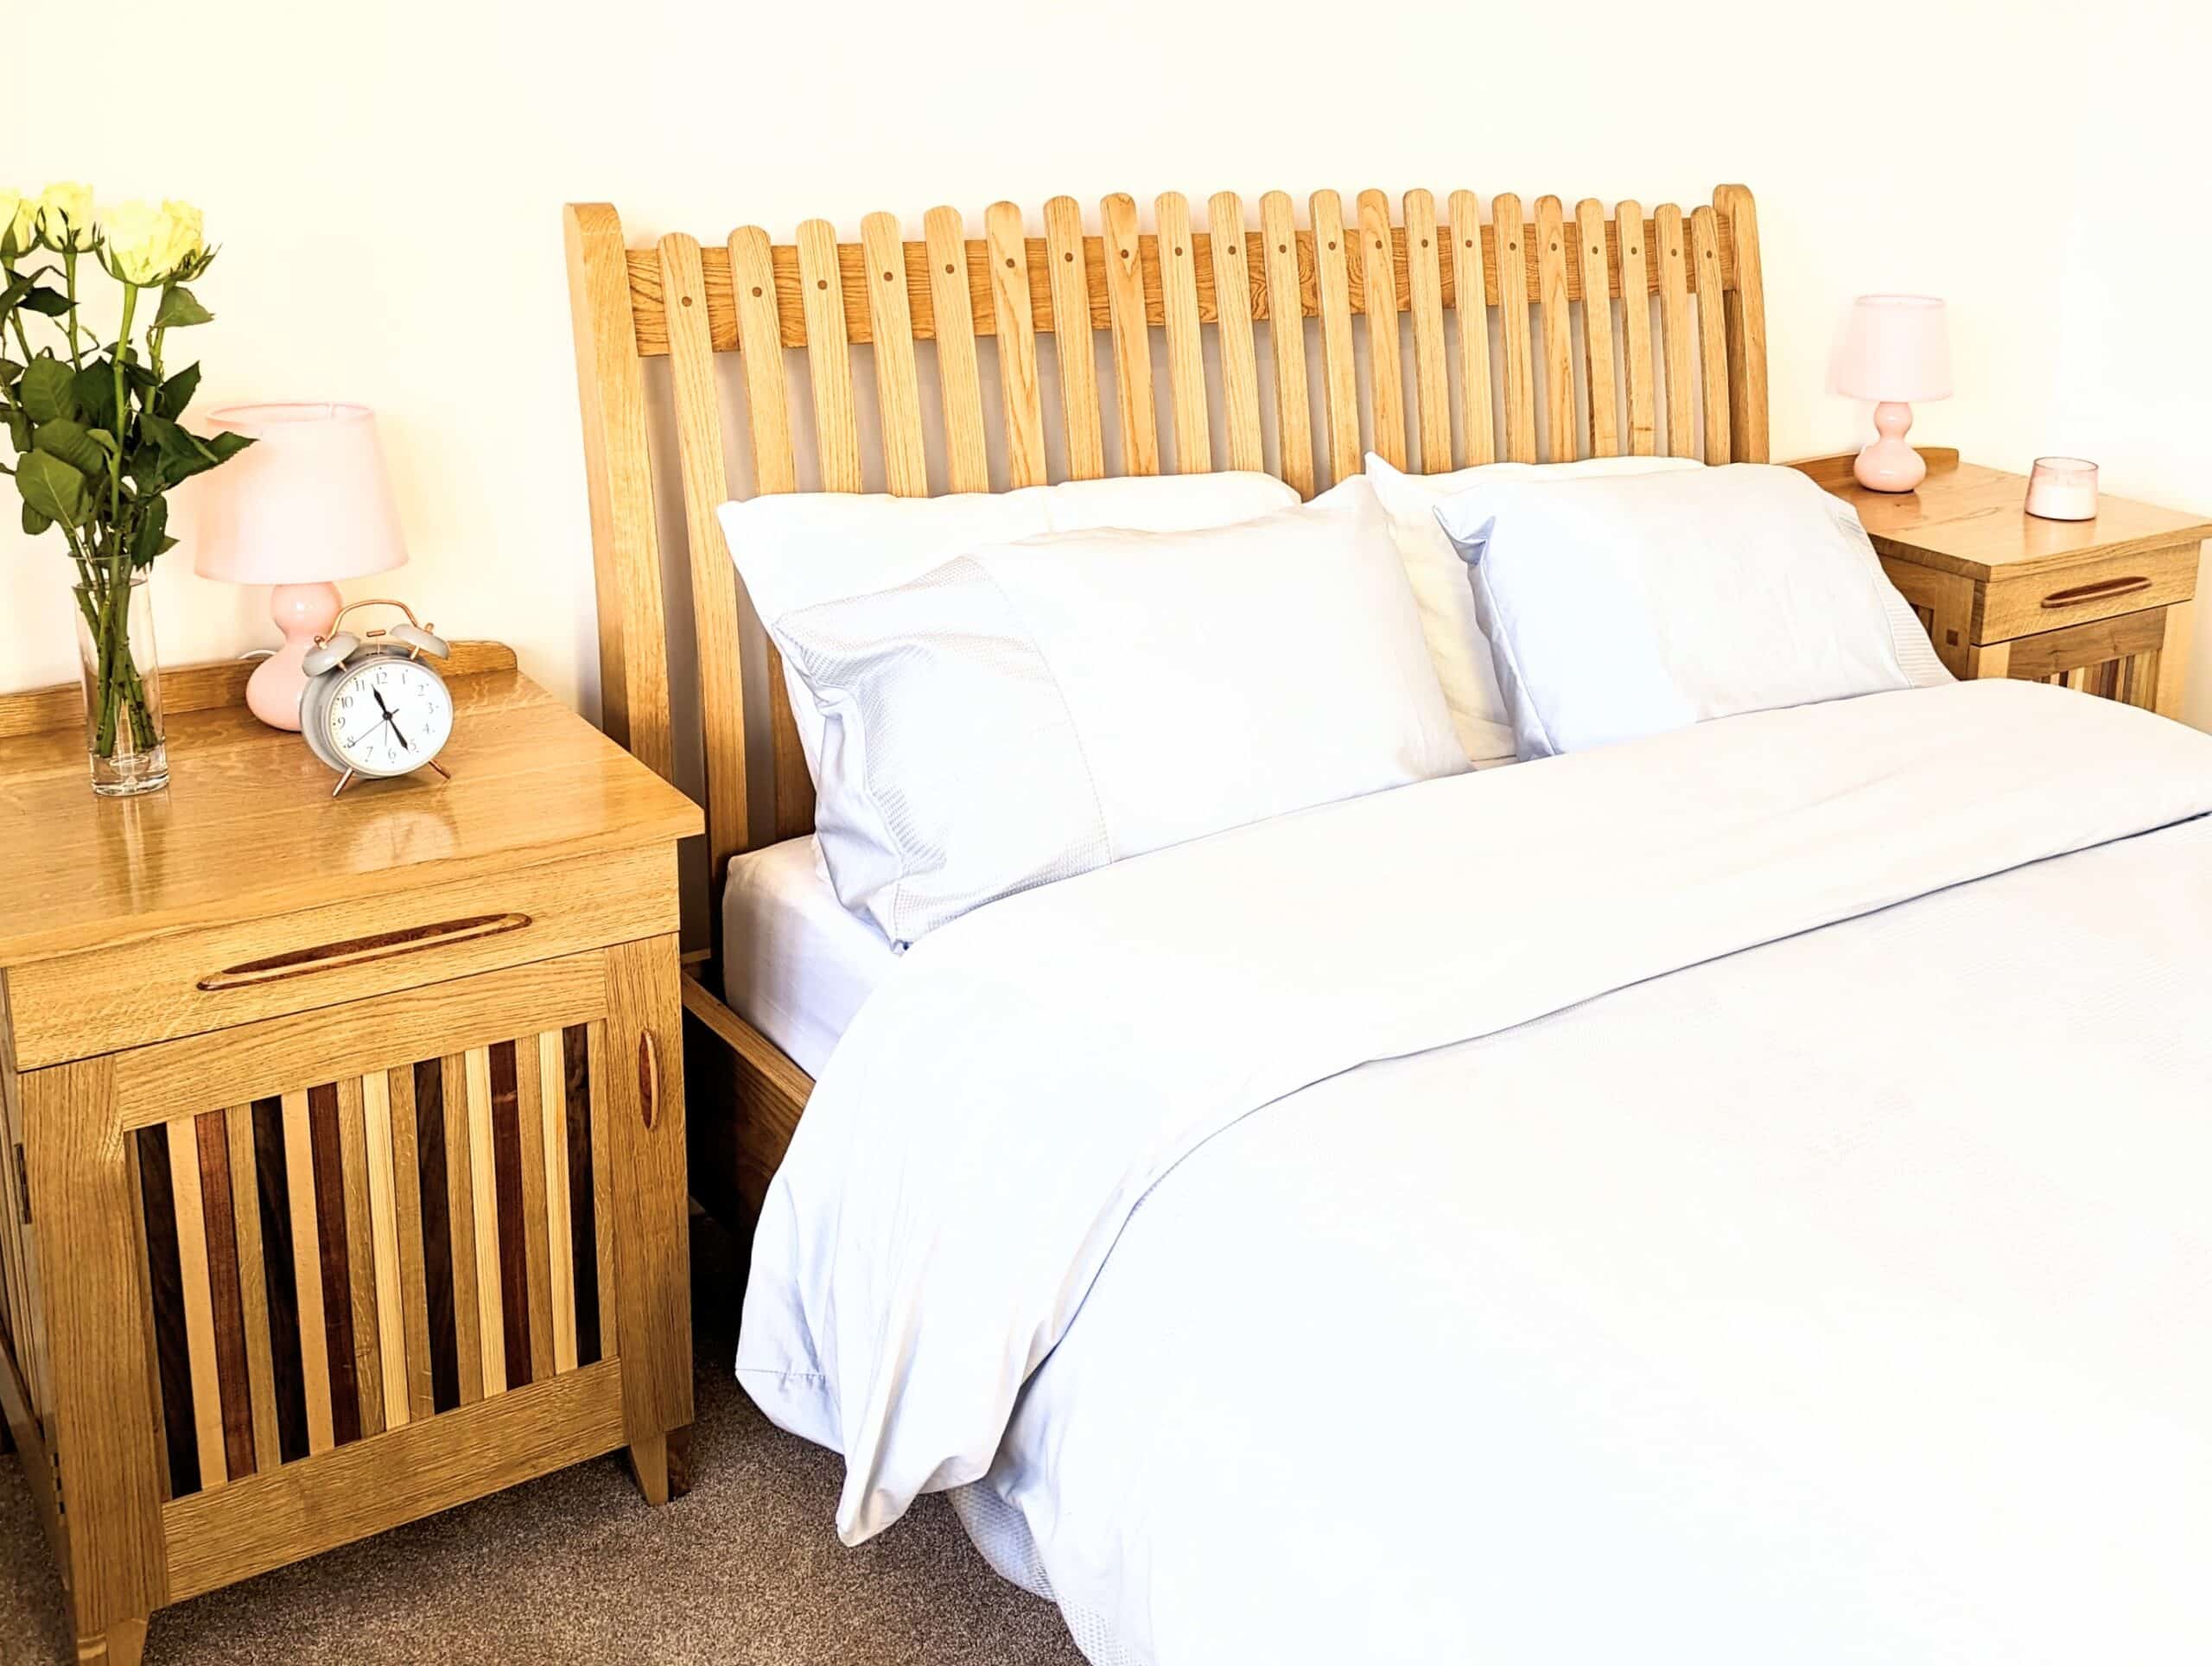
The bent slats are triple-layer laminations and the joinery used throughout is mortise and tenon. For this bed in this size, I would charge at least $3,000 and I never had a bed that didn’t sell for a price in this range. Also, it is good to remember that a twin (single) bed takes the same amount of time to make as a king so you have to be careful when pricing for children’s rooms. This bed is not at all complicated to make and much of the work is repetitive. It’s important to establish the main locus first as commonly this establishes the space available and the location possibilities of subsequent pieces like chests of drawers, bedside cabinets, wardrobes and so on.
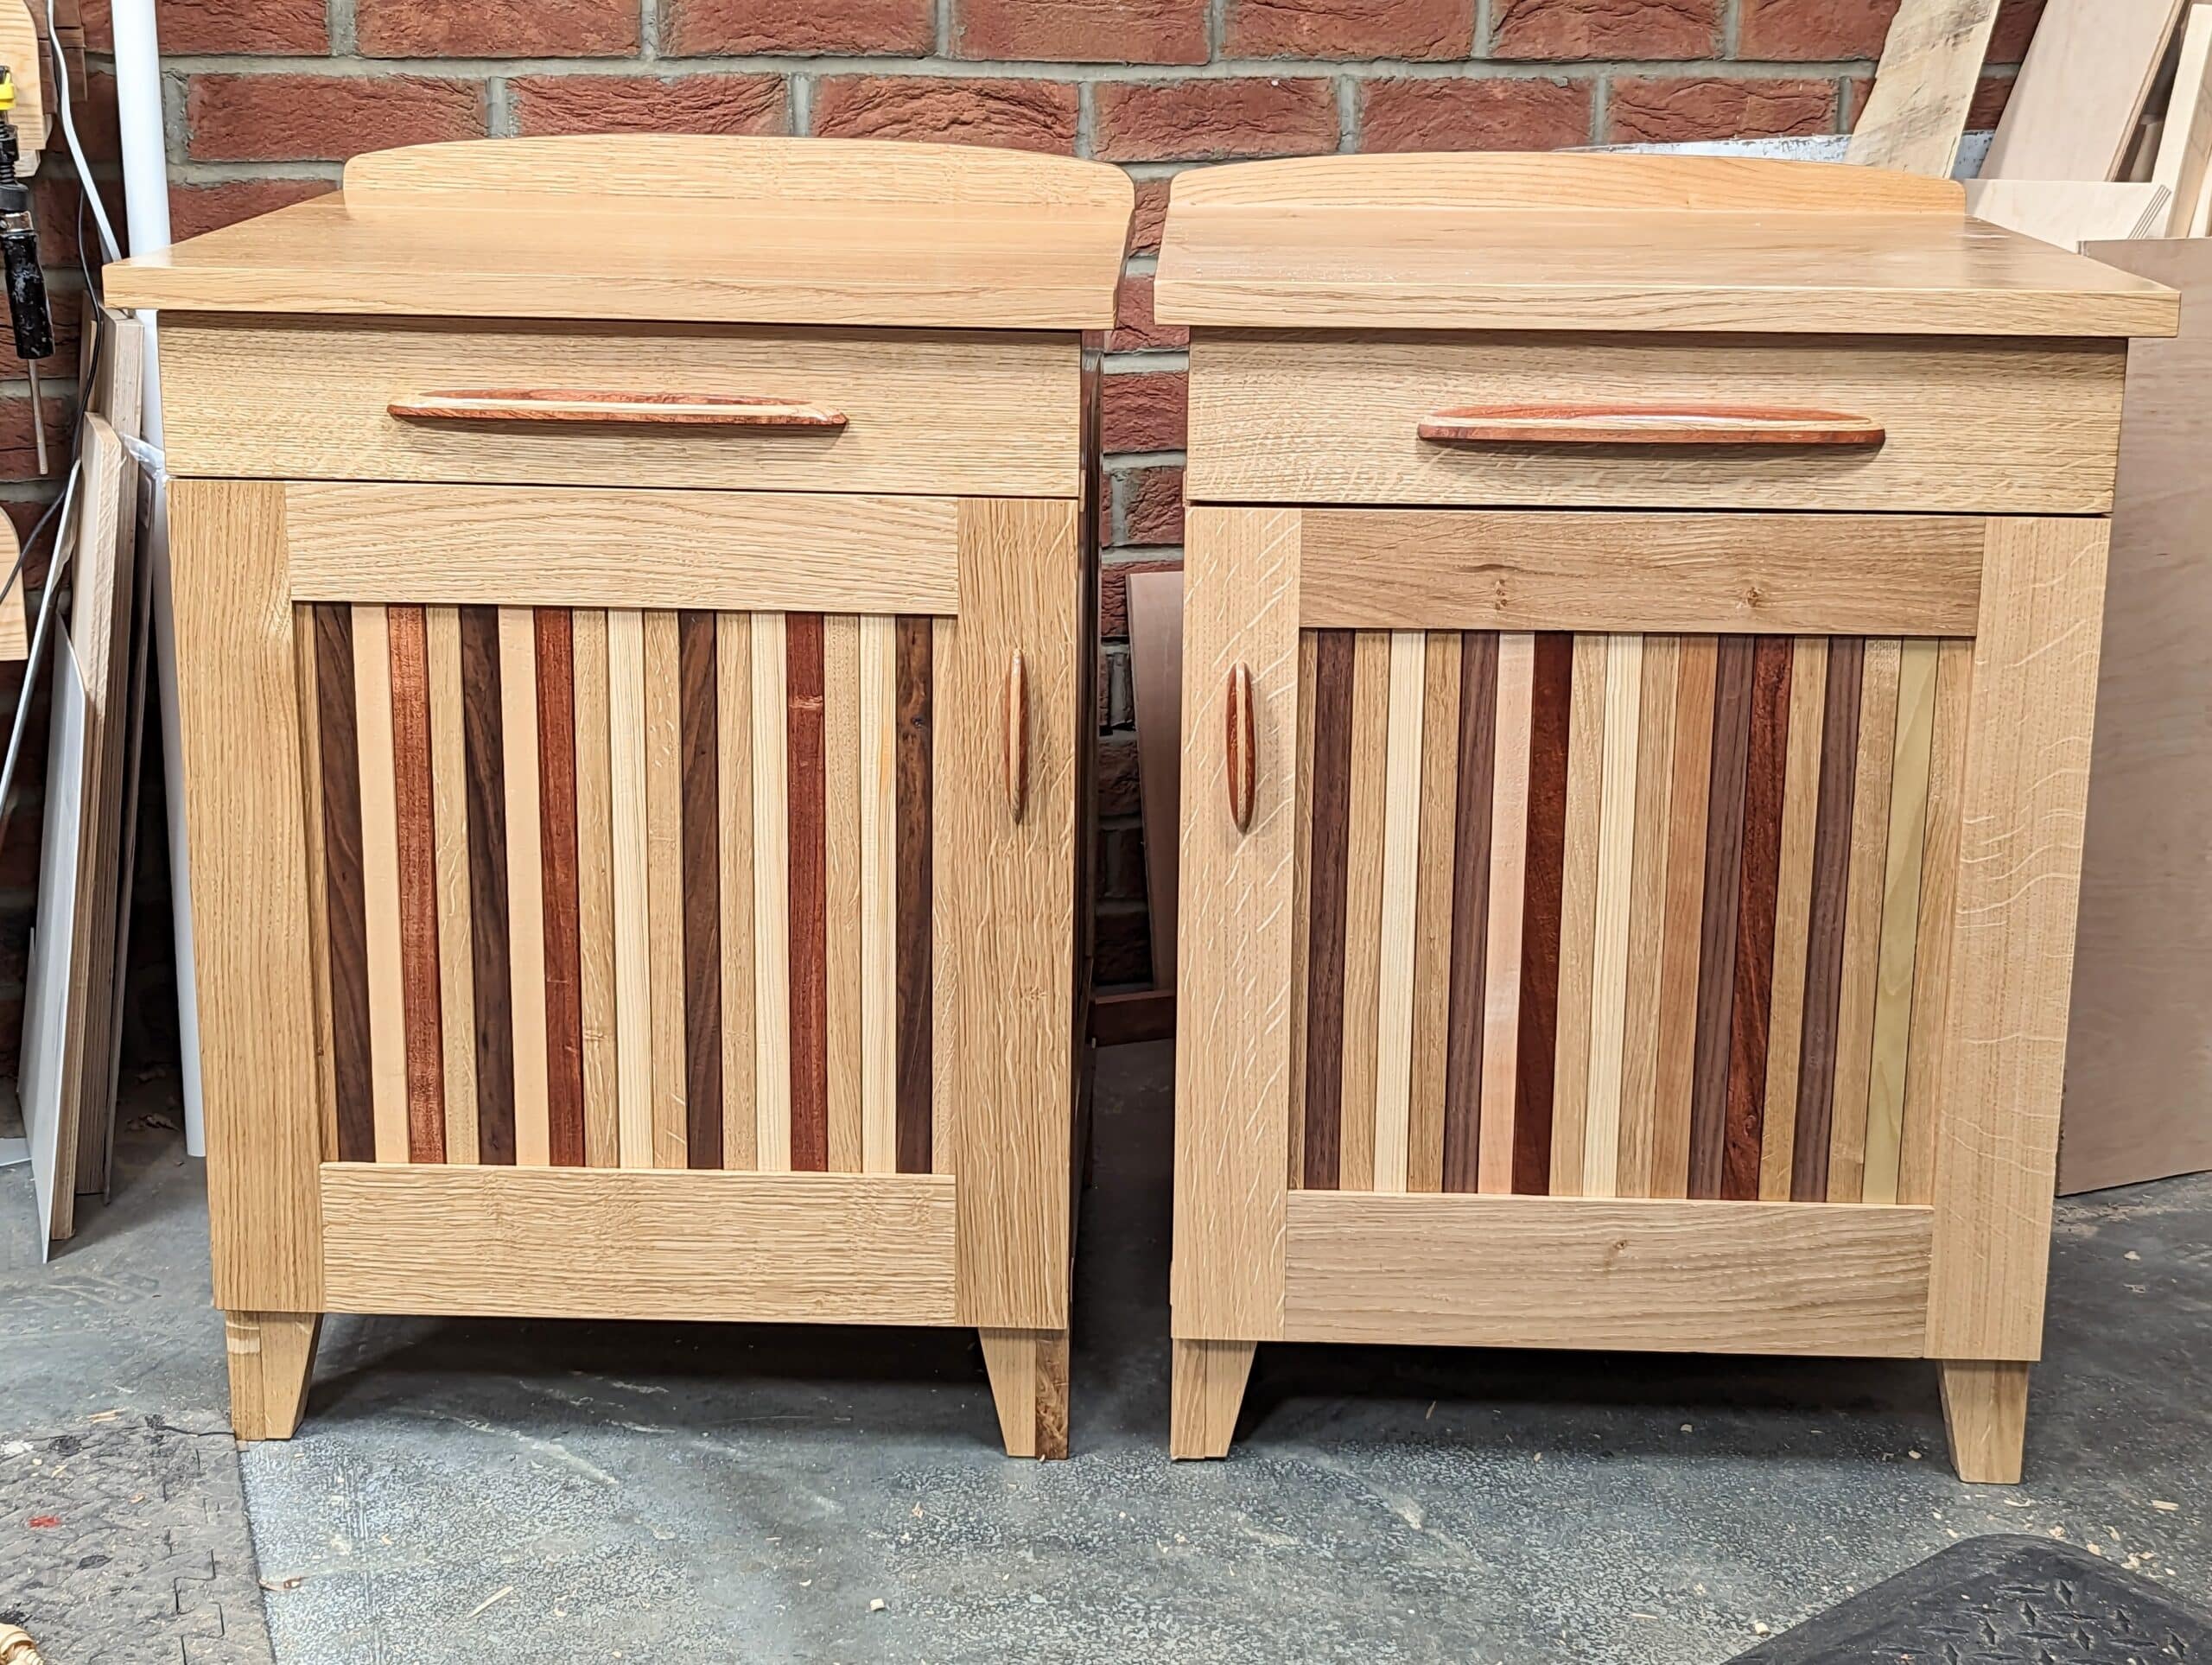
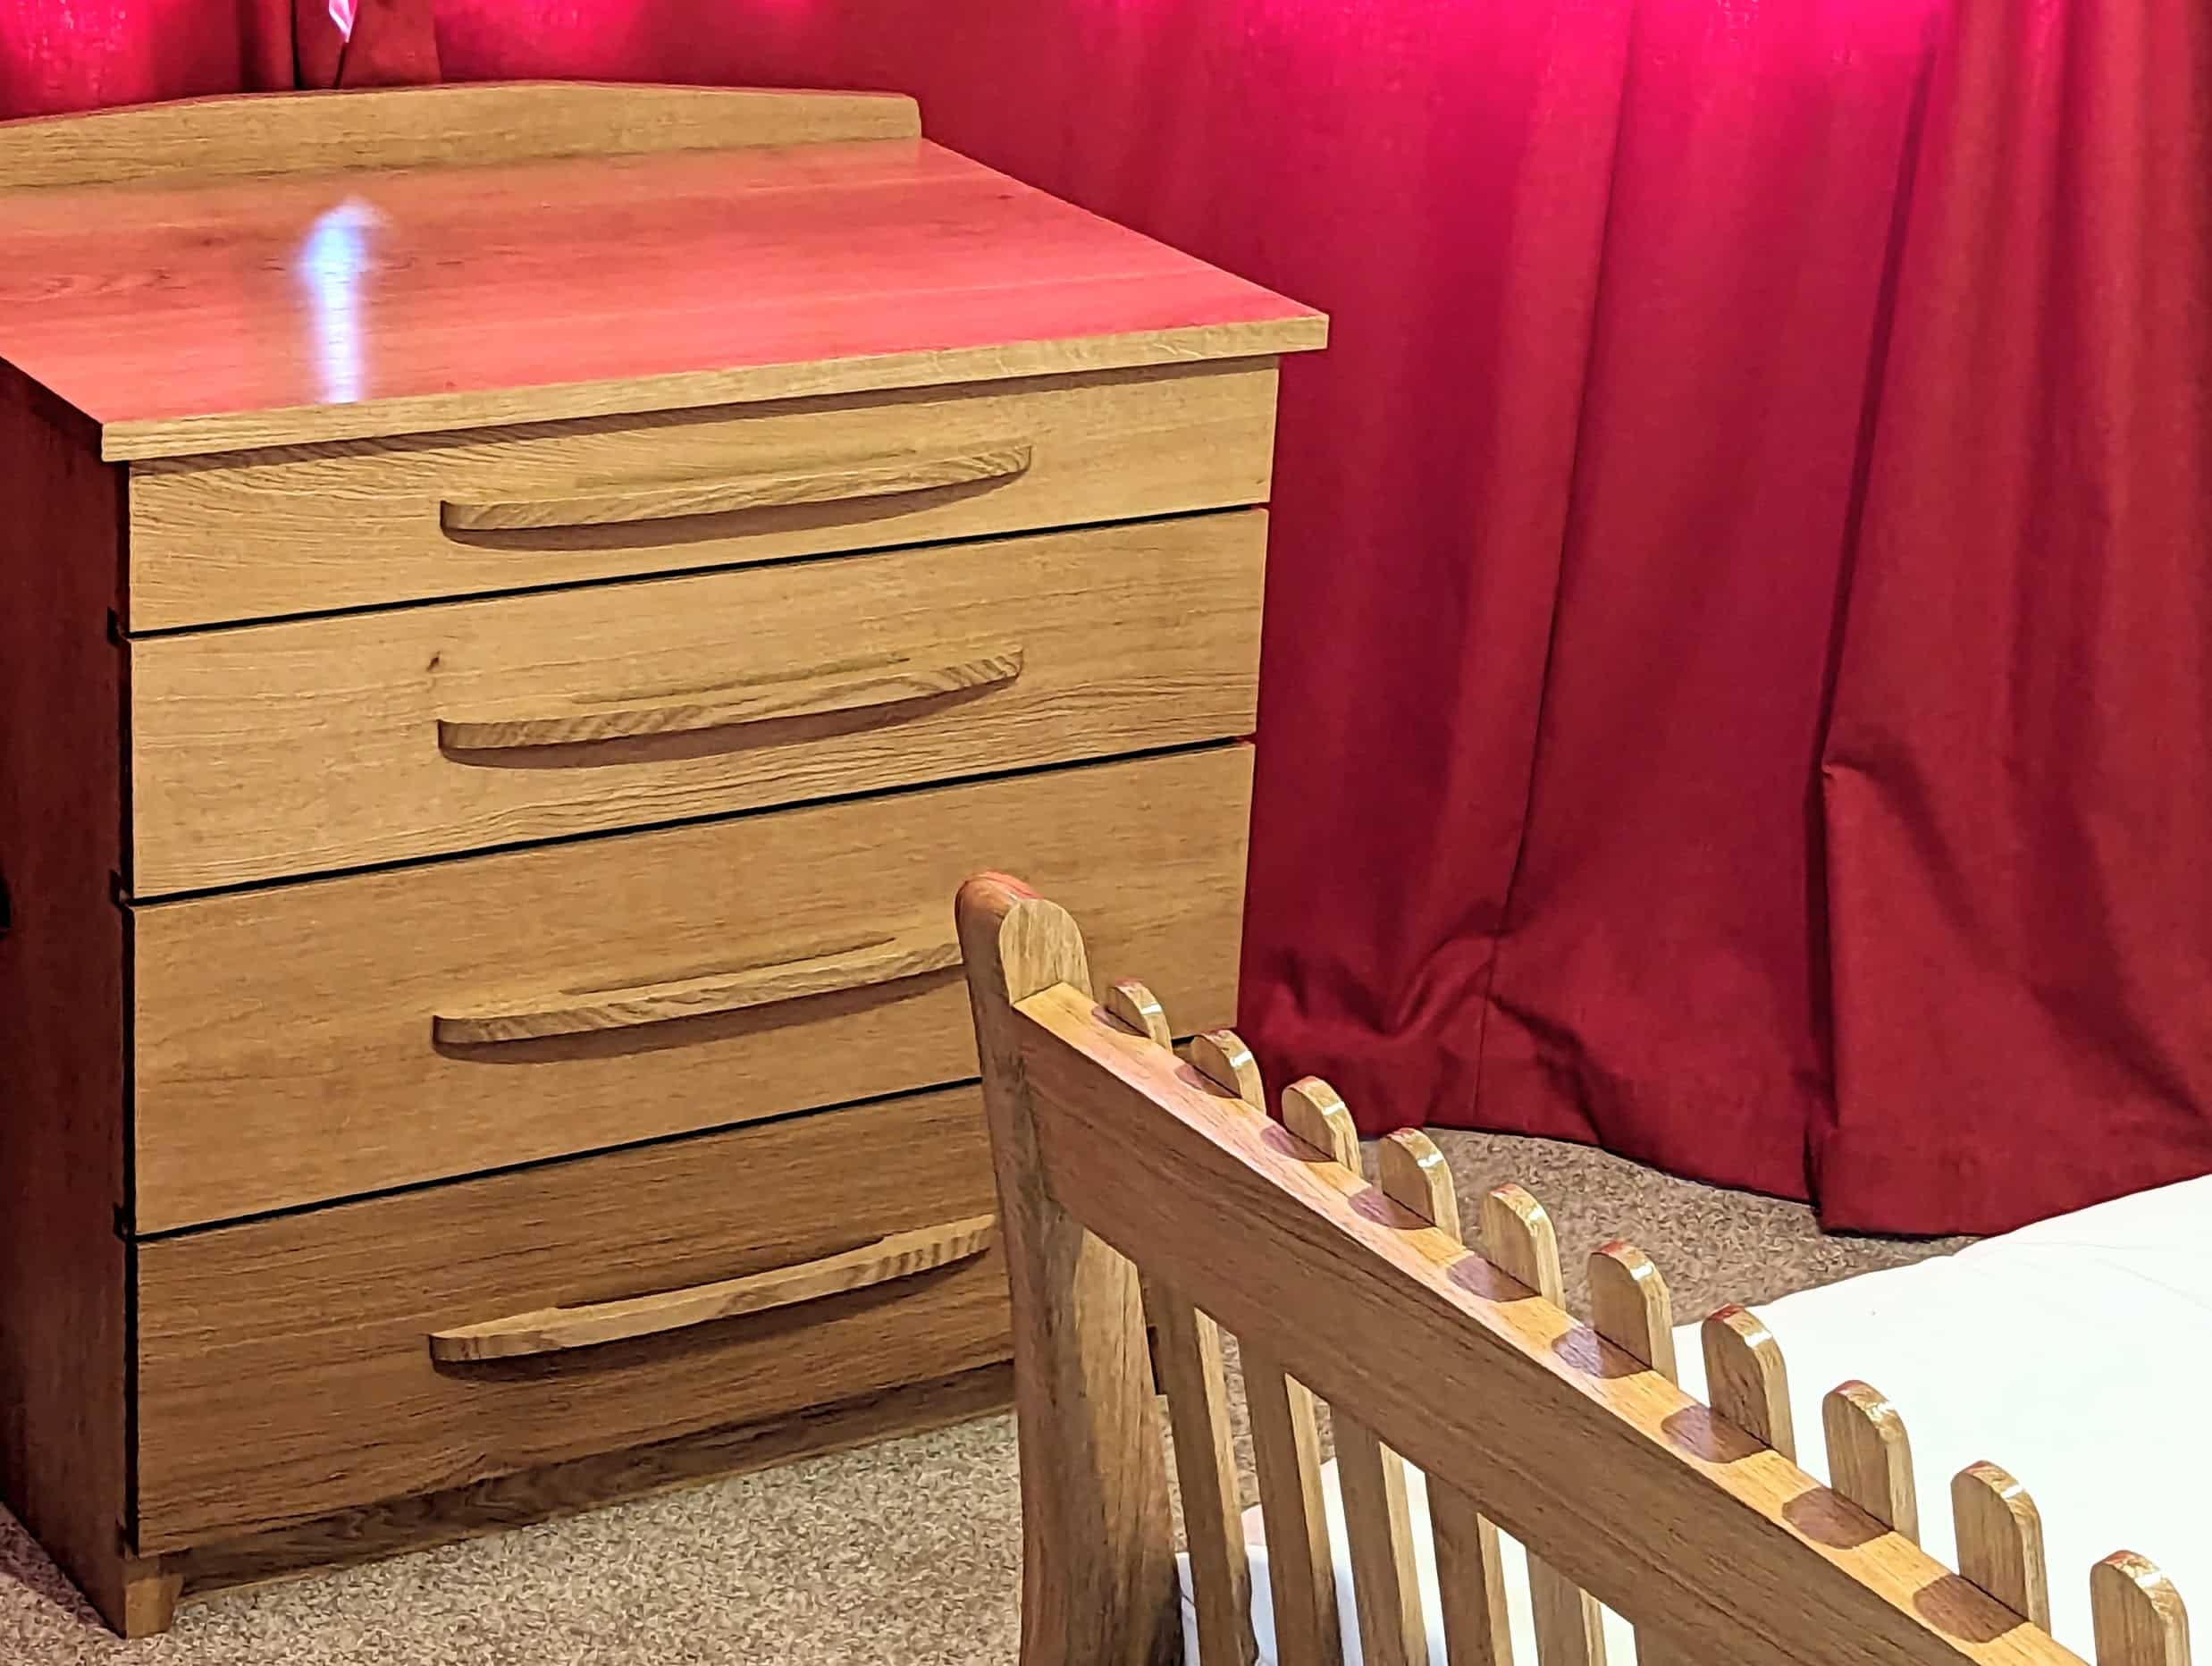
I moved straightway onto the bedside cabinets. Making two meant the first one could be my prototype. I loved the stripy look of the tambour panelling I did for the living room TV stand which had lots of strips of mixed woods gathered over the previous weeks. These made the side panels and the door fronts. Yes, it’s different but I felt quite lovely. Then too I focussed on different handles shaped again from scraps.
The pista resistance came when I put a screw through the middle of the dovetails so I could keep working on the pieces. the screw of course would never be seen. For some reason, this drew 4.8 million views on my Facebook page with 2,000 comments and 12,000 likes. These two pieces would come out at about $2,000 each so $4,000 for 12 days work. The design itself is worth an additional $1,000 but I’ll leave that out.
The solid feel of the finished cabinets was truly rewarding. It’s important to note here that none of the pieces made using this panel-type construction has caused any issues anywhere and I will continue using it in my work in the future.
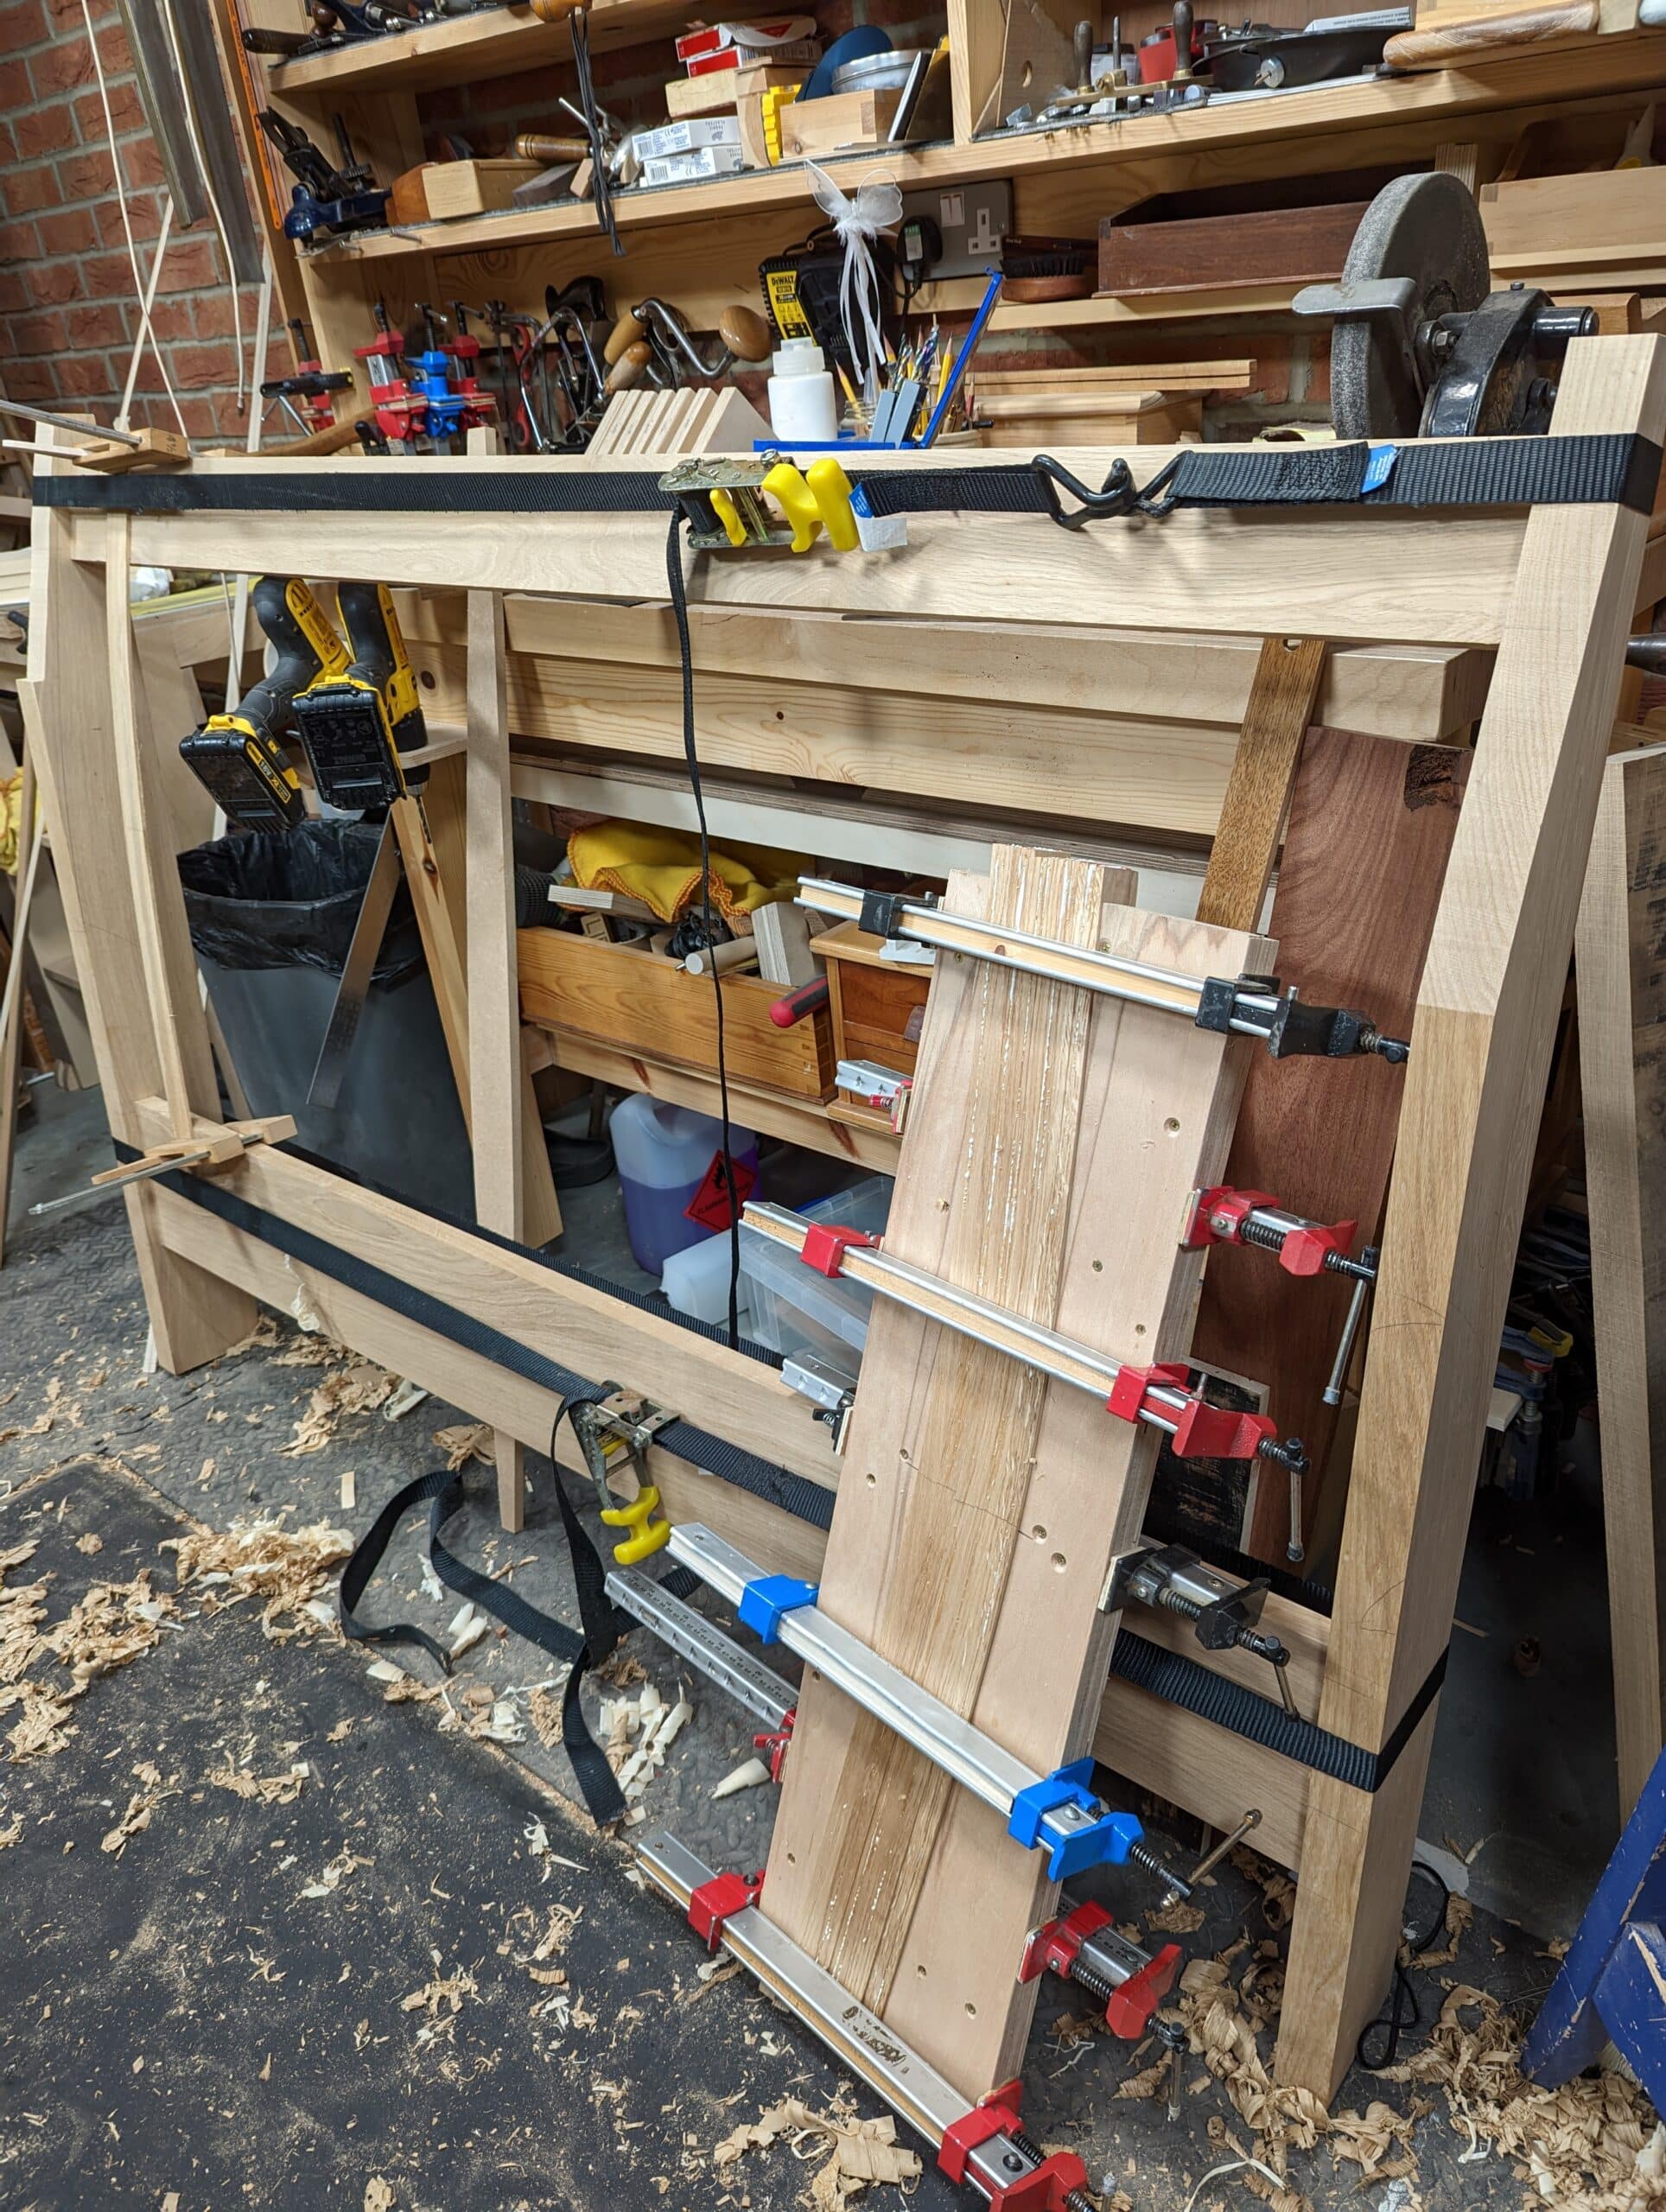
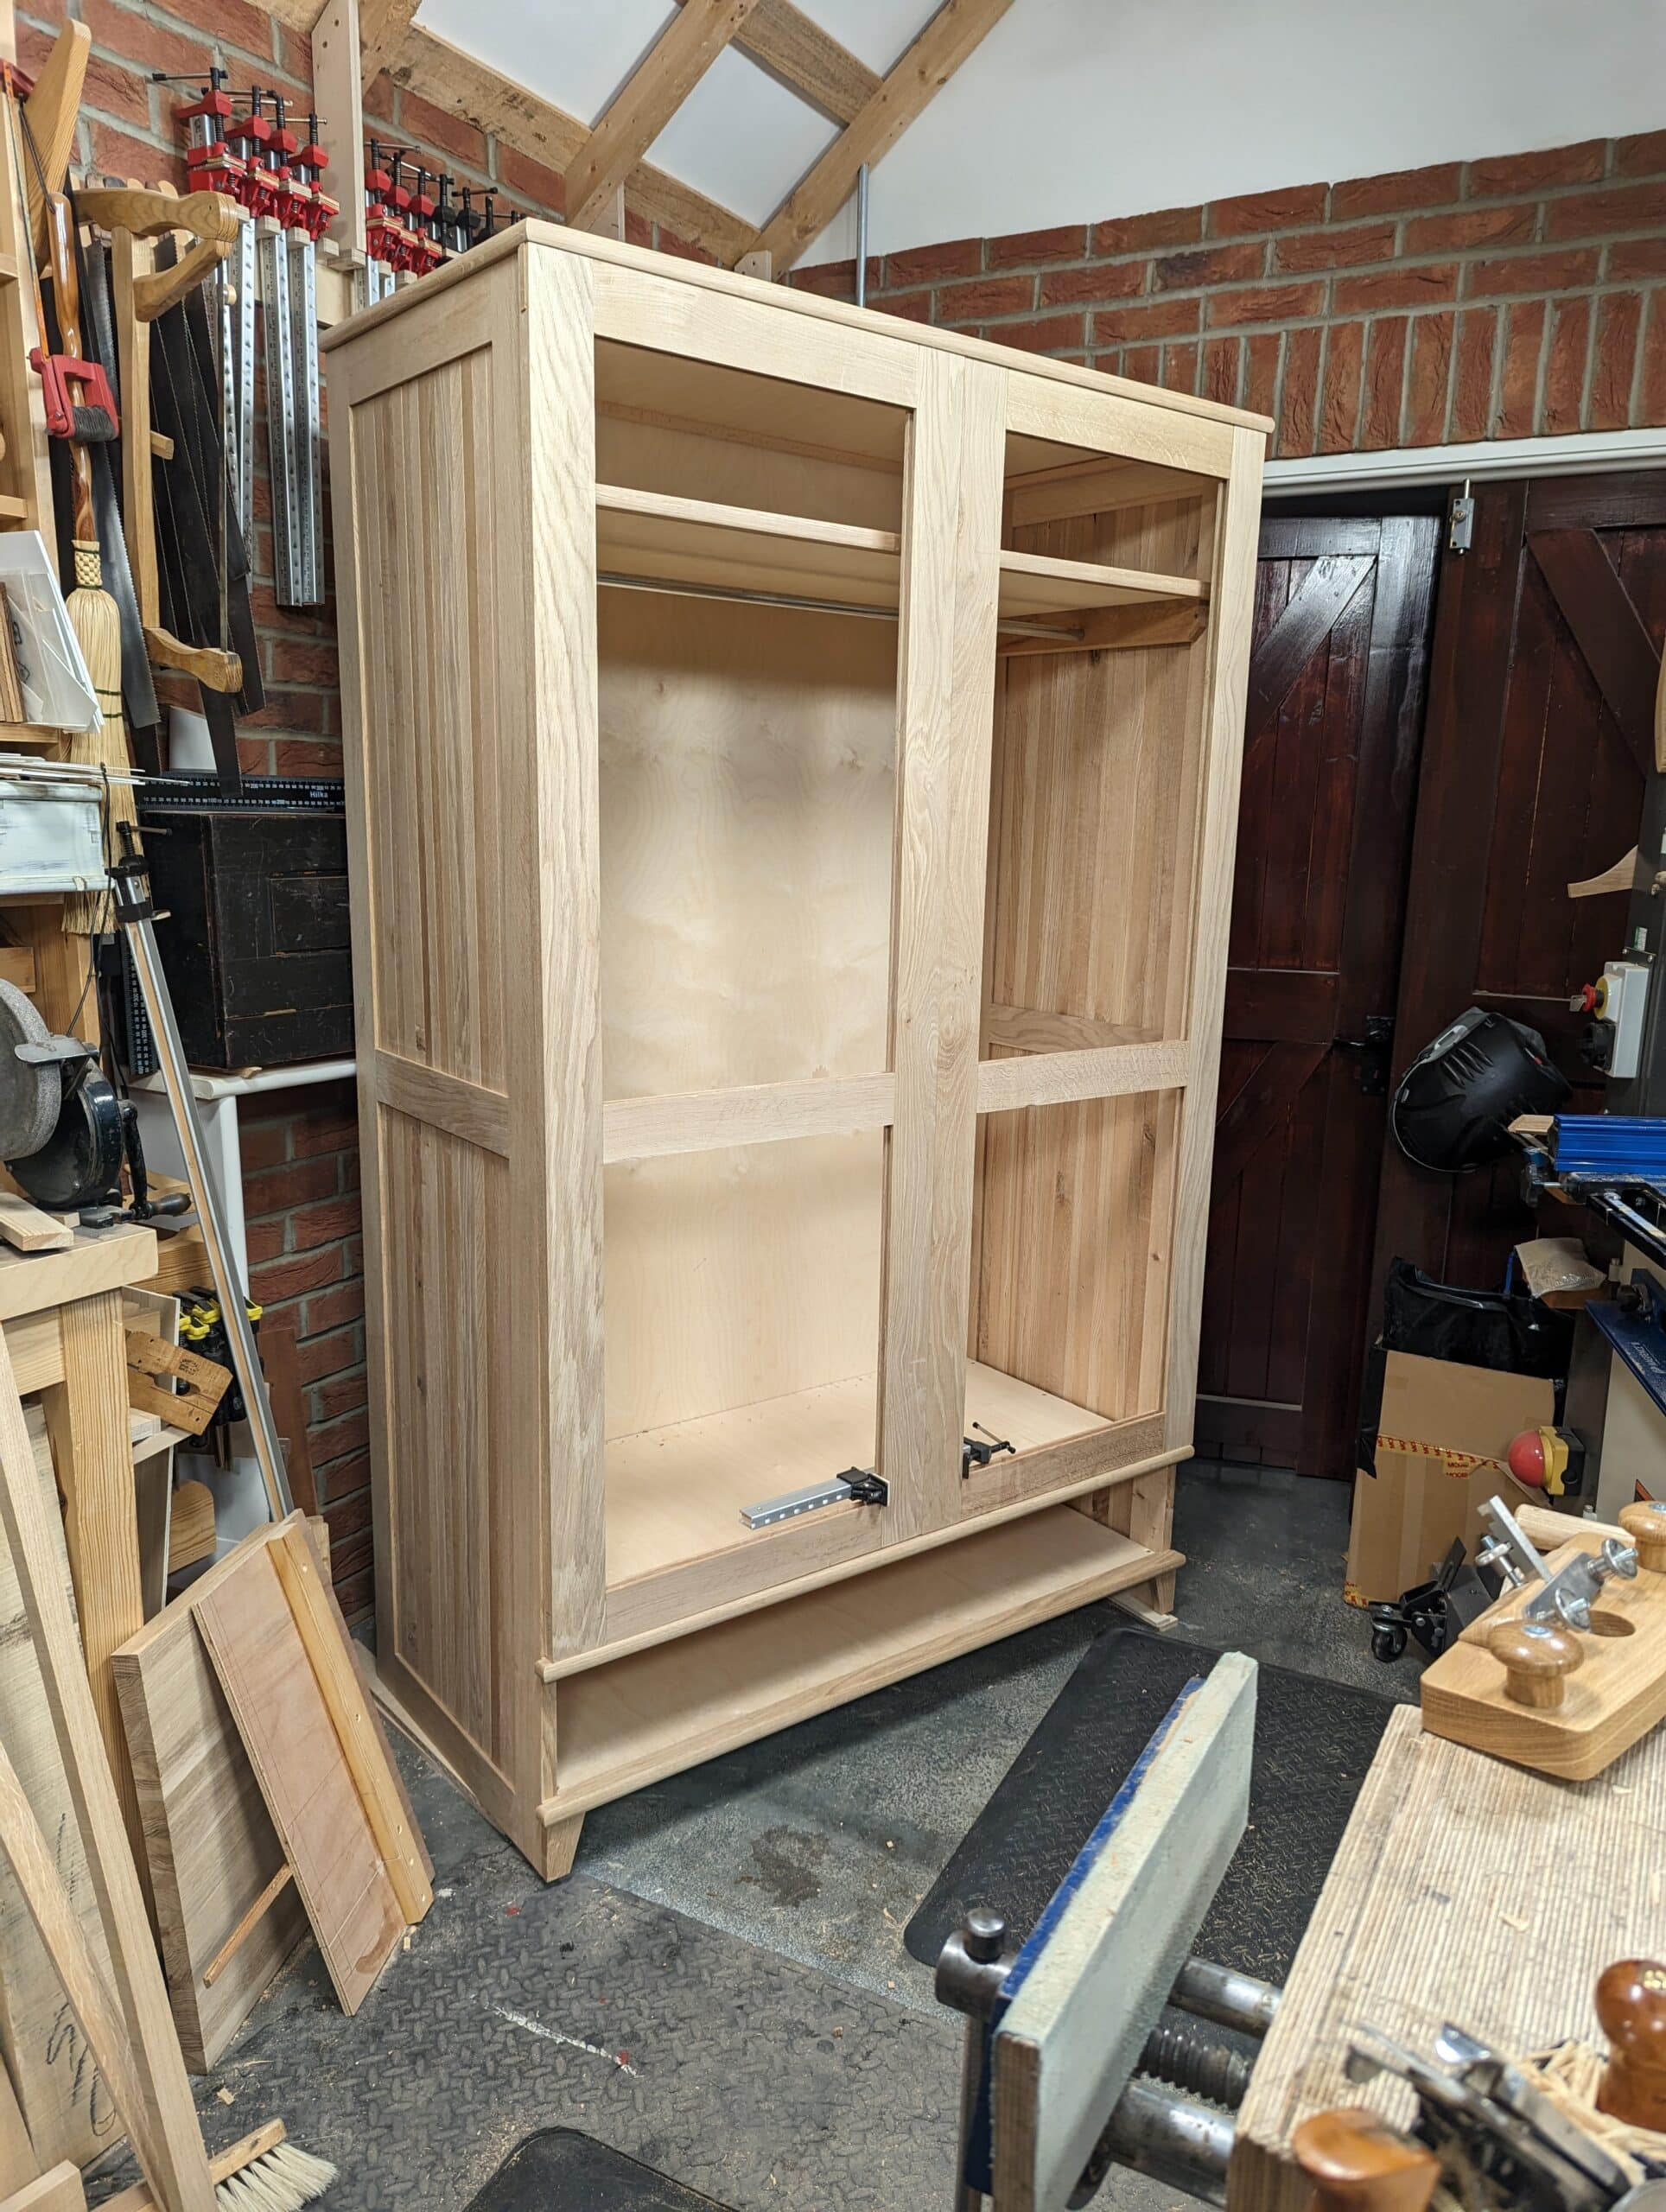
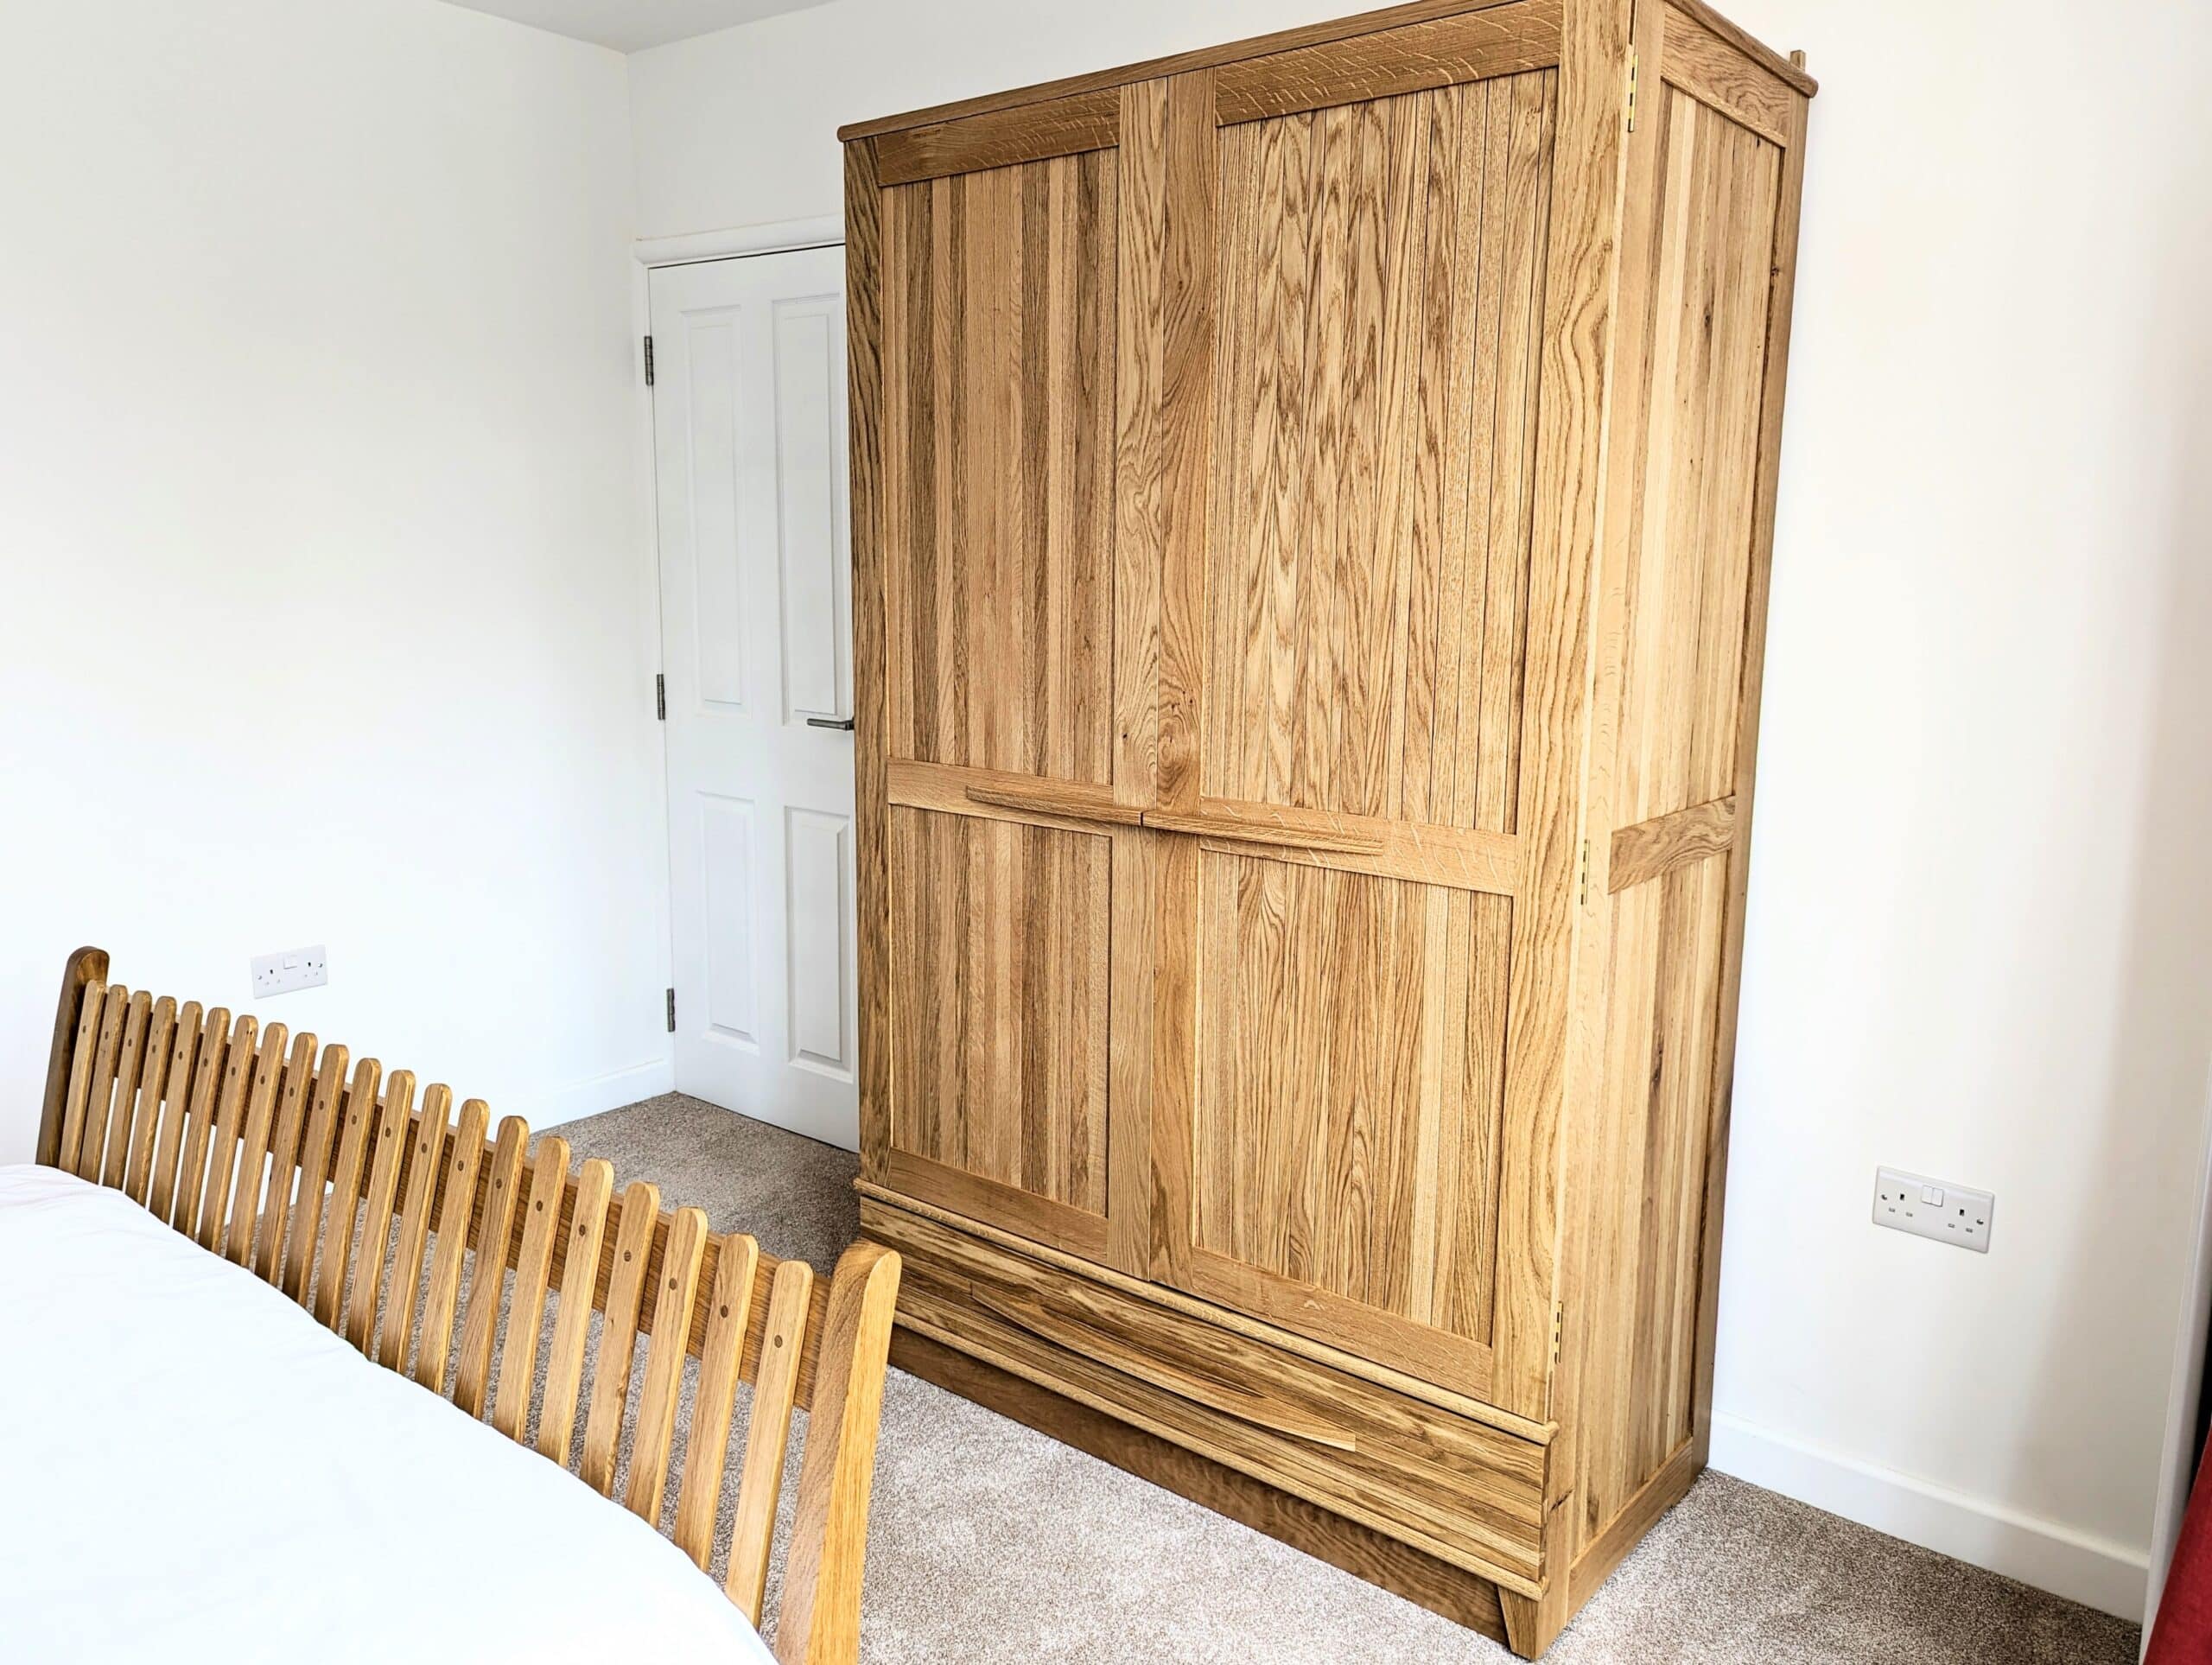
The greater challenge for the bedroom was the wardrobe. The dogleg staircase meant I could no way build the whole as a single piece item. It would need to be a flat pack. Basically, I decided on eight panels of different types including framed doors and side panels and then plywood panels lipped in oak. It worked brilliantly. I took it from the garage workshop into the house and up the stairs, around the bends and into the bedroom no problem. Adopting the tambour look yet again really worked for me. I ripped any strips left over from various makes into strips of random widths up to 1 1/4″ wide and from 3/4″ and jointed and edge-glued them into the frame as panels. It worked and gave the piece the dynamic I wanted. The wardrobe is three weeks’ work really. Fifteen days. Cost? I think $3,000. It might be hard to go much higher.
Chests of drawers have twice as much work as that seen from the outside. the same is true of the work it takes to make them. Allowing a day for each drawer is a luxury but more realistic if you use only hand tools and I would, could never ever use a power router and jig to cheat myself of the wonderful experience I always, ALWAYS, get from making a drawer with hand-cut dovetails to the corners. I doubt that power equipment would give me much gain in terms of speed in the actual dovetailing bit. 20-30 minutes per joint corner by hand is a good speed using my unique method and no one but no one uses this system anywhere in the world.
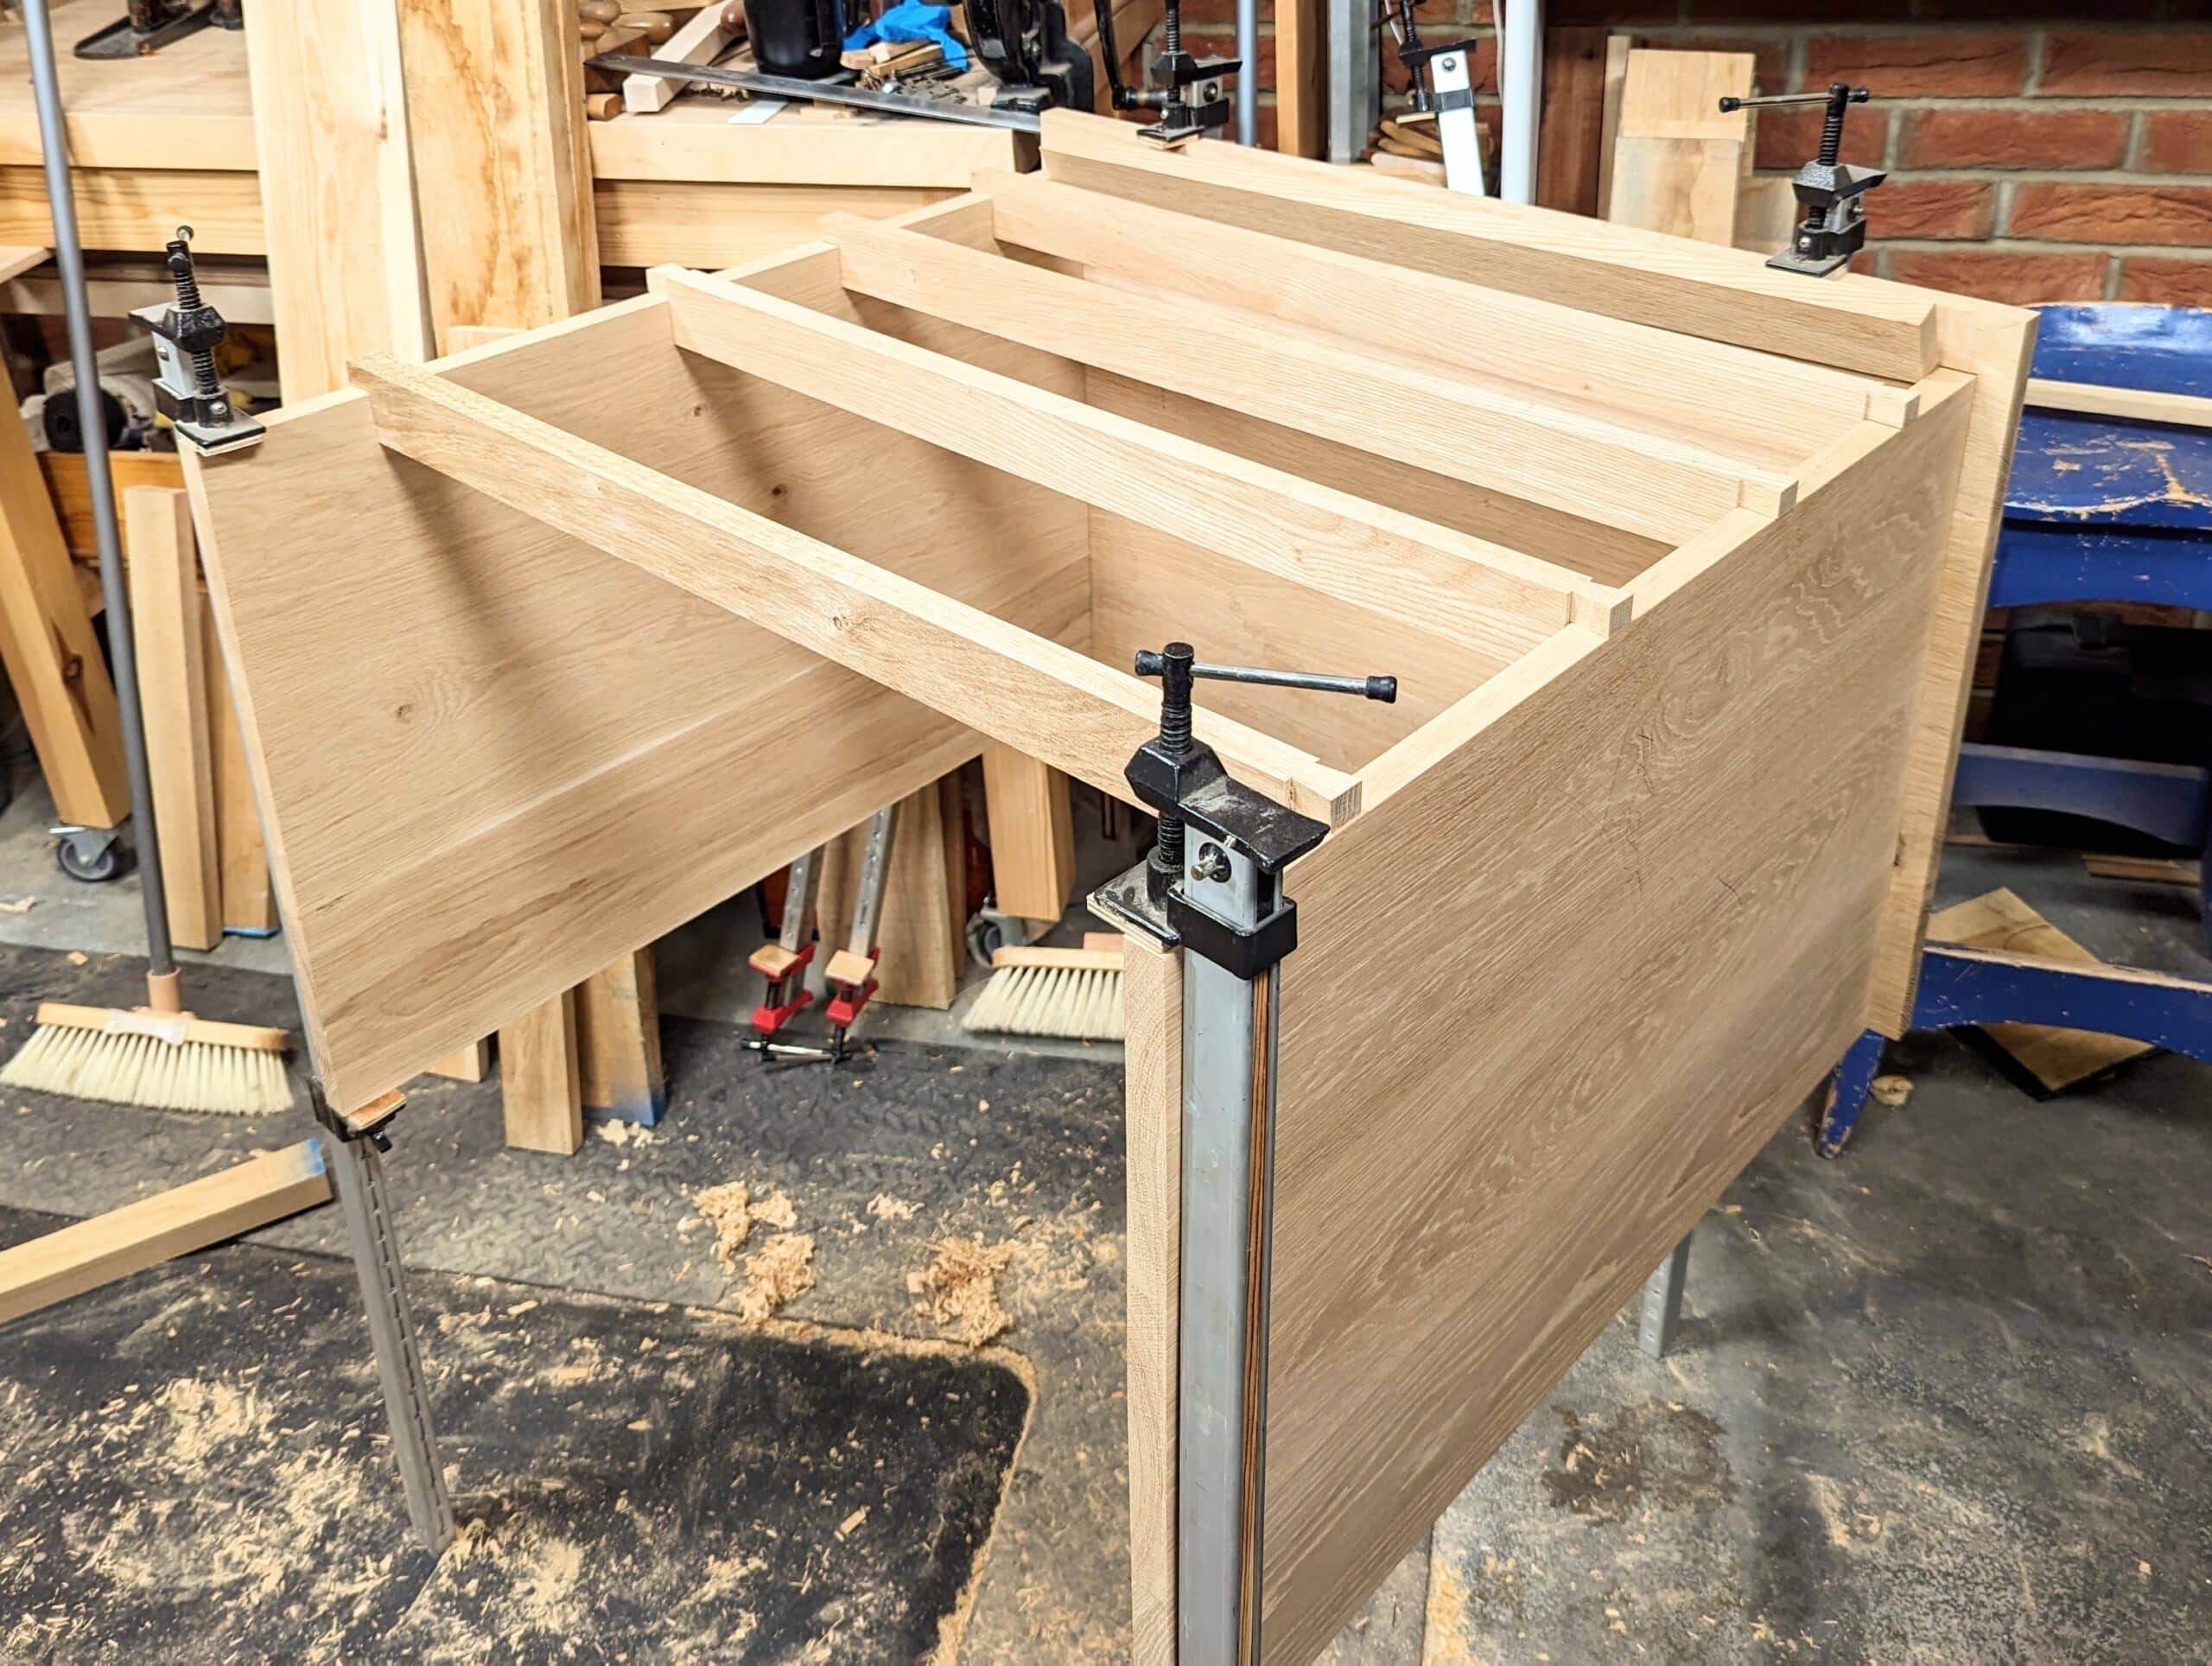
The chest came together remarkably quickly. carcass first and then the drawers in diminishing sizes. Sliding it into place gave me the buzz I always get on delivery and installation. I had made a box-size version in cardboard to check for positioning and worked to that end in the overall sizing. It was a simple piece to make. Two days for the carcass, four days of drawer making and fitting and two more fine-tuning and applying finish. Eight days in all. $2,000 is a fair price for a robustly mad lifetime heirloom piece like this.
All of the large components fit the size and shape of the room. They can all be moved to any one of the three available walls so I achieved the ability for change in years to come if ever desired. This was an important ingredient.
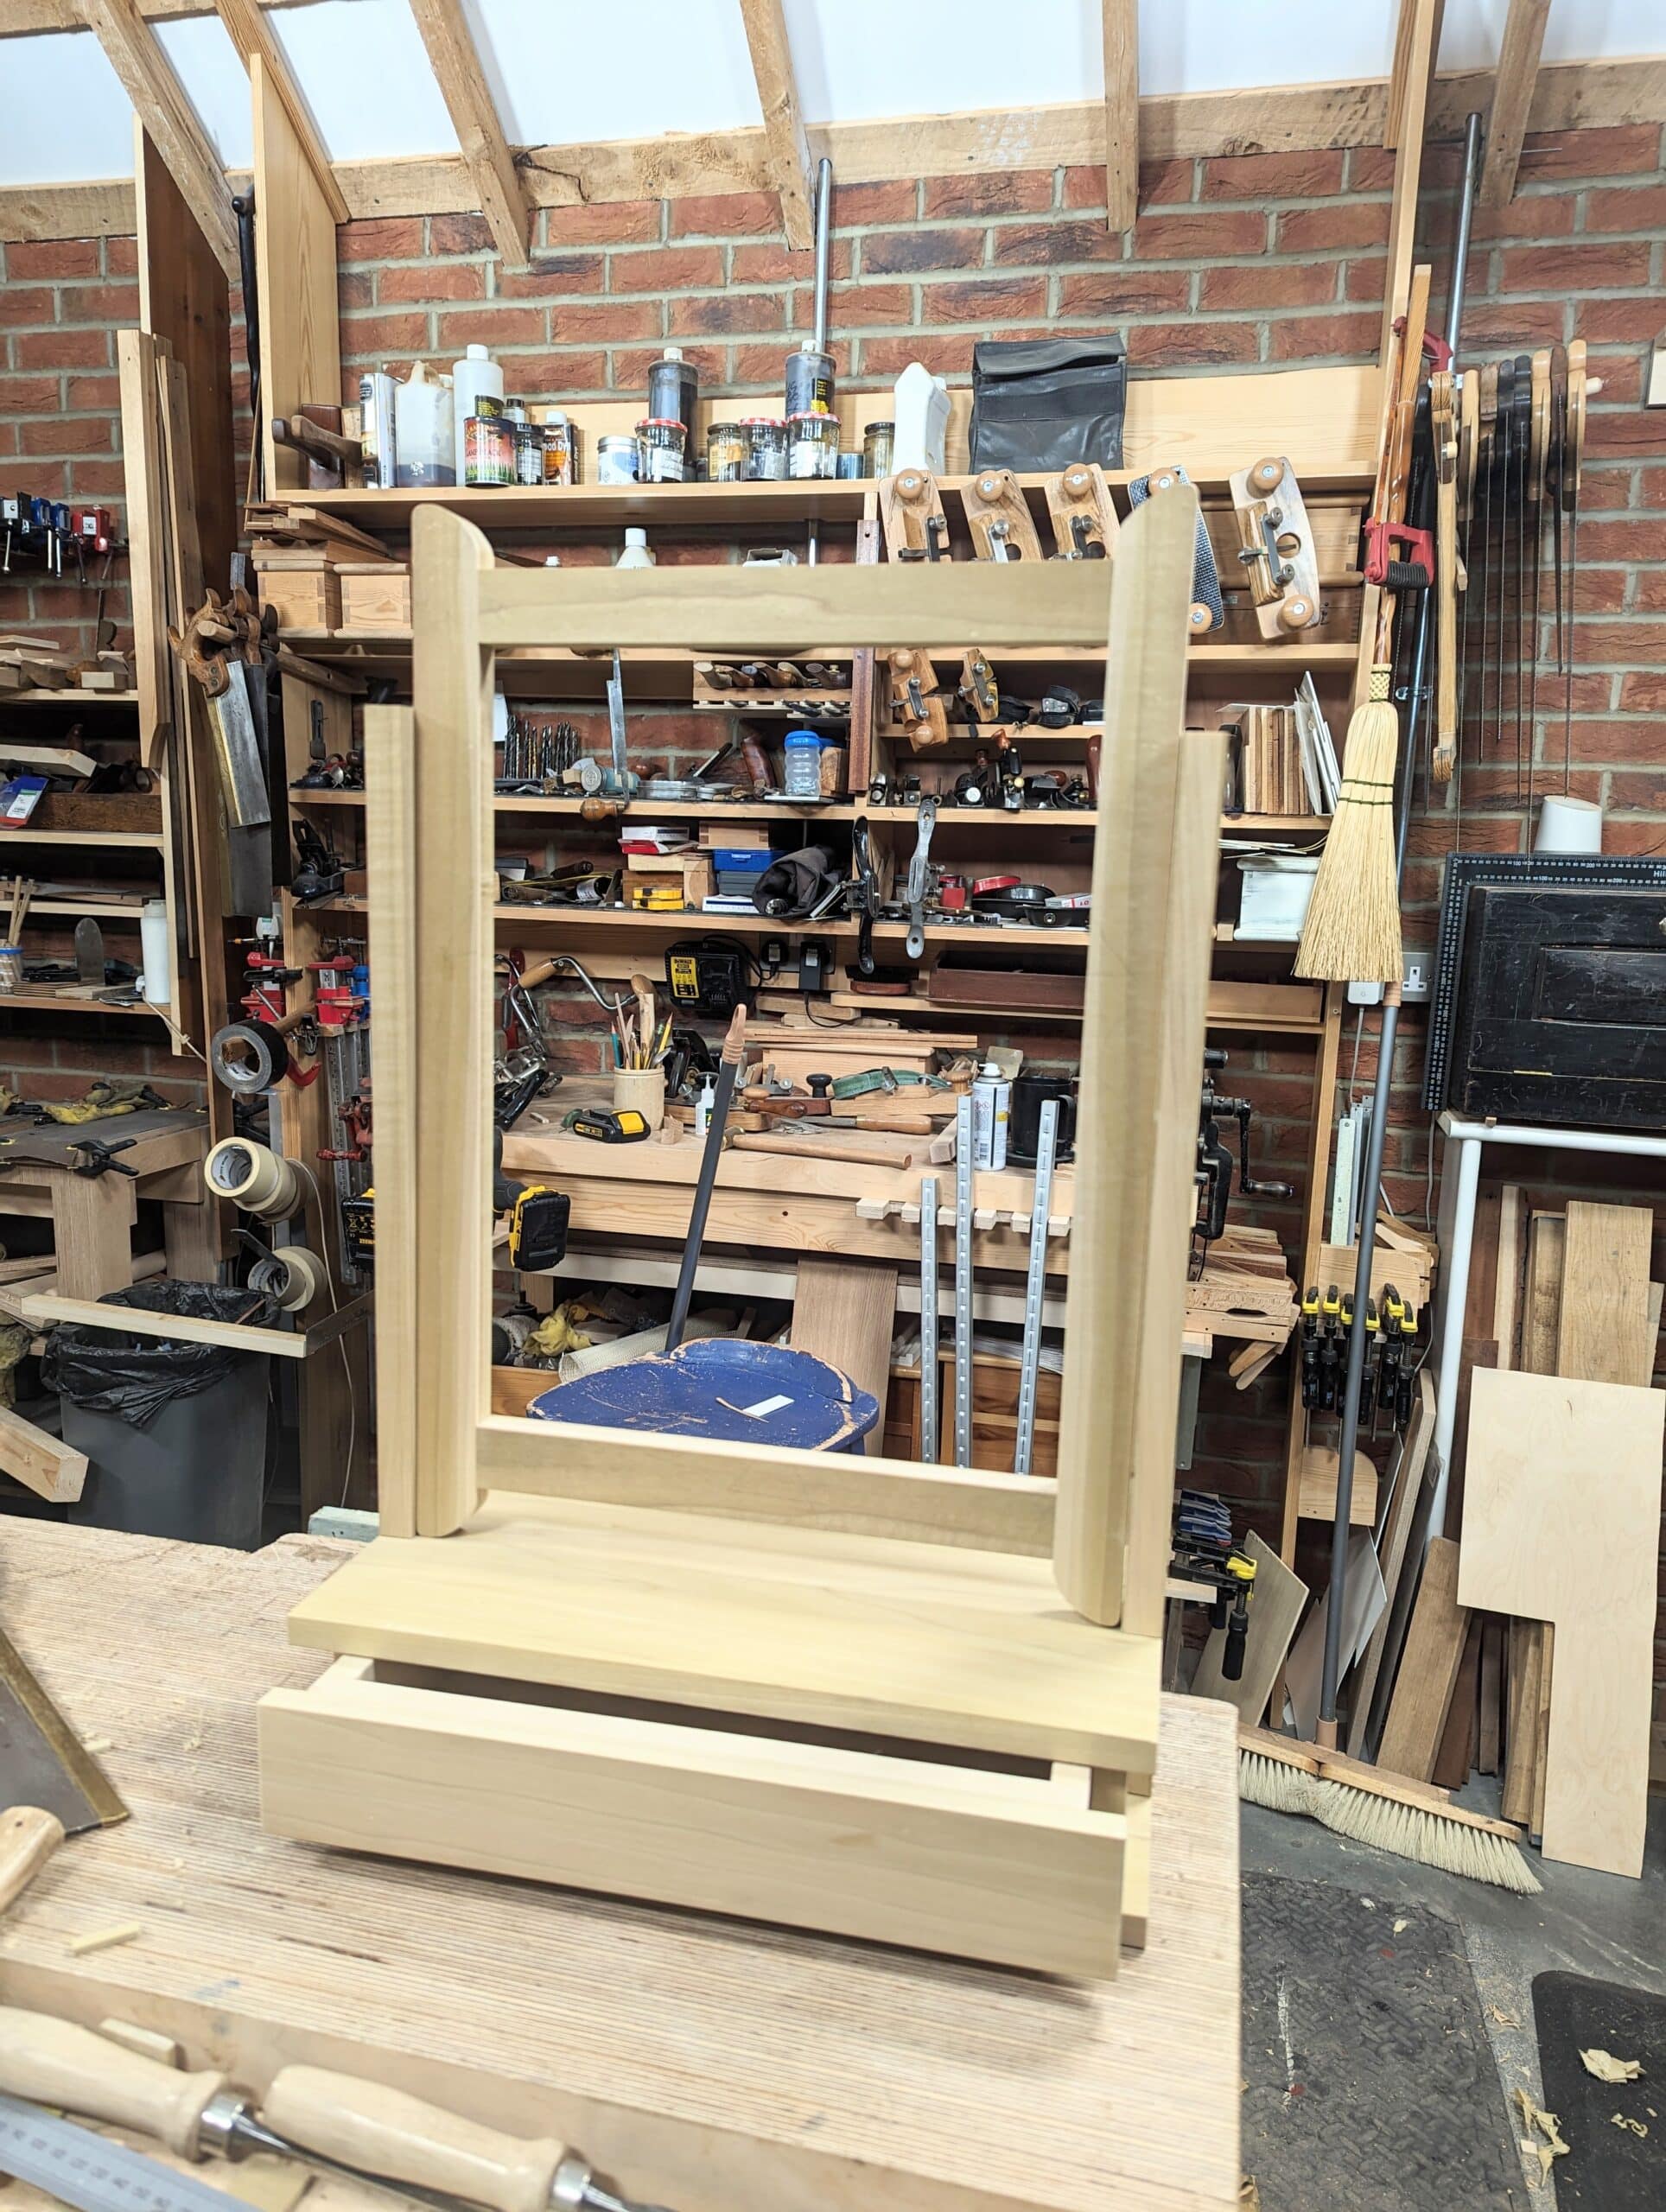
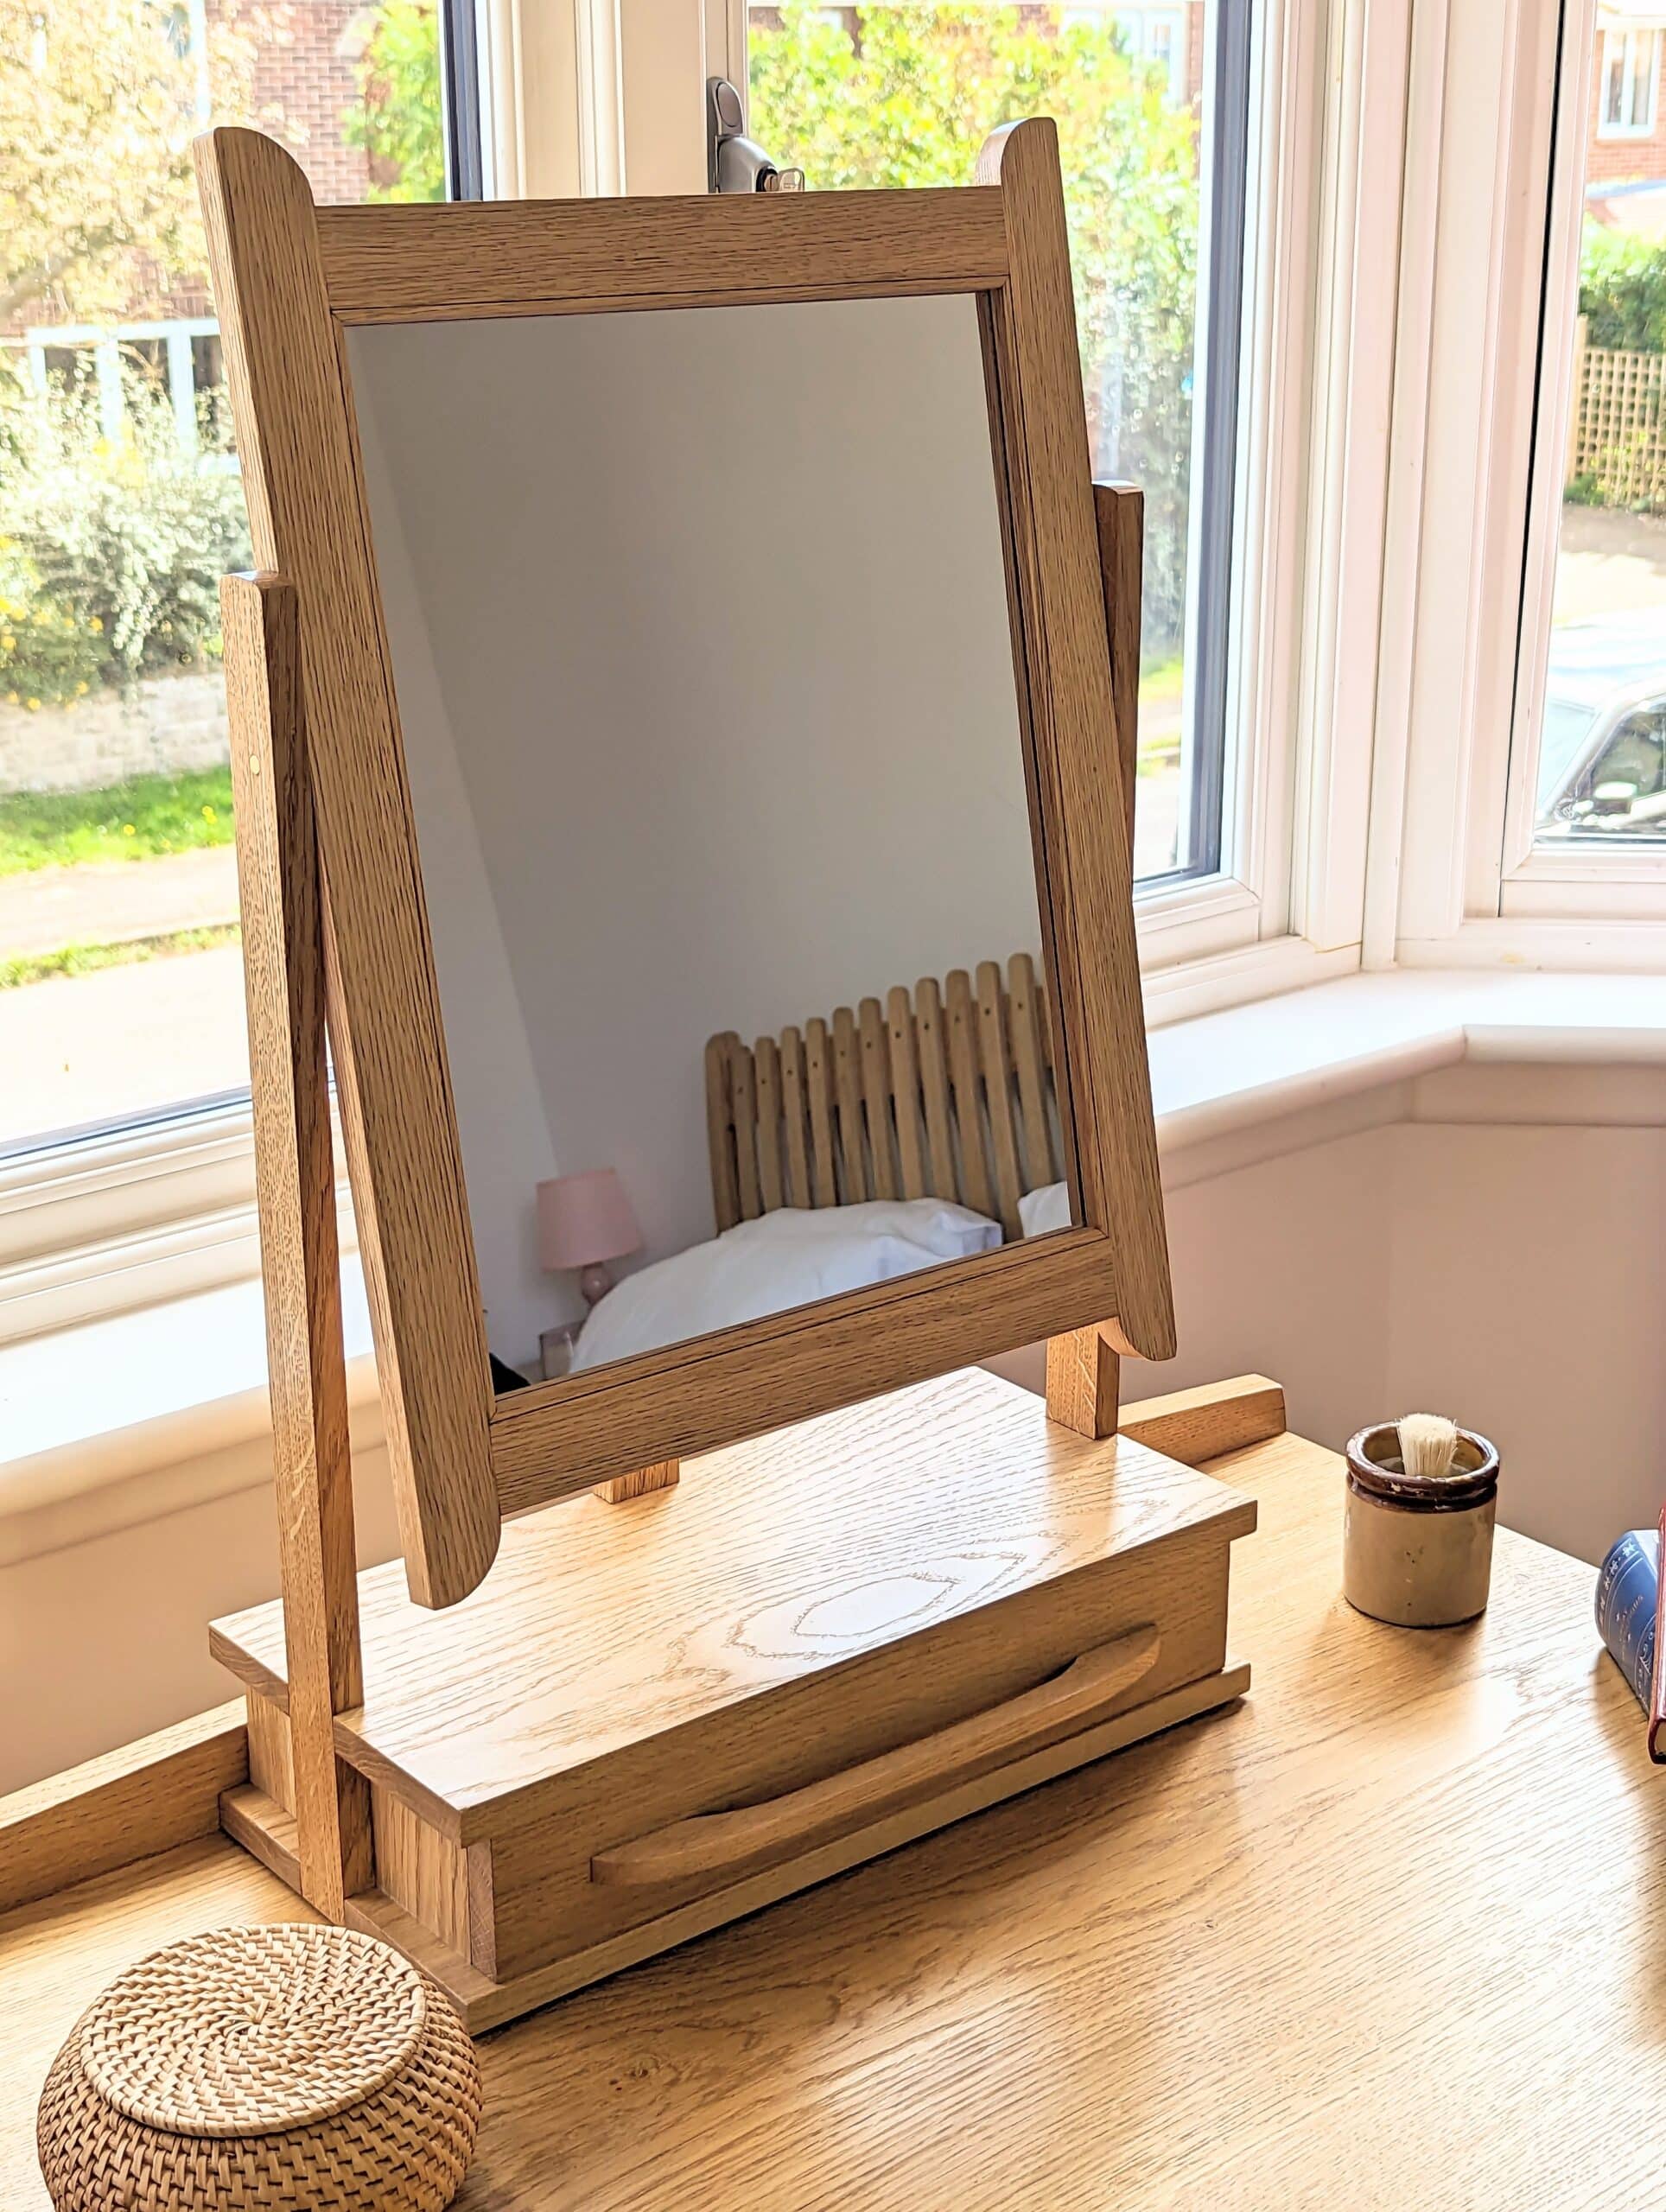
My last piece for now was the mirror stand with the tilting mirror and the small drawer. I want this to stand on the chest of drawers, the obvious place I suppose. This is an excellent reinforcement project for new woodworkers in that you have dovetails and housing together with mortise and tenon joinery for the mirror frame. it’s also a good saleable piece. For me, it is a day’s work steady. An hour and a half for the mirror frame and then the stand is about four hours. The rest is the finish time and mirror installation. £250 with the right wood would be a fair price. This is also a project I might make three or four of as a small batch production run. I actually made two such pieces. The poplar one looked just as nice as the oak one. Let’s say $450 for the two.
I think you would save a day and comfortably make four in three and a half days that way. Not taking breaks and repetitive processes makes you more efficient without being overwhelmed. For instance, splitting the project into three principal areas would mean making the four base units of the stand first, followed by four mirror frames and finally the drawers.
My workdays come out at around 52 days with a gross income of $12,500. that’s ten weeks of work so I would need to increase my prices for the design work if I were selling but, of course, I am not, and that is more to the point. This ‘homework‘ defies valuing the way I just did, but it is a viable way of assessing that you are not losing money by making your own furniture for the home but gaining financially and in the quality of what you make along with the quality of life and I can indeed make a living and the living I want from hand work making my furniture with a lone bandsaw. As a known maker and working on new and unseen designs I would double my prices at least and change my production on some of the pieces to make two or three at the same time.
Included in this work have been so many other things I do with teaching and training, writing, drawing, designing and such. My granddaughter of four came in Thursday afternoons to make and learn. I actually made about 18 router plane designs to compliment my range and then an additional 15 of my unique picture frames the like of which the local framing shop said he had never seen frames so beautiful and unique.
The value of what’s made is of little relevance here, but I put it to counter how some will present their point of view in saying no more than, “In the real world. . .” or “You can’t make a living working with hand tools.” when it would be better put to say something like, ‘I am not trained in hand tool woodworking so I personally could not make a living using those methods of working.’ Even if you halved my prices above, living within your budget would mean making choices but you could live and provide for a family on a single income as I did in fact for decades.
The fulfilment from this work is the greatest reward and, of course, no price can be put on the benefits. Walking through the rooms filled with what you made is to almost repeat two years of therapy.