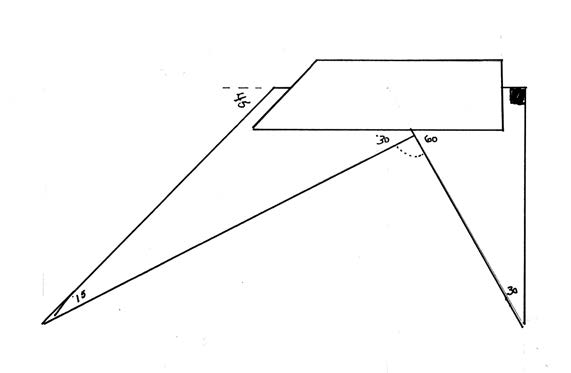
This is an excerpt from “Euclid’s Door” by Geo. R Walker and Jim Toplin. The book teaches how to make the tools from “By Hand and Eye.” At this point in chapter 7, a meter square that has a 15-degree tip is being constructed. This fragile corner of the tool has to be taken into consideration when choosing its placement on the grain of the board.
unique layout challenge
Many geometric layouts begin with just a given line. This has real practical value. It means we can construct the layout from just a small piece of the overall picture. This construction is a little more complicated than what we’ve done so far, so I suggest you work through this sequence on paper to get an understanding of it.
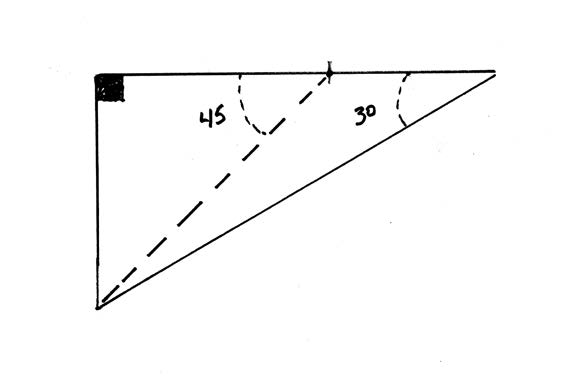
Case in point is this second triangle from our multi square, Fig. 7.13. The sharp blade that juts out to the left begins life as a 30:60:90 triangle that gets altered to include a 45° reference on one end, Fig. 7.14.
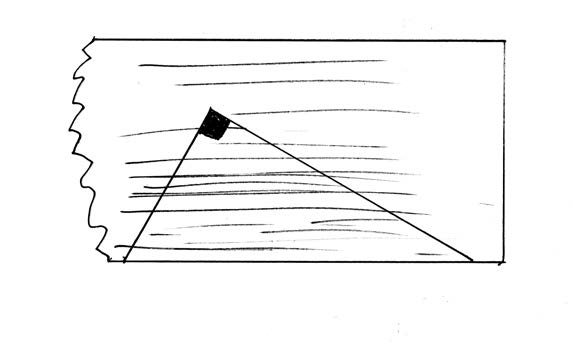
But that leaves us with a fragile, narrow point. We must lay out our triangle so that the hypotenuse is aligned with the long grain on our blank, Fig. 7.15.
So we need to lay out our triangle, but all we have to start our construction is the line that will be our hypotenuse. Before we proceed, let’s step back and take a look at a different geometric layout to get an understanding of how we get there. Here’s the construction we’ll base this on, Fig. 7.16.
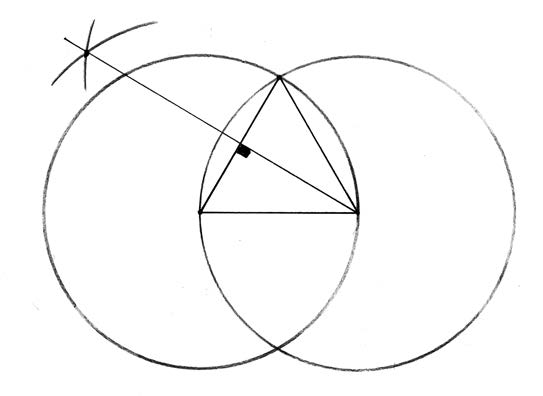
Let’s break it down into smaller pieces. We begin with Euclid’s first proposition, which is how to construct an equilateral triangle from a given line. Start by using the ends of a line to set the compass span and, using the end of the line as anchor points, draw two identical overlapping circles. Connect the top intersection where the circles overlap. Take note that the lines that connect the intersections also happen to share the radius of both circles. You just created a triangle with all sides equal which means all three corners are 60°, Fig. 7.17.
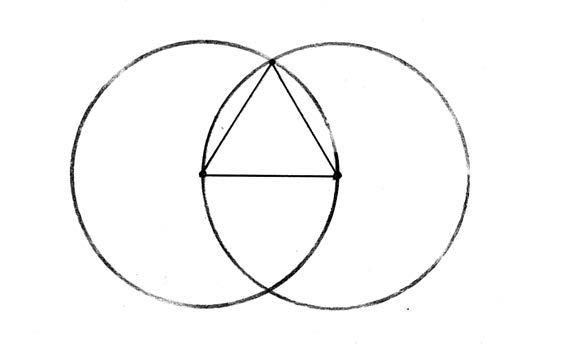
If you bisect this triangle, you get a pair of back-to-back 30:60:90 triangles, Fig. 7.18. It helps to see what you are after by superimposing this construction over our blade stock to see how it might apply, Fig. 7.19.
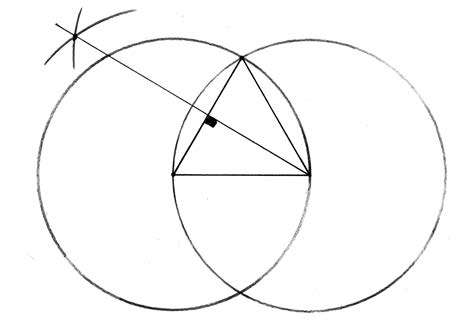
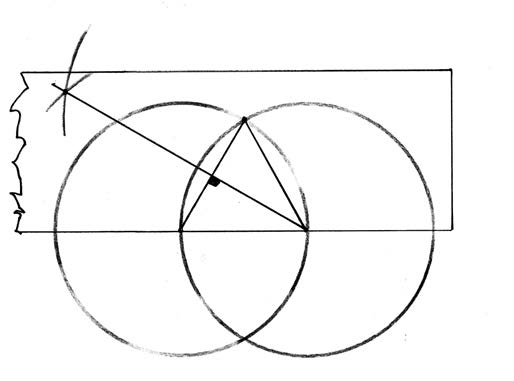
Fig. 7.19 (right) In practice though, we don’t execute the entire
construction, just a piece of it. It’s not really practical to draw
this entire layout because much of it is out in space beyond our blade blank.
This is quite common in layouts at the bench. We don’t need to scribe every line, just the important ones that get us our result. Let the bottom edge of your blank be the hypotenuse of our triangle. Set a compass to span the length of your hypotenuse and strike an upward arc from the lower edge. Leave the compass at the same setting and anchor it where the arc touches the bottom of the board then strike a second mark across the arc, Fig. 7.20.
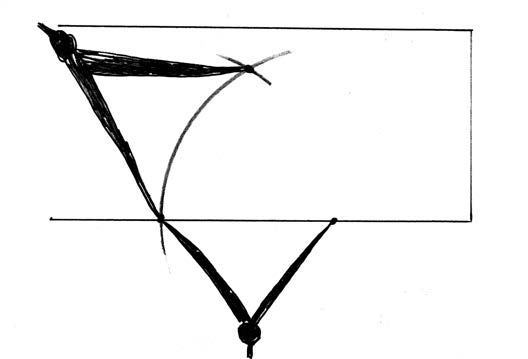
circles. That’s all we need to execute our layout. The second
mark defines the second side of the equilateral triangle.
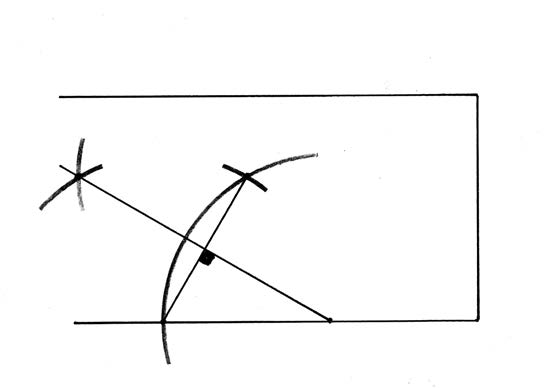
Strike a line connecting these points then bisect this chord on one end of the triangle. Now you’ve created our 30:60:90 with the correct grain orientation, Fig. 7.21.
Does it come together for you?
We’ll use this construction to create our second blade with the proper grain orientation.
