Sanding can be time-consuming, tedious and one of the dustiest, messiest, most boring tasks in the woodshop. But it’s also something that you’ll have to do in just about every single project. So let’s talk about the basics and how to minimize the monotony.
Sanding and sandpaper is a big subject. Big enough that there are actually entire books devoted to the topic, but I am limiting the scope of this article and video to the most common sanding you’ll use in a home workshop.
My Sanders
(Note: some of my tools aren’t manufactured anymore so I’ve included tools that are nearly identical.)
- Random Orbit Sander
- Finishing Sander
- 8″ Disc/Belt Sander
- Oscillating Spindle Sander
- Belt Sander
- Sanding Block
- Drum Sander Kit for Drill
Sandpaper Grits
All sandpaper, whether it’s in a sheet or for a power sander, comes in various degrees of coarseness. The bigger the number, the smoother or finer, the paper. And there are a lot of grades available. All the way from a super coarse 24 grit paper for removing lots of wood fast, to ultra-fine 1200 or even higher for polishing finishes.
Thankfully, you don’t need all of them for woodworking. I recommend keeping just three on hand and in roughly these proportions: 220 and 80 grit makes up about half of my stock and 120 makes up the other half.

I have others too, but use them only occasionally for special purposes. I would only buy say, 600 grit for something specific. Nothing you need to stock up on. I consider 120 grit to be the workhorse of sandpaper. It is so versatile, that you can often get by with it alone.
80 Grit Sandpaper: Shaping
Technically, 80 grit sandpaper is a medium grit, but in my shop, I consider it coarse, since I don’t use anything rougher. It’s great for quickly removing sections of wood. This is especially useful if you’ve joined a couple boards together that aren’t quite flush.


80 grit is aggressive enough that you can use it for shaping and carving. It’s also great for rounding over sharp edges.

Sometimes, the faces of boards may have scratches or dents which are easy to remove with coarse paper. And 80 grit is useful for stripping paint or other finishes.
120 Grit Sandpaper: The Workhorse
It might take a bit longer, but all of the sanding tasks you can do with 80 grit can also be done with 120 grit paper. For some shaping tasks it’s a better choice. Since it’s less aggressive, you can maintain better control over the smoothing. It’s a good option if you want to just ease over sharp edges.

Unless there are major scratches, dents or uneven spots, 120 is quite often the ONLY grit of sandpaper I use on my projects once they are assembled. It’s the best of both worlds: it evens out rough areas and smooths the wood to a finish-ready surface.
There are, of course, exceptions. For instance, after sanding with 120, I will sand wood even smoother with 220 grit paper if I am going to apply an oil finish such as tung oil.

But if you are going to apply lacquer or polyurethane, I see no need to waste time sanding the wood any finer than 120. The finish itself is what will give your project it’s silky smooth feel.
And if you are painting a project, you can relax about almost all sanding. Just sand out dents, unevenness and imperfections. The paint will do the rest.
220 Grit Sandpaper: Finishing
Keep in mind that most fine grit sandpapers are for finishing and not usually used on bare wood. Sure you can work your way through grits of sandpaper all the way up to 1200 grit if you like and your project will feel incredibly silky smooth. You’ll love it.
But, you’ll want to apply a protective finish to most projects, which will cancel out all that work. Again, an exception might be if you are applying tung oil or linseed oil which will soak into the wood. I don’t include Danish Oil here, since it is a polyurethane blend.
I use 220 grit sandpaper for sanding between coats of polyurethane finish so each layer can bond to the next.

For lacquer, the finish I use the most, you don’t need to sand between coats since each fuses into the next. With lacquer, I lightly sand the surface with 220 paper before applying the final coat. This is very important for removing all those little bumps and dust particles you can feel when you rub your hand over the surface. This is what separates a good finish from a great feeling finish.

Also, do the same thing for small painted projects, toys and such. Sand the paint smooth before applying the second or final coat. You’ll be amazed at how different the surface feels.
One final note about finish sanding: I like to sand by hand rather than using a power sander. It takes a light touch and I like to sand with one hand and feel the finished surface for imperfections with my other hand. A power sander is likely to sand the finish completely off.
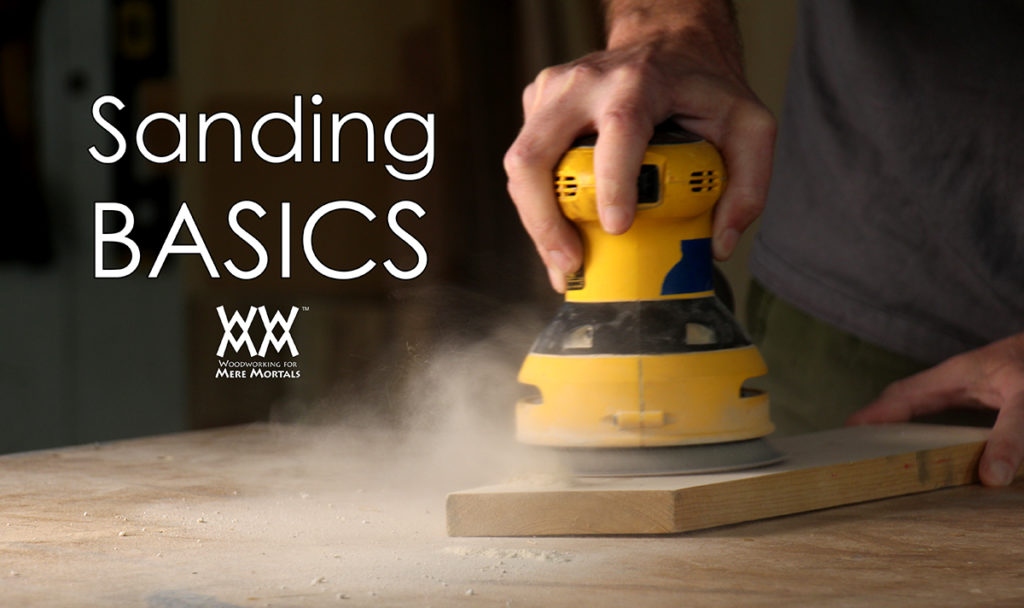
Random Orbit Sanders
The cheapest way to sand is to buy sheets of sandpaper and sand by hand. You can wrap the sandpaper around a sanding block or just use your bare hand.


But for most projects, hand sanding will get old really quick. Instead, consider buying a random orbit sander. This is the most useful and versatile sander you can own.

Its motion is called random orbit because it doesn’t just spin, but also moves around in random directions, helping to prevent circular sanding scratches on your work.
It uses sandpaper discs that attach using hook and loop, or Velcro. The holes are there to suck up a lot of the sanding dust as you are sanding. It either collects in this container, or you can attach a vacuum hose.


Sanding is easy, just flip the switch and move it around. Generally, the advice you hear it to let the weight of the sander do all the work, but sometimes if I am trying to remove a deep scratch, I find that pressing down actually seems to help. But that could just be my imagination!

A random orbit sander can cover large surfaces pretty quickly. Check your progress with your hand until it feels smooth. Also look at the wood surface from a low angle so see any imperfections you might have missed.

One drawback to a random orbit sander is that you can’t get into corners, say inside a cabinet. I usually sand those parts before assembling them. You can also sand them by hand or use a finishing sander like this one that has a point for getting into corners. But really, if it’s inside a cabinet or drawer, you probably don’t need to bother sanding that much anyway.

Belt Sanders
A belt sander is super aggressive and I don’t recommend it for much woodworking. It’s very easy to gouge your work piece and often causes more damage than it’s worth. It’s best for construction projects or very rough carpentry where you need to remove a lot of material.


One way you can use it effectively in a woodworking shop is to mount it upside down and take the workpiece to is. That will give you a lot more control.

Benchtop Sanders
I have two benchtop sanders that are relatively inexpensive and are very handy to have. The first one is a combination strip sander/ disc sander. If you are interested in getting a benchtop sander, this is the one I recommend. It’s my go-to sander for all kinds of tasks.

I mostly use the disk for shaping and removing material. It is especially handy for sanding off ridges left by bandsaw cuts and for sanding curved pieces down to exact lines.

One of the main benefits is that it has a tilting table. This helps you keep your pieces square while sanding, or you can tilt it to create bevels.

My sander has a one inch wide strip sander on the side. When I first bought this sander I thought I would hardly ever use it, but wow…it comes in very handy. You can sand wood using the table, but mostly I like to sand freehand up here for hard to reach spots and even to carve shapes. And it’s great for sharpening tools.


There are two drawbacks to this unit. The first is that changing the discs is a real pain since it uses adhesive backed paper. You can probably guess, I only use 120 grit paper. And I just use it until there’s hardly any grit left on it! The strips are easier to switch out, but still, I only use 120 grit.
The second drawback…really just a limitation…is that you can’t sand inside curves with the disc sander.
You can wrap sandpaper around a dowel or even a can for a hand sanding solution. Or you can get various diameter sanding drums that will fit into a drill or drill press. You can also get pretty good results with a random orbit sander if it will fit in the curve.


A number of years ago a viewer sent me this oscillating spindle sander which makes sanding inside curves a breeze. It comes with a number of different sizes of spindles that are easy to change out. It has spinning and up & down movement to maximize all the paper and reduce circular scratch patterns in your board.


Safety
Sanding is one of the safest power tool activities in the shop with one exception: the fine sawdust sanding creates. Whenever I am sanding, I make sure I have good airflow through my shop and attach my ShopVac to the tool. And I always wear a dust mask.
The post Sanding BASICS | What you need to know about sanders and sandpaper appeared first on Woodworking for Mere Mortals.
SOURCE: Woodworking for Mere Mortals – Read entire story here.