For sharpening all chisels, planes, spokeshaves and knife types, in fact, anything with a cutting edge, diamond plates do it all, they cut steel very fast, stay flat, and they are cleaner than oilstones, natural stones, water stones, man made or naturally occurring all of which need additional paraphernalia with little good reason or advantage. Why do I say that? Well, as soon as any edge is sharpened, and you offer it to the wood, the edge fracture known as wear begins. Sharpening is a maintenance task and the edges of all edge tools, particularly planes, need renewing every half hour or so of use. 95% of woodworkers procrastinate over sharpening.
You can pay anywhere from £5 per plate to £150. I suggest you buy the three diamond plates as shown. These are about the cheapest available, but they do last. These plates are available in a large range of grits, but you only need three grits to sharpen all edge tools. At the coarse or ‘grinding’ level, 250-grit works well for removing enough steel to get you back to the cutting edge. The second level of abrading, should be somewhere between 600 and 800-grit and the final level between 1200 and 1500-grit. The 1200 to 1500-grit versions will feel like a sheet of writing paper or the outside of an aluminium MacBook Pro case with regards to fineness. Don’t let anyone dismiss these inexpensive diamond plates. Once glued down onto a good grade of 3/4″ birch plywood, they stay flat, cut steel fast, last well (for years) and are really solid. Cost wise, they vary between £5 and £12 apiece, but you do not need more than three. As I said, each grit cuts fast, and even the 1200-grit gives you a serious cutting edge to cut with, though elitists will tell you otherwise. These grit sizes work well and are readily available on eBay and Amazon. They measure around 6 3/4″ long by 3″ wide. This is plenty of surface to sharpen on and laid out as shown, compact enough to stow and pull out as needed. In the past, I have always used and advocated 1/4″ thick plates and recessed them into plywood boards, but these thin plates have proven just as good for me and are a fraction of the cost yet giving equal results.

Finding a piece of leather is not usually hard. Remnants are sold on eBay in market and craft stalls and on other online outlets. An old handbag or cushion will do it too. I have never bought leather for a strop to date. I once saw an old leather couch dumped on the side of the road in North Wales, a cut the panels out so I have strops for the next two hundred years. A practical size is 10″ by 3″ and upholstery hide works great. Don’t make them bigger, it’s a waste because big is not best as it is impractical.

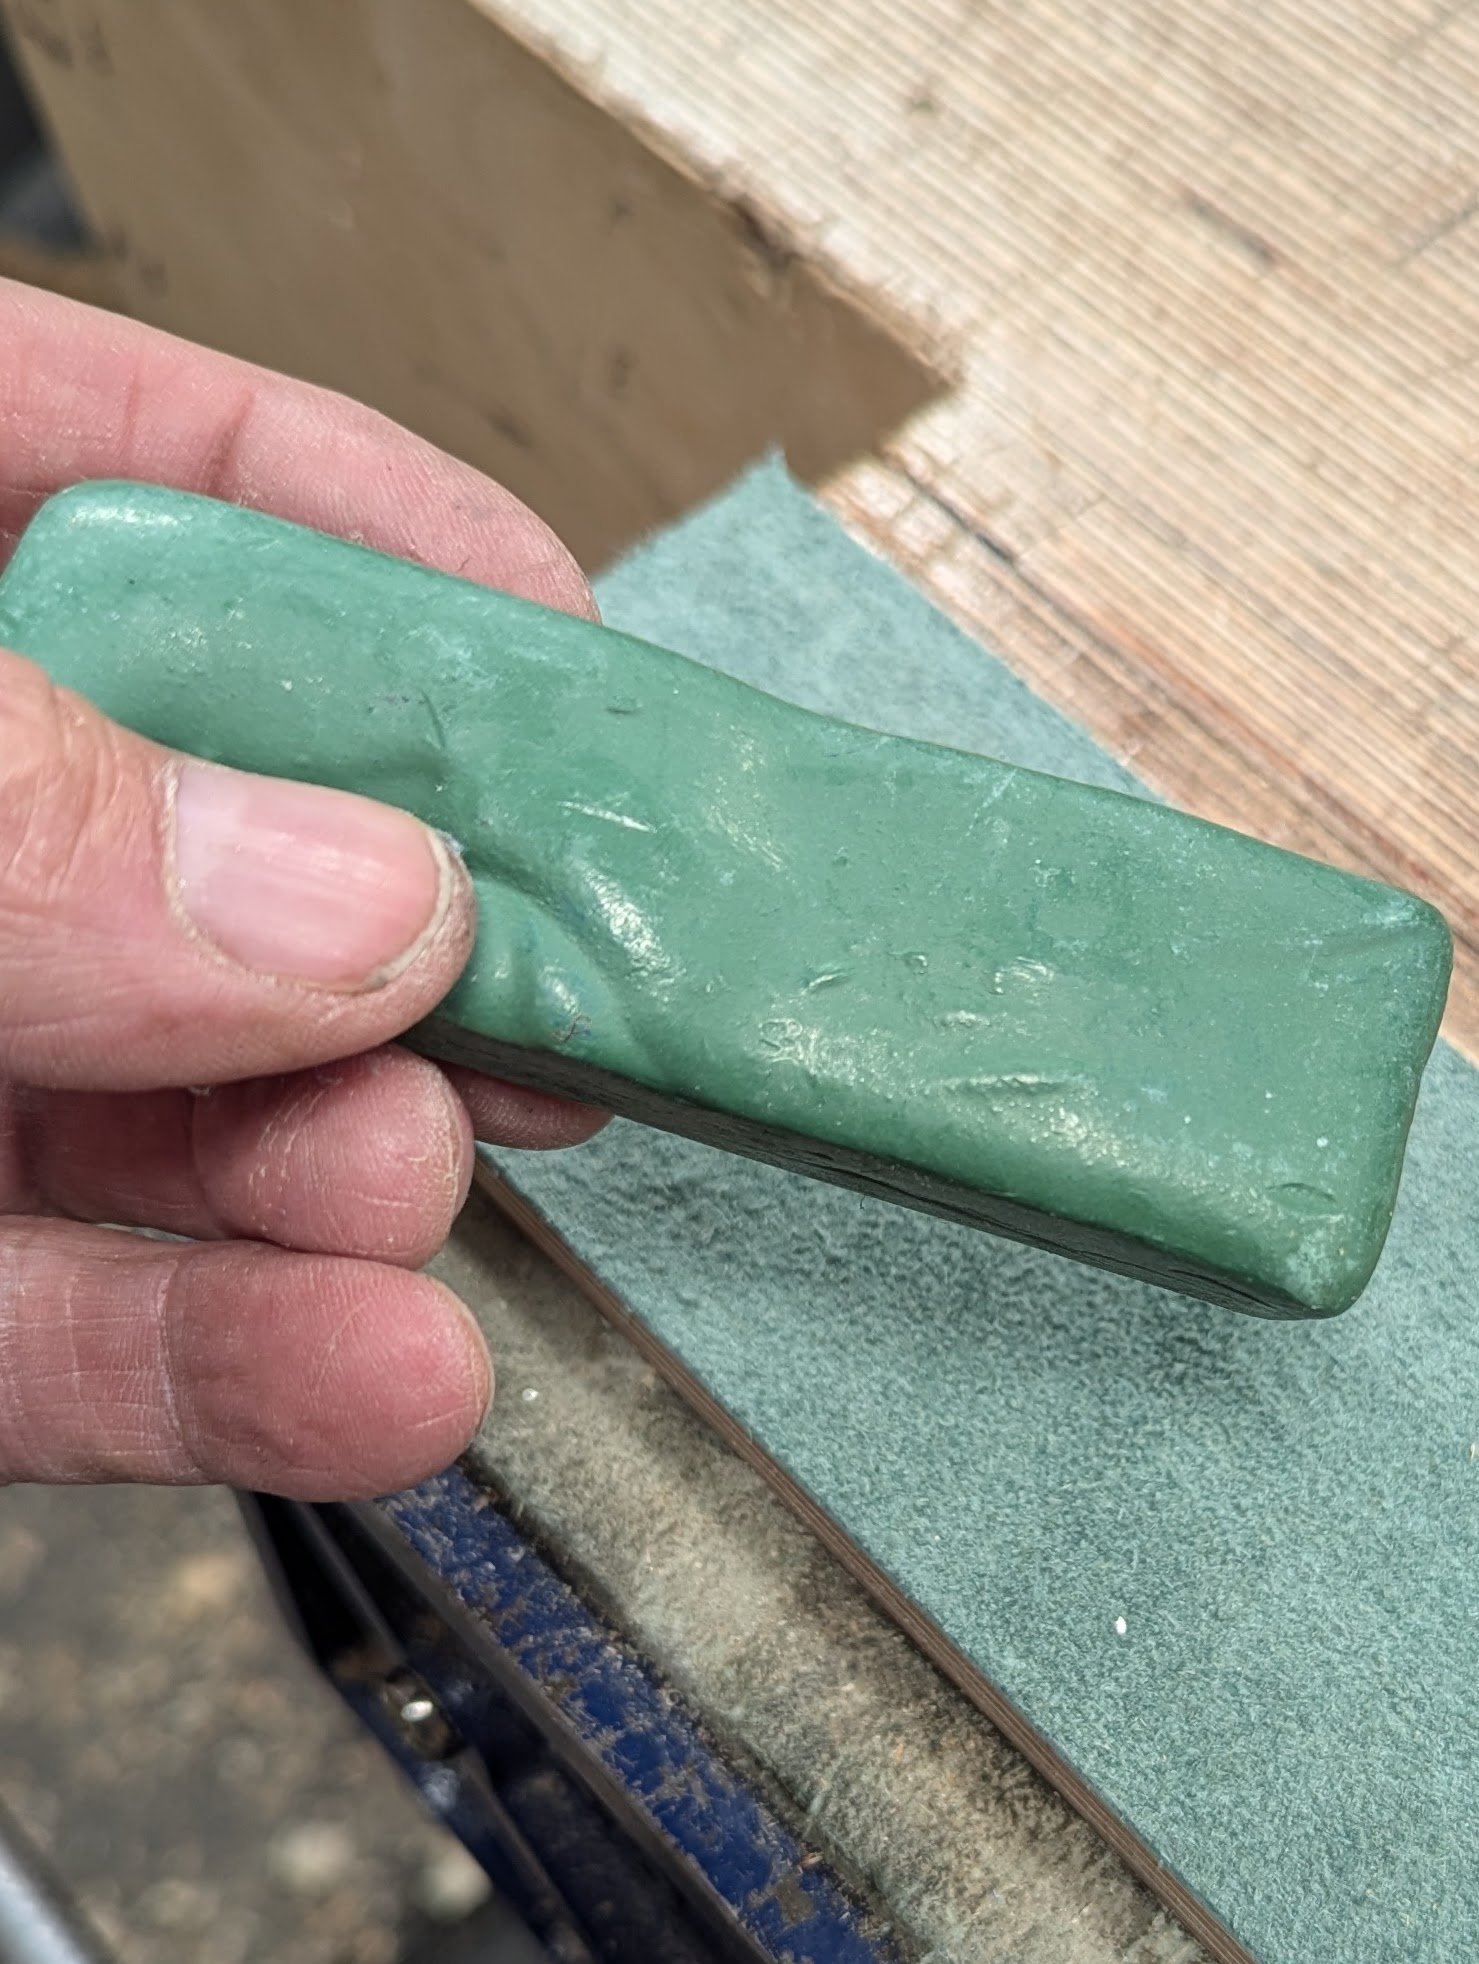
The buffing compound is the type used for refining and polishing metal surfaces in industry. For the main part, it is applied to an electric buffing wheel and the metal is held against it as it rotates or alternatively applied to a sisal applicator to take to the metal. These bars of compound are usually colour coded for different metals, so less abrasive on soft metals like gold and silver and more aggressive for hard metals like stainless steel; green is for steel and stainless steel, though any of these buffing compounds will polish out your steel edges. A bar like this will be 20 years supply for anyone.

The honing guide is a good way to go for anyone starting out. It stabilises your action, enables higher levels of applied pressure, and at the same time helps to get the feel for angles as you develop muscle memory. Also, you are not creating alternative angles and out-of-square problems. The best, easiest and most convenient to set and use is the Stanley version shown above. The twin wheels are set far enough apart that you don’t feel like you have to balance anything in use, so ultimately you always end up with a square ended cutting edge. A flip over angle guide helps you to set the angle instantly using the two established angles of 25º and 30º, or you can just use 30º to get the same angle; the cutting efficiency is the same. I will also add this caveat; these are training wheels for a year or so. Ultimately, the fastest and most seamless way to sharpen is freehand. Everyone can ultimately own this as long as they train themselves. Additionally and unfortunately, this is usually sold as a kit with a pretty useless oilstone and a bottle of useless honing oil. You might consider a secondhand one on eBay as that is the case.
So in the above and the following below, you have the essentials for sharpening your edge tools. The cost? Roughly £35 for a system that could last you for 50 years of hand tool sharpening, whether you work wood a day a week or full-time like me.
On to `Making

When these thin plates came on the market a few years ago, I jumped on them. My first ones cost around £4 and I bought the three I’m still using five years on. I have used several sets to check out the longevity, and they seem very standard with regards to quality. They will certainly outlive and outlast abrasive papers and get you in and out of the making zone faster than just about anything, especially when you master freehand working.

The plywood base should be as good a plywood as you can get. I always have an odd piece of 3/4″ birch plywood as a remnant somewhere. If you don’t, try your local cabinet shop. They’ll likely give you a piece. My base is 11″ wide and by 7 3/4″. The stop for underneath is again 3/4″ and measures 11″ long by 1 1/4″.


I glued and screwed the stop flush with the long edge from the underside.

Applying some kind of waterproof varnish or oil on the underside helps to keep the base clean. I will do the topside after the plates are installed, as any finish can prevent good adhesion of the plates to the wood.

I laid out the positions of the plates with a half-inch perimeter edge and half-inch between the plates. The good thing about these thin plates is that they need no recessing into the wood.


The ultimate best adhesive for securing the plates is impact or contact cement––one and the same. Apply a thin coat to both surfaces, leave until just touch dry, usually a minute or two, and then press them together.

I used the vise to apply pressure.

I taped off the plate edges before applying finish. The finish helps to keep the plywood surround from getting grungy along with the absorption of liquid, that’s all. Just an aesthetic.

For the strop, I used the same 3/4″ Birch plywood. It’s strong and resilient and resists distortion under pressure from any direction. Plane up the edges, sand for smoothness and cut your leather oversize.


Apply the same adhesive to the smooth side of the leather and the surface of the plywood and leave for a few minutes until barely tacky.

Apply carefully from the centre and stretch out either side. Remember, when these two surfaces come together they usually cannot be separated, so align it well straight off.

Clamp it in the vise to apply even pressure.

Trim off the excess with a sharp knife.

This is what I use in the day-to-day of my everyday woodworking but without the honing guide in my general work. I freehand all of my edges now, but if my bias takes me out of square occasionally, it is faster to use the guide to gain squareness again.

Join me on my platforms for much more depth and insight into the world of real woodworking. We started the De-industrial Revolution over two decades and more ago, in the days when the woodworking world was losing its grip to become pure machinists. That’s changed, and we educate woodworkers to take charge of their lives by our offering the alternative most of them were looking for starting out but couldn’t find. Looking back, our success is not measured in Dollars, Pounds or Yen and Euros but in the lives of New-genre woodworkers who want work and want to earn and own skilled workmanship by deploying their whole bodies and throwing their minds against the obstacles that obscure it. Wow! This is the power of a slow-growing strategy that meets the needs of people on a global scale. The seeds have been sown for three decades now, when we were a lone voice in the wilderness. Join us and support our work on Woodworking Masterclasses and Common Woodworking. You are the ones that can and will take our efforts forward in your families and friends. I love it!


