About six weeks ago Diane and I went to a free weekend class at Tandy Leather in Henderson that dealt with how to engrave leather using a swivel knife. We’re both always interested in learning about new processes “just because”. The piece on the bottom left is what we did in class and even though I’m not happy that I dyed it you can see all of the line work we did during the process. Fast forward to the past two weeks here in Las Vegas where the temperatures have gotten so hot which means I’m really unable to do the finishing and gilding on two frames currently in progress. How hot is it? … well the shop hasn’t cooled down below 88° at night and by early afternoon is as high as 117°. I can handle it to a point but applying sealers, mordants, or shellac isn’t possible so spending my time with the leather. Some of you may recall my Kumiko rabbit hole and I’m hoping this venture doesn’t get that intense!!
As I’m sure many of you do too, not being able to stay engaged in the woodworking I love means I spent some idle time looking through the internet and experimenting with the swivel knife which is on the left side of the picture above. At Tandy, they taught how you can take an image from the internet, print it out, and then cover the back of the page with packing tape. You then wet the leather; technically called casing; and use a ball shaped engraver to transfer the design to the leather so you can cut the design into the wet leather. There are numerous YouTube video’s showing leather working and if you’re like me you find some you like and other’s you can’t stand to listen to! One I like is Don Gonzales, a saddle maker from Texas. He offered a plan on how to make a cover for a Field Notes booklet so I decided this would be my first project. I use notebooks to sketch designs and also to keep notes on how I do things and these come in either lined or with a dotted paper which I like for sketching. I used the larger size so needed to expand the pattern from Don Gonzales but that wasn’t a problem.
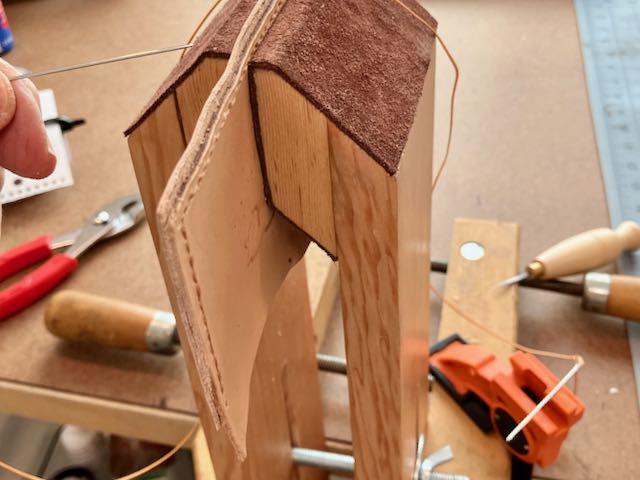
After finding my designs (cat and a woodworking plane) they were printed out to make the patterns. I also wanted to put a border around them and a pattern was made for that as well. I learned that a straight edge can be used to guide the swivel knife. I also learned that if you make your leather too wet when casing it, it will shrink! Confession time, I was like the 3 little bears; my first was too small, the second was too big, and finally the third was just right. In any case it gave me good experience in learning how to do a saddle stitch using two needles and an awl! In this picture I’m cutting a groove to locate the stitches to attach the inside pockets. The tape marks the location of them on the inside of the cover. You can see that the pockets are bigger than the cover but they get trimmed after the stitching is done.


To make stitching easier I needed to make a stitching pony. After looking at many examples I came up with this design that allows me to use it either in my shop or Diane’s air conditioned studio. I can clamp it to whatever table or bench is available. The initial holes are laid out with a tool that has a toothed wheel to mark the spaces in the groove made previously. I then used punches to go through those holes and enlarged them with a diamond shaped awl as needed. Waxed thread is used which makes pulling through the leather easier, especially at the end when you back stitch to lock everything in place.
Here is a collage of pictures showing the completed project, learned a lot and created something useful!