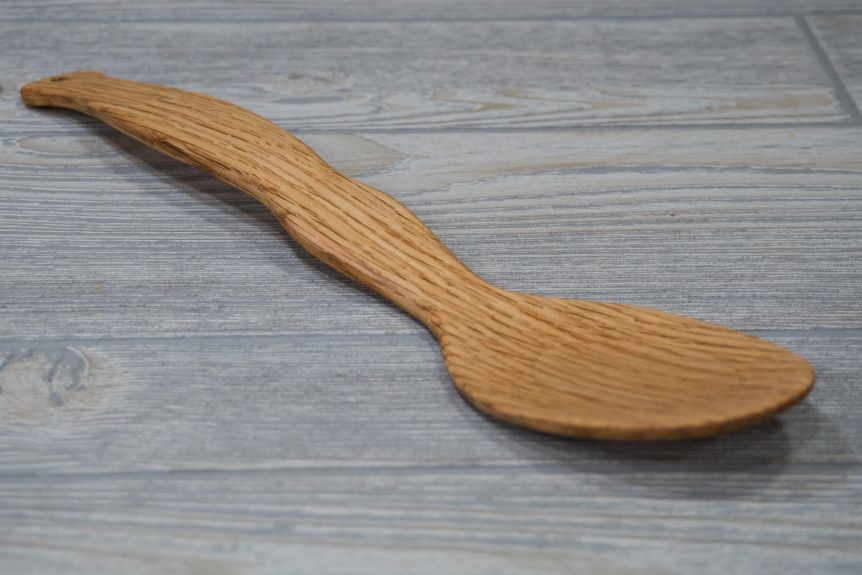
Way back in 1992 when I was just a junior in high school, I made a bent laminated wooden spoon in shop class for a Mother’s Day gift. Now 24 years later I’m recreating the spoon for an updated gift to give to Mom this Mother’s Day. Bent lamination involves resawing the wood into thin bendable strips that can be placed in a mold and glued in place. Once the glue dries the spoon shaped can be cut out on the bandsaw with some final shaping done with the spindle and orbital sander. This is a quick and fun woodworking project that can be done in just a few hours. If you plan on using the spoon for cooking then you’ll need a food safe finish such as the butcher block conditioner I used in the video. As always, be passionate and Make Something!
Tools and Supplies Used
- Micro Jig GRR-Rippers
- Micro Jig GRR-Rip Block
- Magswitch Fence
- Dewalt Planer
- Jet Drum Sander
- Titebond Glue
- Bessey Clamps
- Grizzly Bandsaw
- Festool Orbital Sander
- Foam Padding
- Packing Tape
- Festool Miter Saw
- Spray Adhesive
- Spindle Sander
- Disc Sander
- Festool Drill
- Butcher Block Conditioner
- Shop Towels

Step 1: Resaw on Bandsaw
I’m using quarter sawn red oak with the straightest grain I could find. I resaw the two surfaced sides of the board into 3/16″ pieces on the bandsaw. The middle piece is jointed on one side and ran through the planer.
Step 2: Sand to Thickness
All the pieces are then sanded down to a final thickness of 1/8″ on the drum sander. You could also do this with a planer and a shop made sled if you don’t have a drum sander.
Step 3: Glue Up Form
For the form I’m gluing up some scrap mahogany I had laying around. 2x6s from the home center works best for this application.
Step 4: Cut the Curve
Once it’s dry I’ll draw the curve I want for the spoon and cut it out on the bandsaw. If you were making a form for larger and thicker pieces you’d want to remove as much wood as the total thickness of your piece so all the curves line up when clamping. Since our spoon is pretty thin it’s not necessary.
Step 5: Line the Form
I’ll then sand down the rough edges and check for a nice even gap. You’ll want to line the form with cork or foam padding to even out the clamping pressure and make up for any inconsistencies. I’m using packing tape to hold it down which also protects the form from glue squeeze out.
Step 6: Glue the Bent Lamination
I then cut my pieces down to size, add glue and start clamping. I’ll start with the center clamp. And a s I tighten the outer clamps I’ll then have to go back and retighten the center clamp. The key is lots of clamps and as tight as you can get them. Let it dry for at least 1 hour.
Step 7: Clamping the Bent Lamination
I’ll start with the center clamp. And a s I tighten the outer clamps I’ll then have to go back and retighten the center clamp. The key is lots of clamps and as tight as you can get them. Let it dry for at least 1 hour.

Step 8: Apply Template
I then used some spray adhesive to apply my template to the wood.
Step 9: Cutting on Bandsaw
Cut the shape of the spoon out on the bandsaw. Cut close to the line and you’ll finish it up on the sander.
Step 10: Final Shaping
I then remove the template and do some final shaping on the spindle sander as well as the random orbit sander. 80 grit works great for sculpting.
Step 11: Finishing
And finally it up I’ll drill a hole in the top and finish it with some butcher’s block conditioner.
SOURCE: Make Something Blog – Read entire story here.


