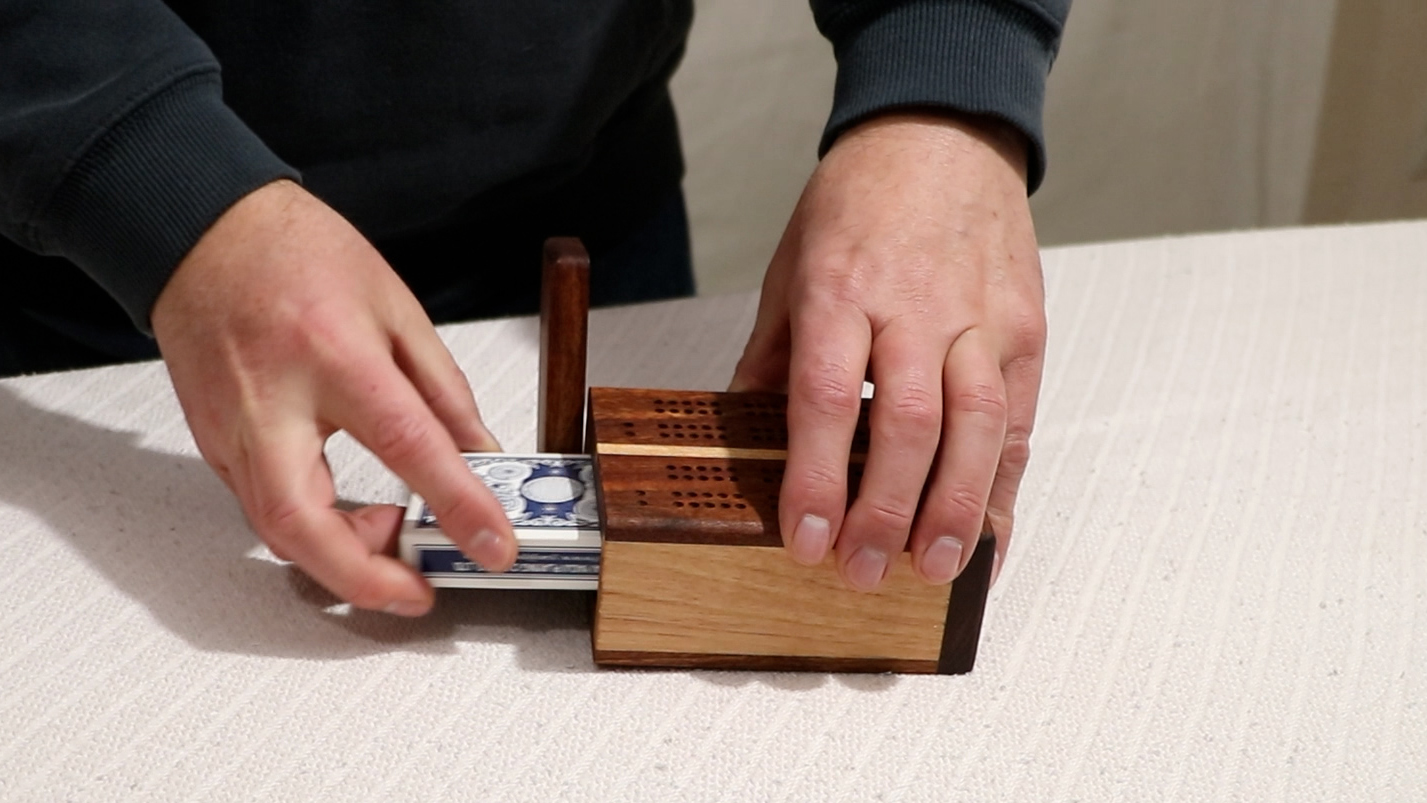
If you’re a fan of cribbage and enjoy woodworking, why not combine the two and create a unique travel cribbage board? In this step-by-step guide, we’ll walk you through the process of crafting a travel cribbage board that opens up to store cards and pieces, making it a perfect companion for your on-the-go gaming needs.
Download The Cribbage Board Woodworking Plans here.
Watch how to build a travel cribbage board.
Materials You Will Need: To get started, gather the following materials:
- The wood of your choice (recommend a dark wood with a light wood as an accent)
- Table Saw, planer, and router with a Dado blade
- Clamps and double-stick tape
- Sandpaper and finish (e.g., hand-rubbed oil)
Step 1: Wood Selection I selected Chechen for its rich grain patterns and deep color. I then used maple for a contrasting effect.
Step 2: Milling from one board:

In the video, I made a total of eight game boards. However, I kept all the pieces together in one long board so I could mill one board to thickness instead of multiple smaller boards. Working with small pieces and power tools can be unsafe. I found it faster and safer to keep the board as one long length and cut it into smaller pieces in a later step.
Step 3: Joining the Top and Sides

I set up a dado stack with a sacrificial fence to protect the main fence so I could cut rabbets on each edge of the top and bottom. The rabbet joint is what is going to join the top and sides of the cribbage board together.
Step 4: Sanding and Pre-Finishing

Before assembly, I did a quick sanding and pre-finish the inside face of the boxes. I marked out a safe area for joinery and tapped it off with painter’s tape. The painter’s tape protects the joinery area, as glue does not stick to an oil finish very well. I then apply a finish like hand-rubbed oil to bring out the wood’s color. I only finished the inside facing parts because it will be much harder to apply finish to those areas after the cribbage box has been assembled.
Step 5: Assembly

When assembling the box, I clamped in both directions to make sure the rabbet joint was tight in all directions. At this point, I still have not cut the cribbage game board apart. It is easier to assemble one long tube than individual game boxes.
Step 6: Cutting Game Boards

I Square up one end of the assembled board and set a stop on my miter gauge to cut out game boards of the desired size.
Step 7: Attaching the ends:

I made the end caps a little oversized so I could use a pattern bit in the router to trim the ends flush to the game board, ensuring a perfect fit. I glued on the back end but used double-stick tape to attach the front end temporarily. This will allow me to flush-trim the front end to size and also allow me to drill a hole for the lid to pivot on. I can drill the hole all the way through the lid and into the box at the same time. This ensures a perfectly located pivot hole.
Step 8: Adding Personalization

Add your personal touch by using a branding iron to mark your logo or maker’s mark on the cribbage board.
Step 9: Installing Magnets

Drill holes diagonally across the pivot point and install tiny rare earth magnets. Ensure the correct alignment of the poles by marking them with a Sharpie.
Step 10: Final Touches

Add a decorative touch round over the edges of the boards using a router to create a smooth and comfortable feel. Cut off the excess material for the pivot, glue it in place, and finish it off with a hand-rubbed oil.
Conclusion: Congratulations! You’ve successfully crafted a unique travel cribbage board that not only provides entertainment on the go but also showcases your woodworking skills. Whether you’re a seasoned woodworker or a DIY enthusiast, this project offers a rewarding experience.
If you don’t want to build your own, you can buy a board from me. Handmade Travel Cribbage Board.

How To Play Cribbage
Objective: The main objective in cribbage is to score points by creating combinations of cards through various card-playing phases. The game is played to a certain number of points, often 121.
Setup:
- Use a standard 52-card deck.
- Each player is dealt six cards, and the remaining four cards form the “crib.”
Card Values:
- Face cards (king, queen, jack) are worth 10 points each.
- Number cards are worth their face value.
- Aces are worth 1 point.
Gameplay:
- The Deal:
- Each player receives six cards.
- Players choose two cards to discard to the crib, which is a separate hand for the dealer.
- The Play:
- Non-dealer plays a card, and the dealer follows.
- Players alternate playing one card at a time, and the cumulative total of the cards played is tracked.
- Face cards count as 10, and players say the running total as they play their cards.
- If a player cannot play without exceeding 31, the other player continues until no more cards can be played.
- Scoring in the Play:
- Players score points for reaching certain totals (15, 31, pairs, runs, etc.).
- The last player to play a card without exceeding 31 gets a point.
- The Show:
- Players reveal their hands and score points for combinations (pairs, runs, flushes) in both their own hand and the crib.
- Scoring in the Show:
- Players score points for pairs, runs, flushes, and combinations totaling 15.
- The dealer scores the crib.
- The Go:
- If a player cannot play a card without exceeding 31 during the play, the opponent scores 1 point for a “Go.”
- Counting the Hands:
- Players count the points in their hands and the crib.
- Winning:
- The game is played to a certain number of points, often 121.
Common Scoring Combinations:
- Pair: 2 points
- Three of a kind (or “pair royal”): 6 points
- Four of a kind: 12 points
- Run of three or more cards: 1 point per card
- Fifteen (combination totaling 15): 2 points
Players take turns being the dealer, and the game continues in rounds until a player reaches the winning score.
These are the basic rules, and there are additional nuances and variations to cribbage. It’s a game that combines strategy, skill, and a bit of luck.


