Learn how to easily case any opening in your home to give a custom look on a budget with a step-by-step tutorial by Shanty2Chic.
I’ve been in my new home for one year! I am still working to make it a home with new furniture builds and other updates. My most recent project was to case all of the openings in my home. When I was shopping for a new home, I was looking for a new construction that was move-in ready, and in a great location (close to my daughter’s school).
Must-Have’s for My New Home
- 3 car garage – I needed extra space for my workshop
- 4 bedrooms – for resale purposes
- 3 bathrooms or settle for 2.5 bathrooms – I prefer a dedicated guest bathroom
- 1 acre minimum – My previous home was on 3/4 acre. I was downsizing and wanted a bit more space between neighboring lots
- Floor plan – I was looking for an open floor plan
- Location – Close driving distance to my daughter’s school and not too far from the city
The Challenge with My House Hunt
It was a bit of a challenge finding my must-haves and staying under my budget. I spent about 2 months searching for homes (none of them had all of my must-have’s) when I accidentally stumbled across the home that I would be purchasing. It was very close to my daughter’s school, close to shopping and lucky for me – this home was listed incorrectly by the builder on the MLS. It was listed as a 2 car garage on 1.4 acres when in fact, it was on just a little over 2 acres and had a single 3rd car garage and included ALL of my must-have’s.
After walking through the home with my friend, I knew it was the perfect home for us. In fear of the MLS listing being corrected or someone else stumbling across it and realizing that it had more land and an extra garage, I made an offer immediately!
My offer was accepted and I thought I had won the jackpot! This was the only home in my search location and budget that had every single must-have on my list and it really should have been listed at a higher price or under contract given the actual specs.
What Led Me to This Project
Of course, in checking all of my must-have’s I knew that there would be some finish items that I did not care to have because they were items that I could upgrade myself. That is what led me to my most recent project, casing the windows and doors.
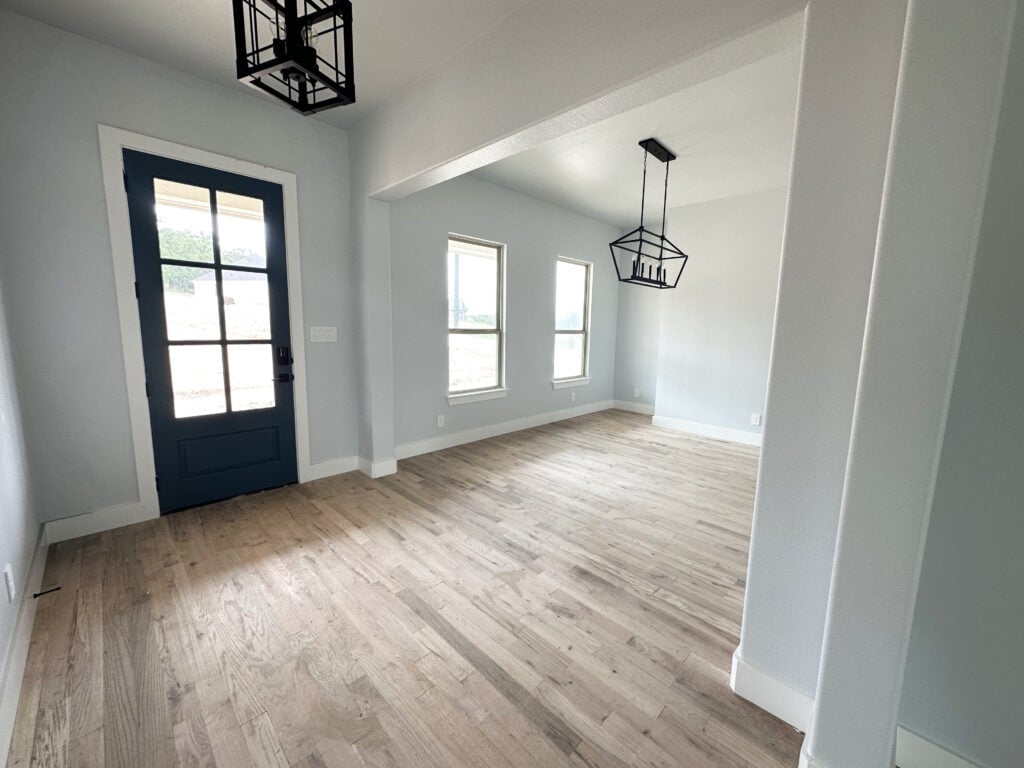
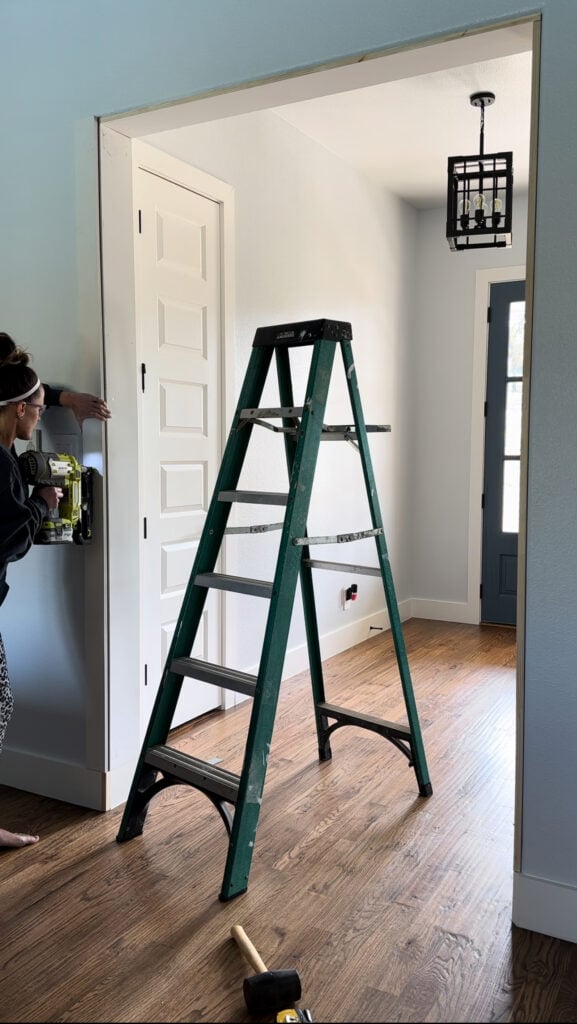
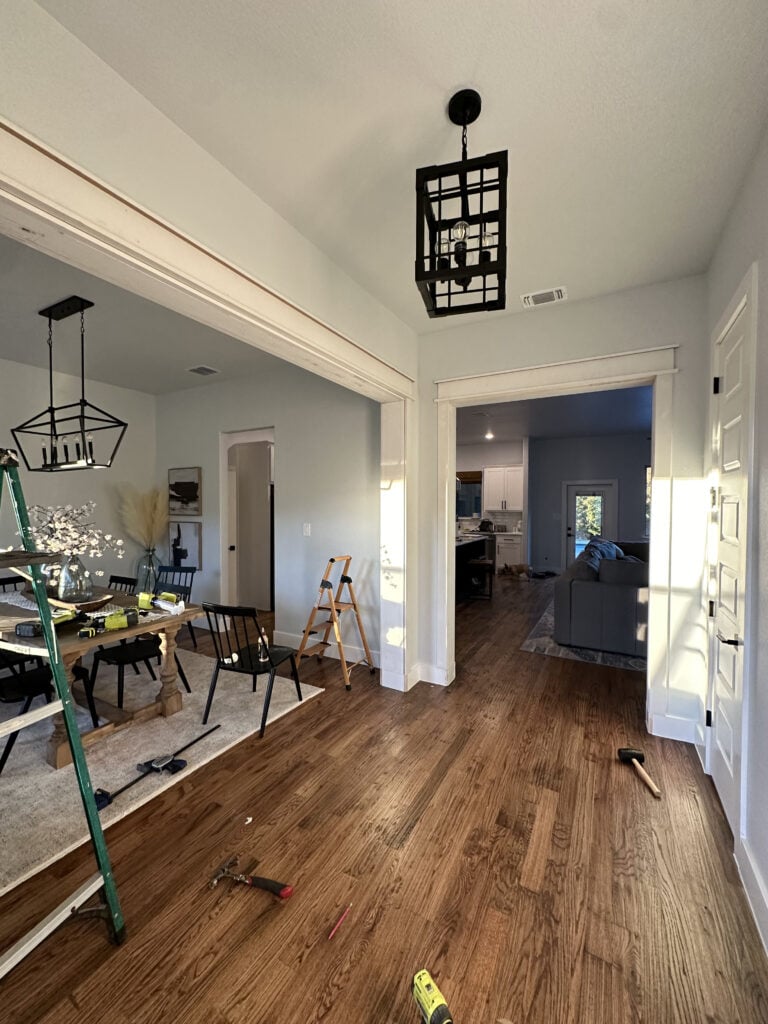
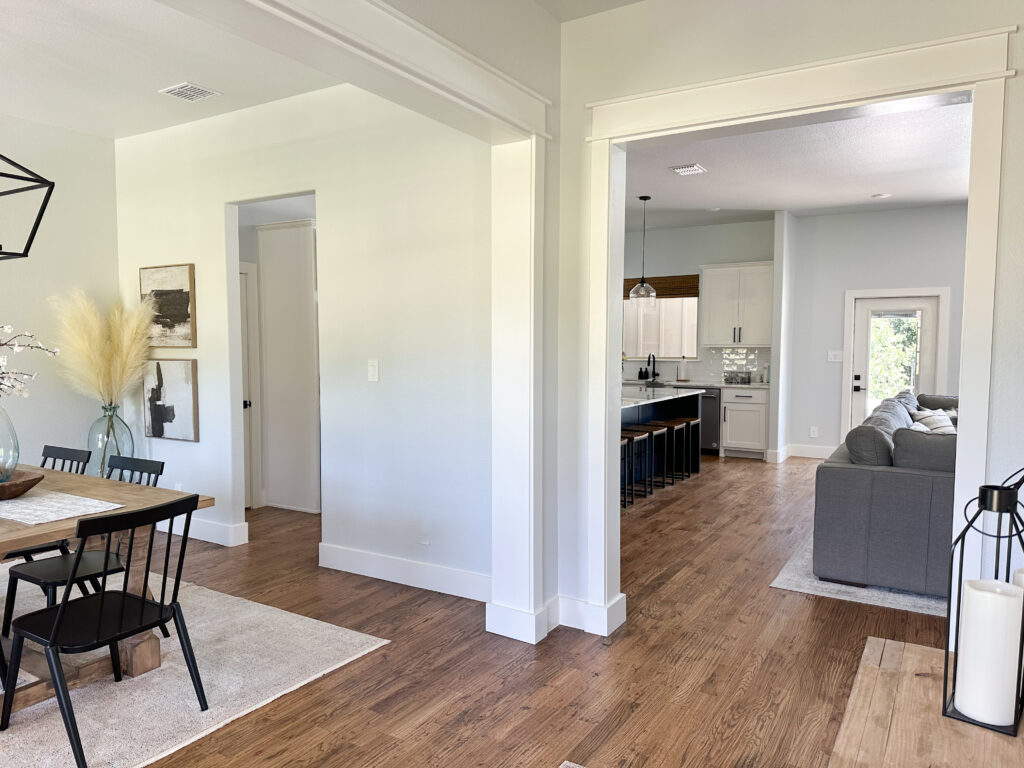
The floor plan is an open design with uncased doorway openings throughout. So, you can see all of the openings in my living room, dining room and kitchen. Cased windows and openings are not an upgrade I would hire someone to do or pay for the over-priced upgrade through the builder because they are so easy and inexpensive to DIY!
My challenge with this project was the rounded corners. I loathe rounded corners because they make updates like this a little more tricky. My plan was to frame these openings out to cover the rounded corners and I planned to trial-and-error where the casing met the baseboards. To be honest, I was apprehensive about the way it would all work out but I’m happy to say it didn’t end up being much of an issue and I love the results!
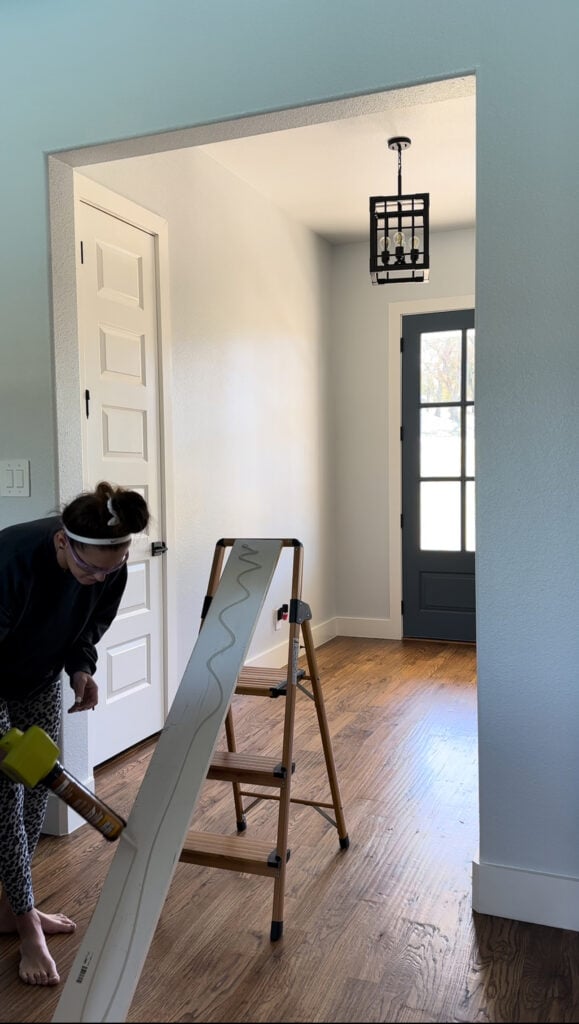
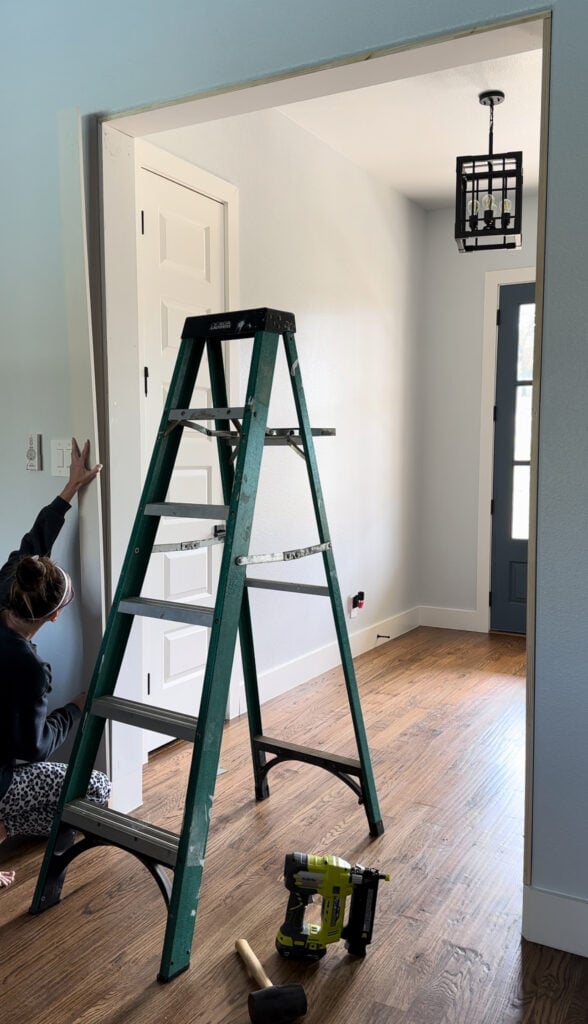
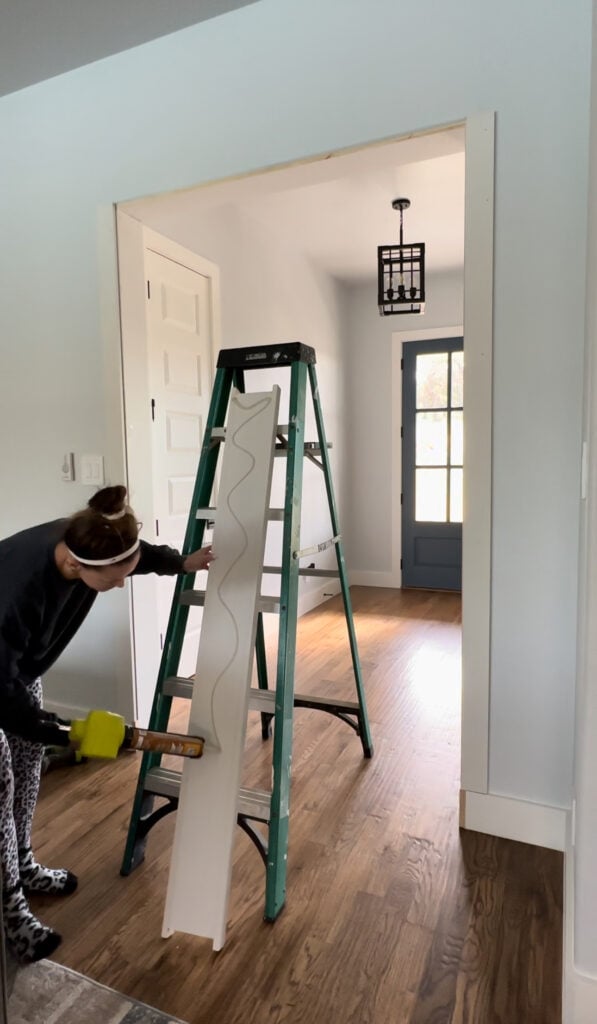
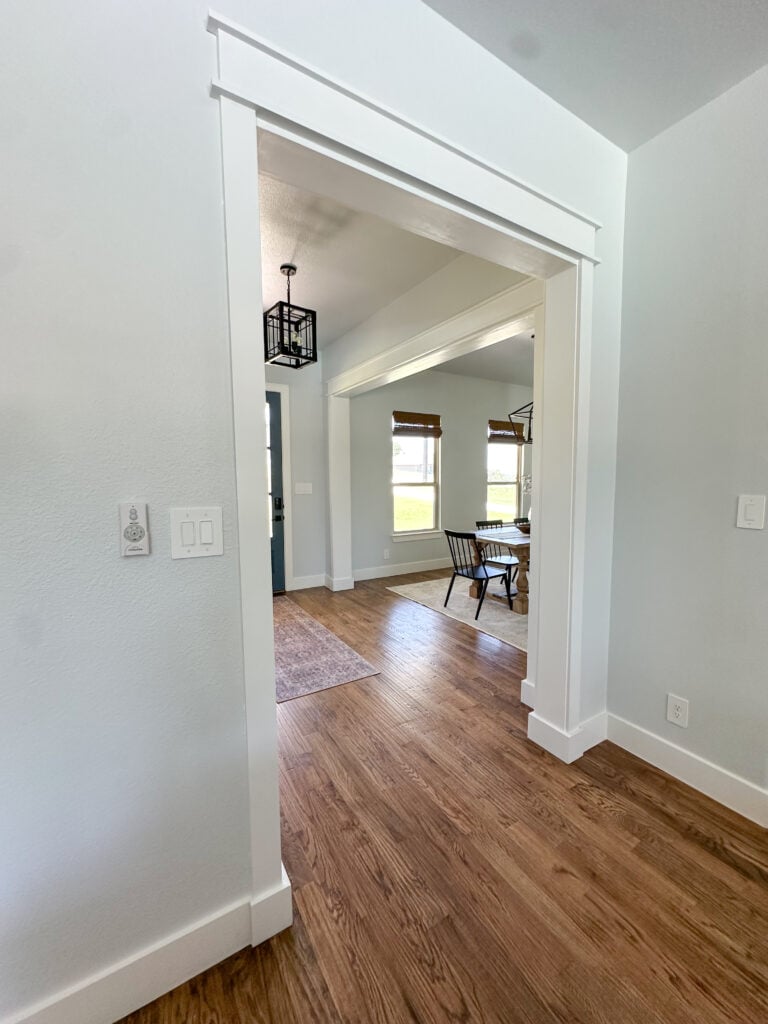
First, I started with the two main openings in my entryway because they are the first thing you see when you walk into my home and they are the largest openings in the house. My goal was a modern trim style but also something beefy. So, I finished designing and planning and got to work!
You can watch the entire process on our Instagram Reel here!
Now, let’s get to building!
How to Create a Cased Opening
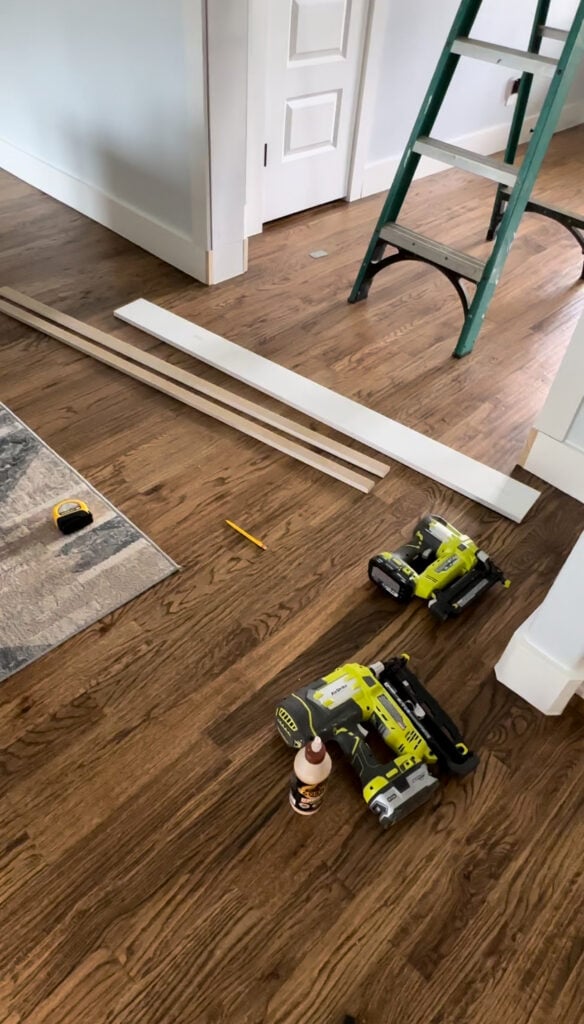
Materials
Note: Every opening will have different dimensions. I based my supply list off of the dimensions of my opening. Make sure to adjust your supply list according to the measurements of your opening.
You will also need to double your boards for the face frame and header to match on the opposite side of the walkthrough.
Tools:
Supplies:
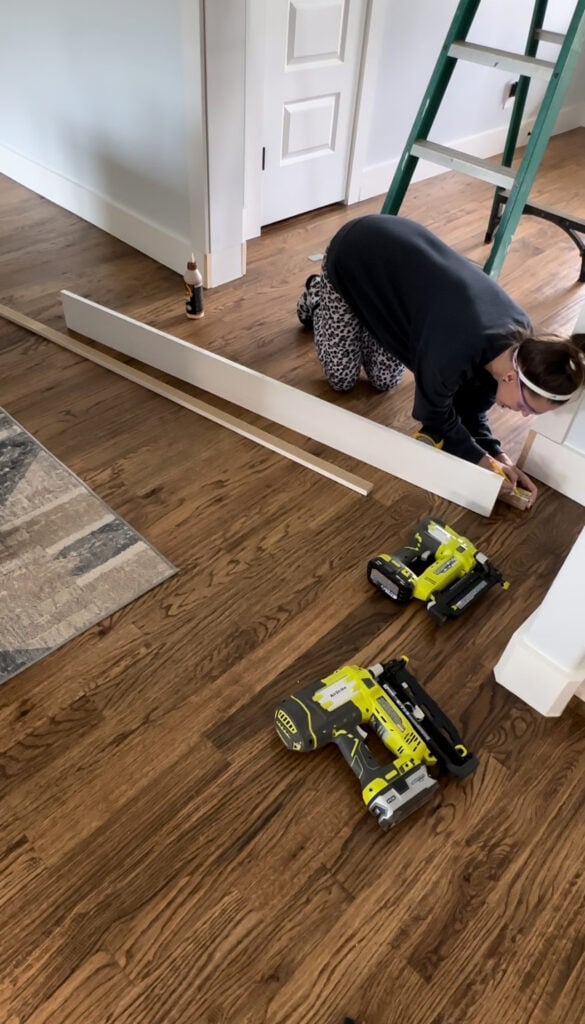
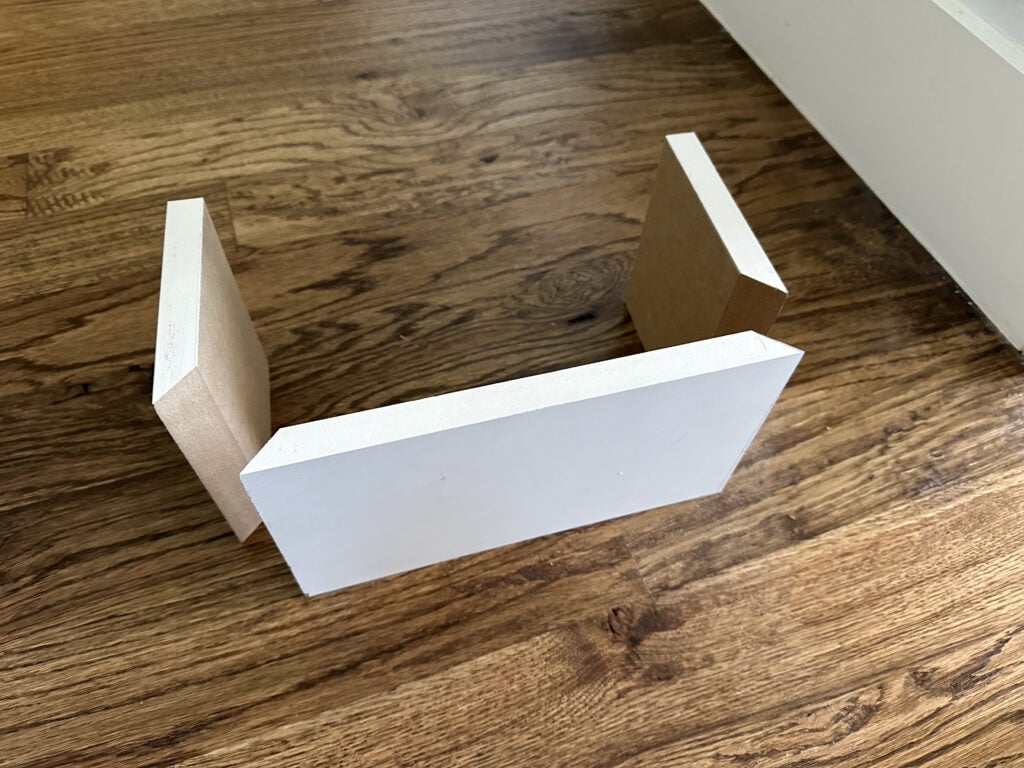
Framing the Inside of the Opening
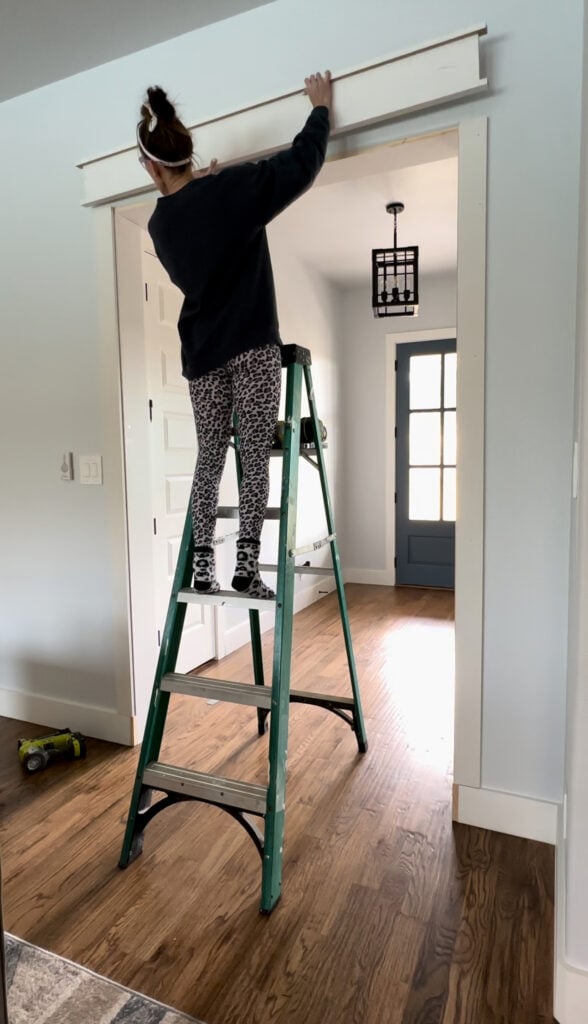
Step 1: Top Board
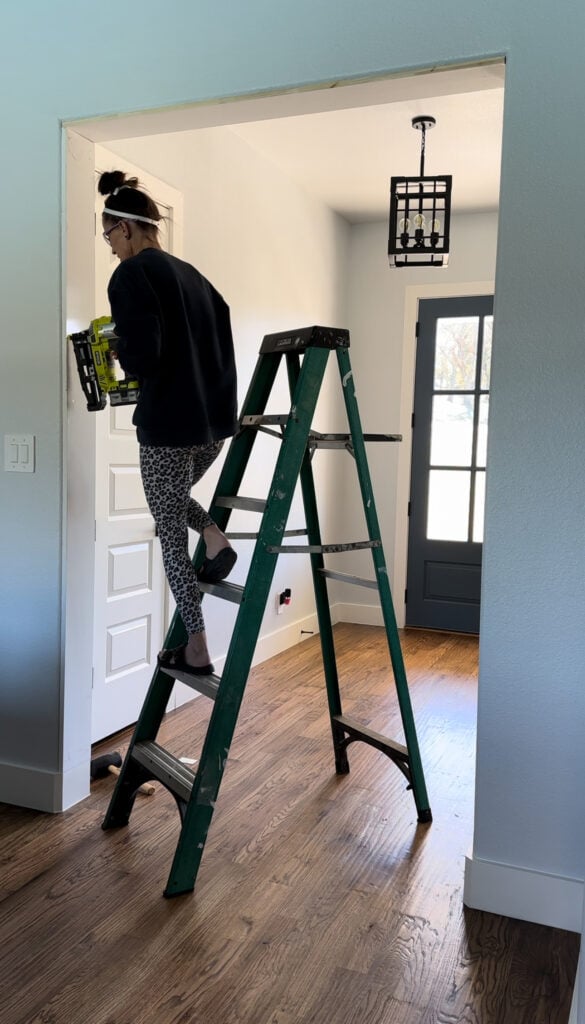
Measure the width of the opening and the length of the header from one side to the other. Rip your board to size and cut the length accordingly. I used my table saw to rip the 1×8 boards down to fit the width of my opening. Apply liquid nails to the back of the board.
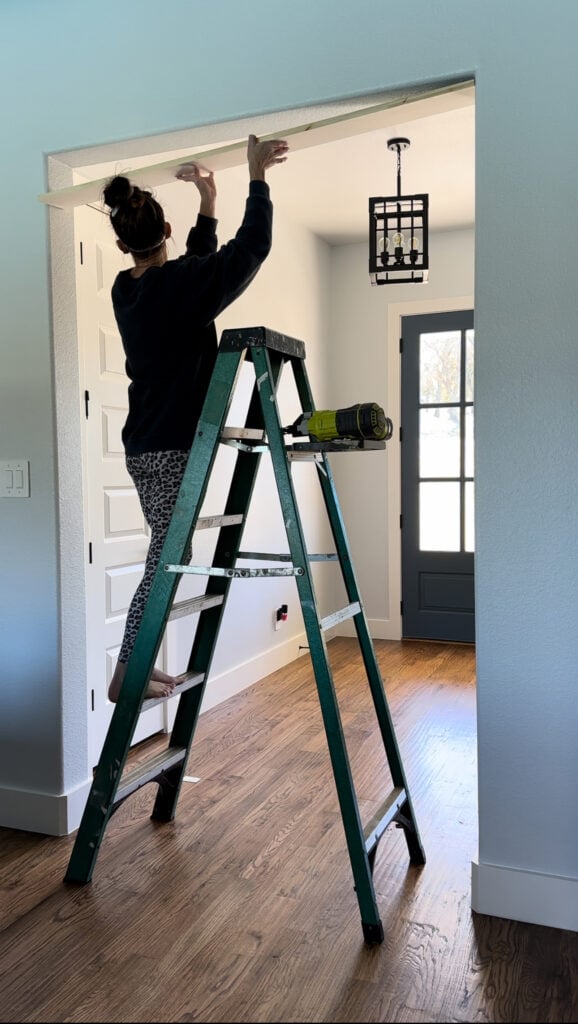
Attach the board to the underside of the header using 2 1/2″ 16 gauge finish nails.
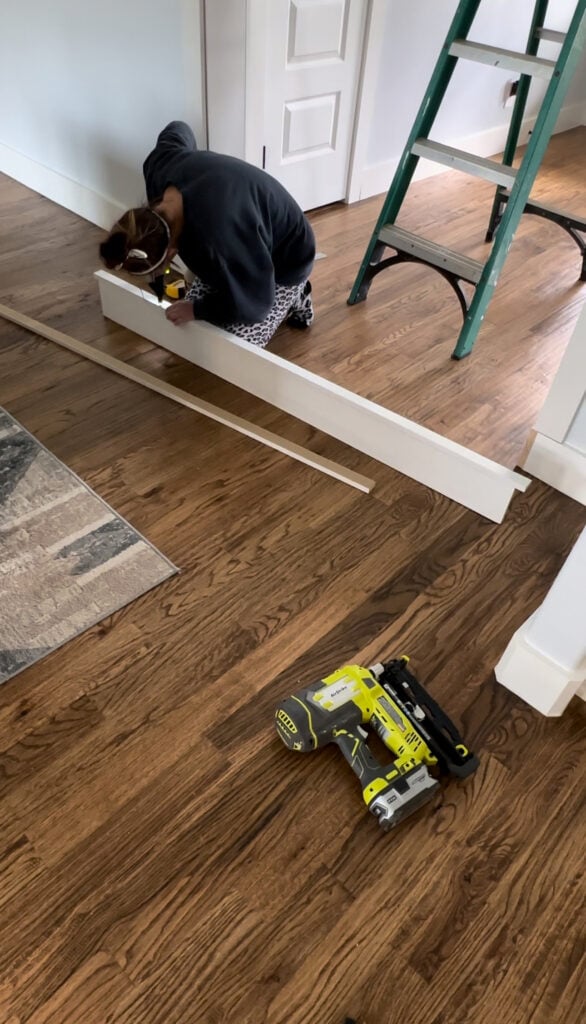
Step 2: Vertical Boards
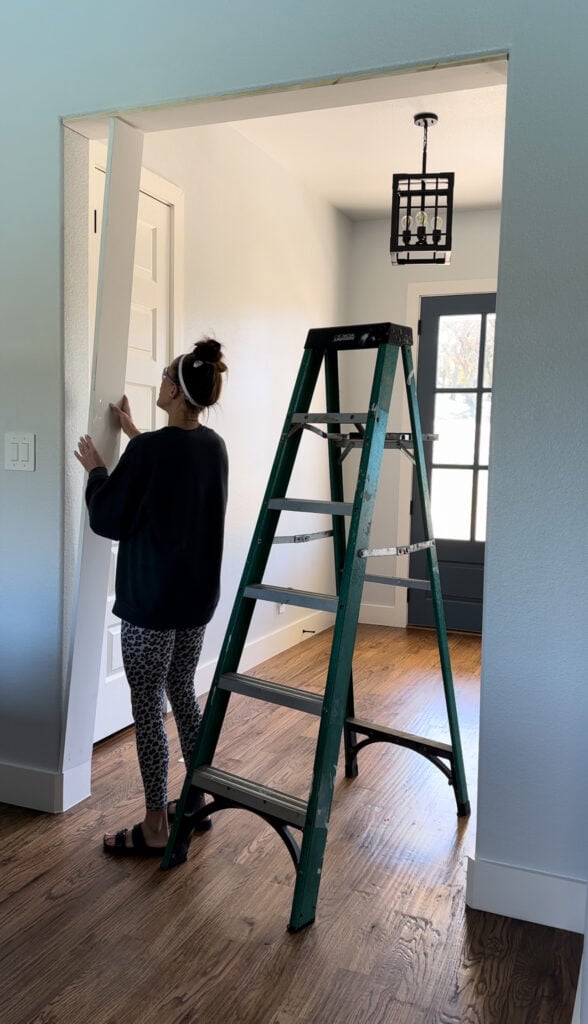
Measure and cut the vertical frame boards to size and apply liquid nails to the back side of the boards.
Attach them to the inside of the opening with 2 1/2″ 16 gauge framing nails. The boards should be flush with the top board and flush with the base trim.
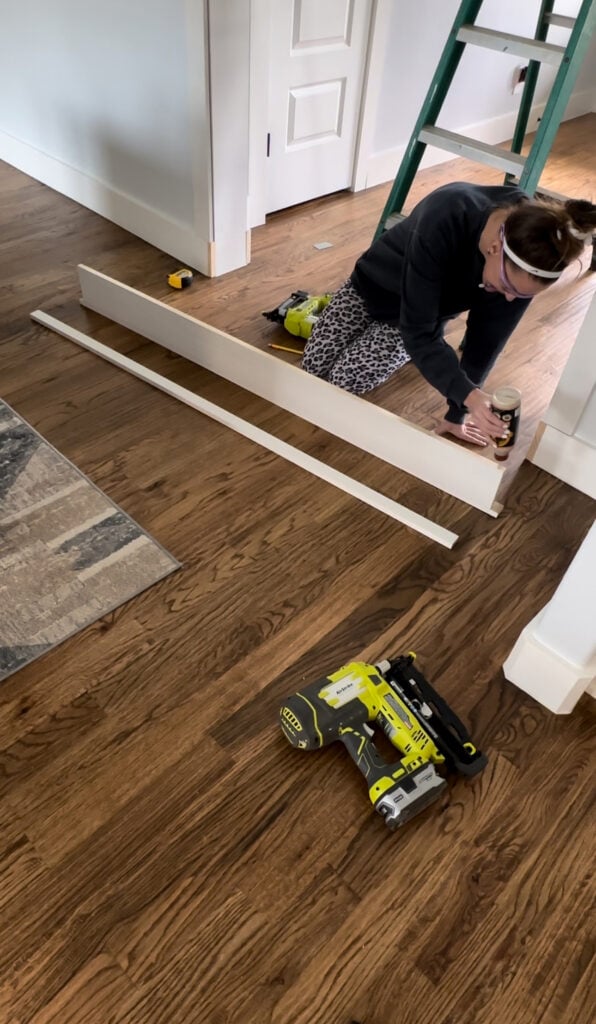
Hiding the Rounded Corners at the Base
Step 3: Corner Piece

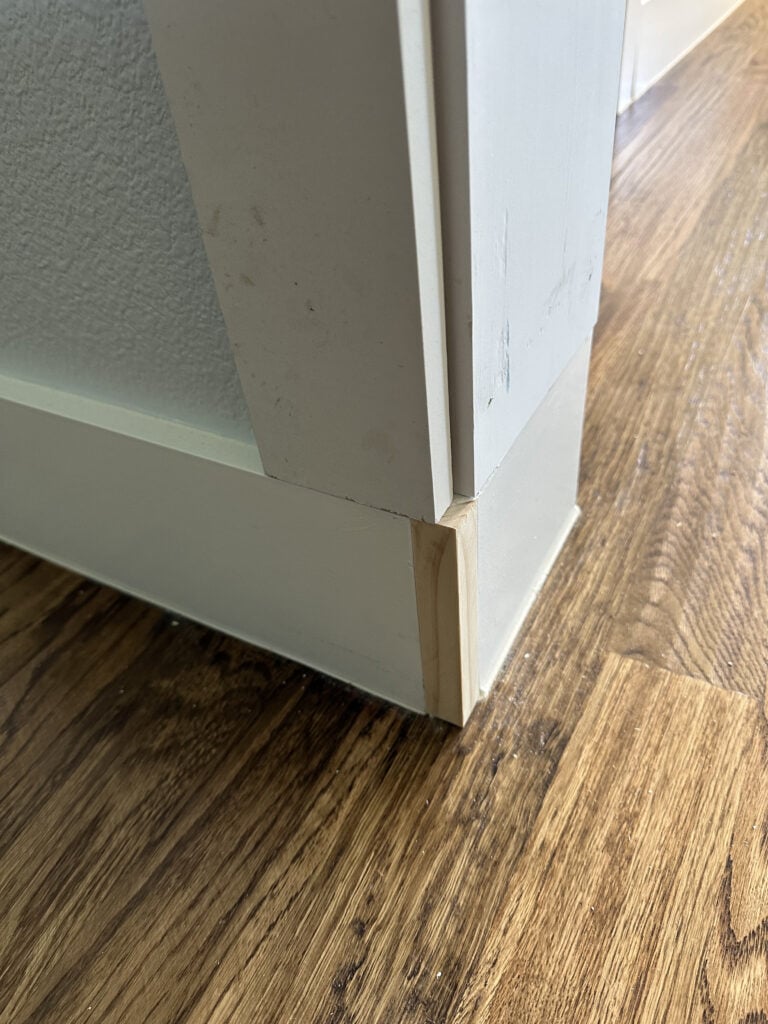
You can see how the framers installed the base molding around the rounded corner. I had to get to this point in the project, to actually see it in person, to get an idea of how I was going to solve this issue.
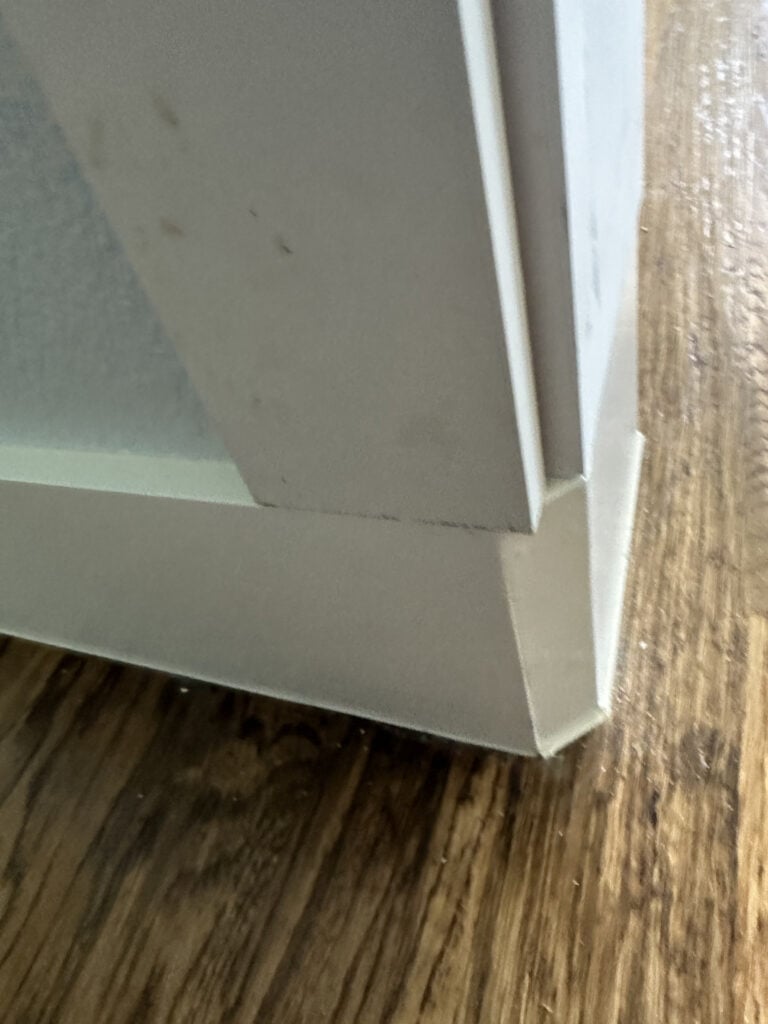
I set my vertical side trim piece in place to see where the overhang would be. It looked to me that I could just cut and attach a small corner molding piece to give the illusion that this was a square base moulding wrapped around the opening.
So, I cut the new corner piece to the same dimensions as the original corner piece, flipped it around and attached it with 1 1/4″ brad nails and wood glue.
This now gave the appearance of a full trim block piece to create a squared edge.
Back in business and now I could move on to the front trim pieces.
Trimming the Casing
Step 4: Vertical Face Frame Pieces
I cut the vertical face frame pieces to leave a 1/2″ reveal of the inside frame boards. So, I marked a 1/2″ from the bottom of the top, inside frame board and measured from the top of the baseboard to the mark on the top frame board. I also marked a 1/2: from the inside of the vertical pieces.
I attached the vertical trim boards to the wall, flush with the mark on the vertical frame boards and flush with the mark on the top frame board. This created a 1/2″ reveal of the frame boards.
I attached the boards with liquid nails and 2 1/2″ framing nails.
Note: You will double the face frame and header on the opposite side of the opening.
Attaching the Header
Step 5: Building the Header
Once the side trim was done, It was time to add the header. A beefy header was what I wanted over the opening so I created one with a 1×6 board and two of 1×2 boards.
To begin, I cut the 1×10 board to be the exact width of the outer vertical trim then, I measured from one side of the vertical trim to the other.
Next, I cut the 1×2 pieces 2″ longer than the 1×10 to give a 1″ overhang of the 1×2 boards on each side.
I flipped the 1×2 board over on it’s face and attached it to one edge of the 1×10 with 1 1/4″ brad nails and wood glue.
I flipped the header over and attached the other 1×2 board the same way. The backs of the 1×2 boards should be flush with the back of the 1×10 board.
This is what the header should look like once it is assembled.
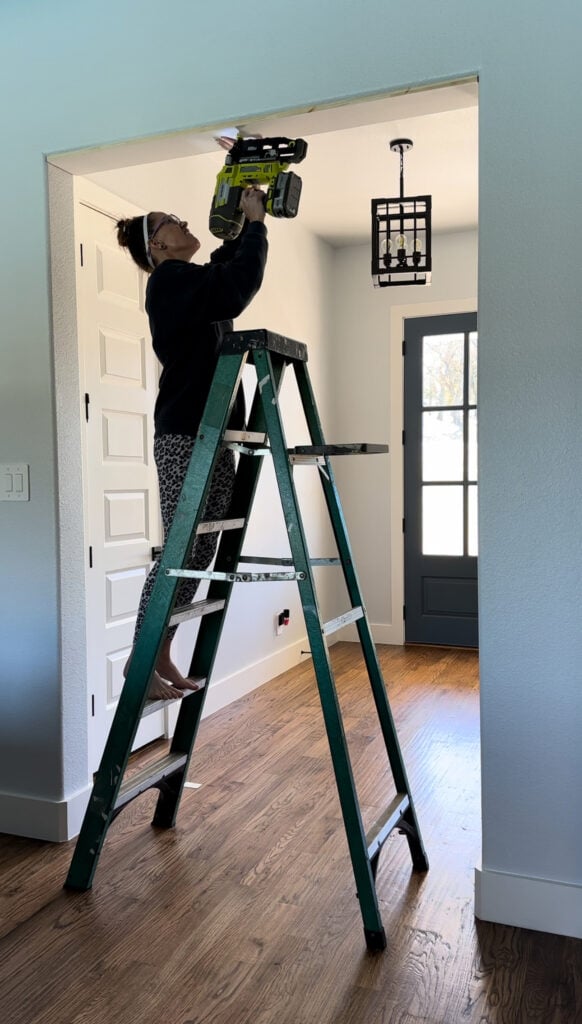
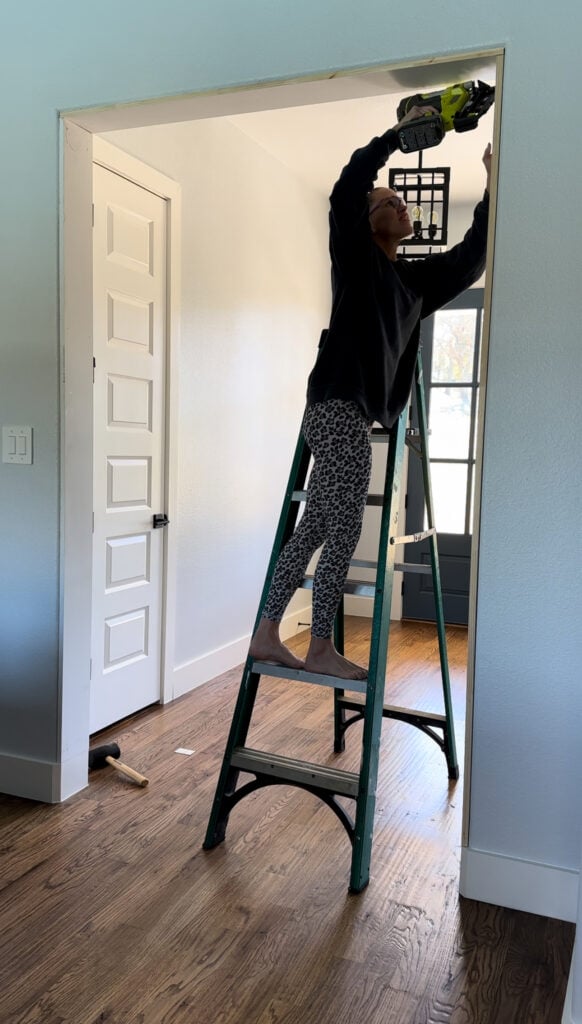
Step 6: Installing the Header
To install the header, I applied liquid nails to the back of the boards and set the header on top of the vertical face frame boards.
This is where that 1/2″ reveal mark came in.
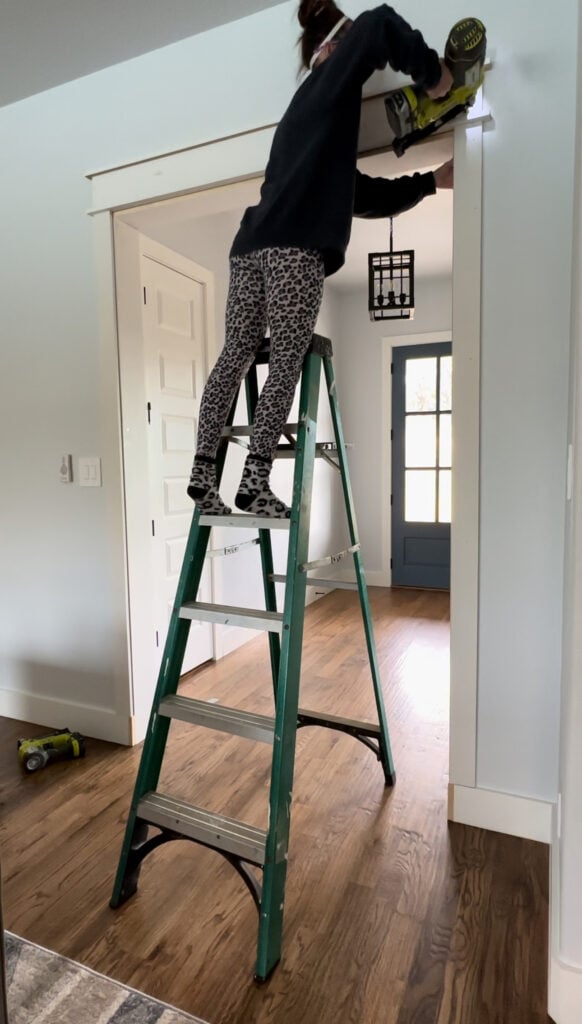
I attached the header to the wall with 2 1/2″ framing nails into the studs behind the wall.
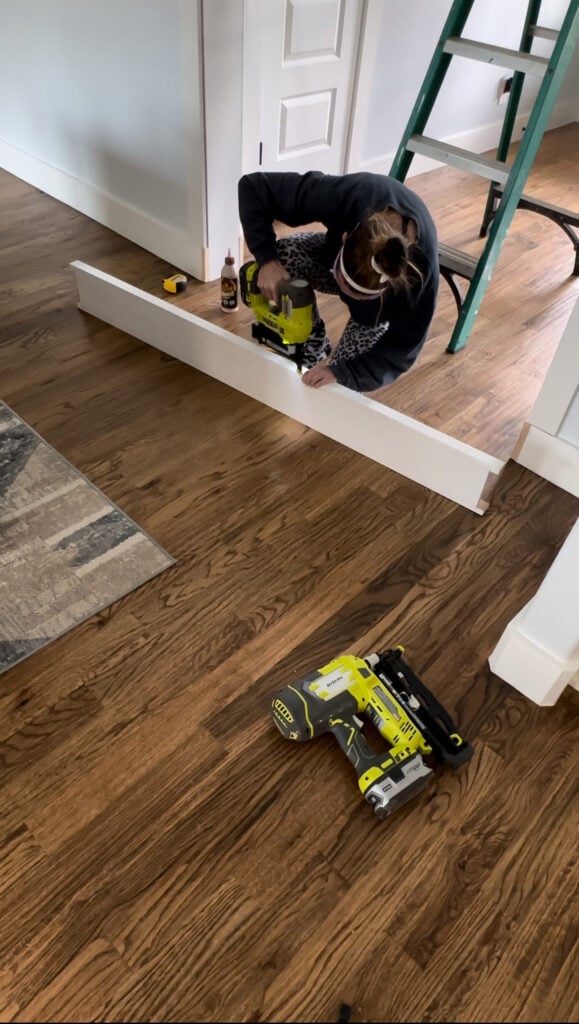
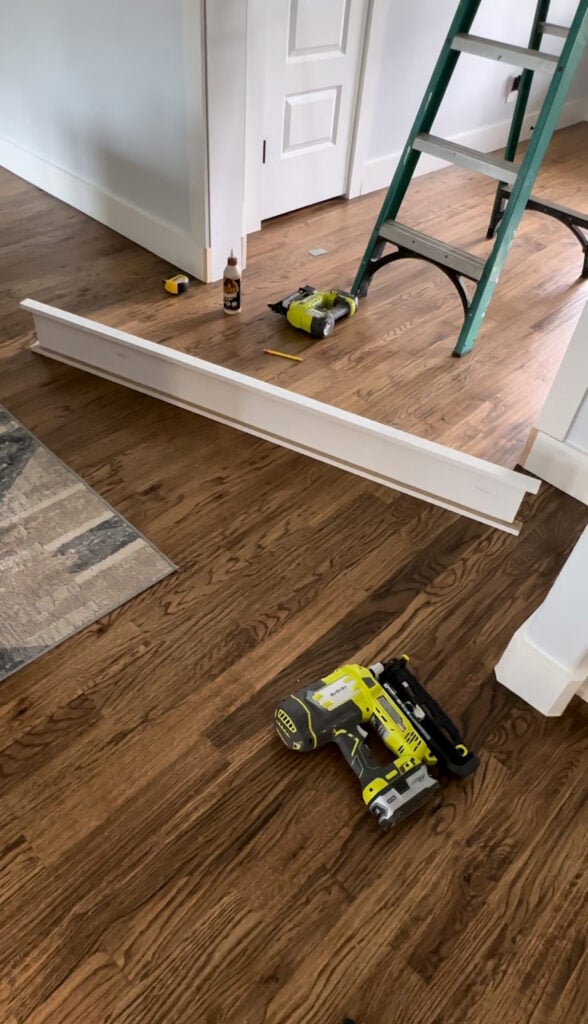
Installing the Bottom Trim Blocks
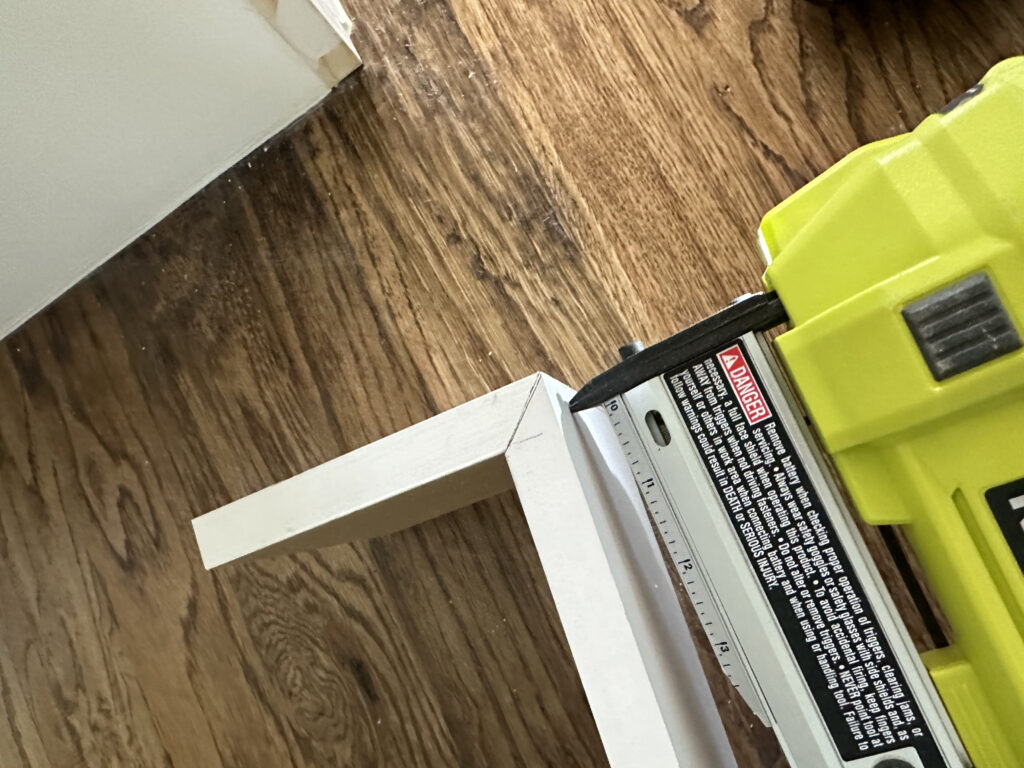
Step 7: Making the Miter Cuts

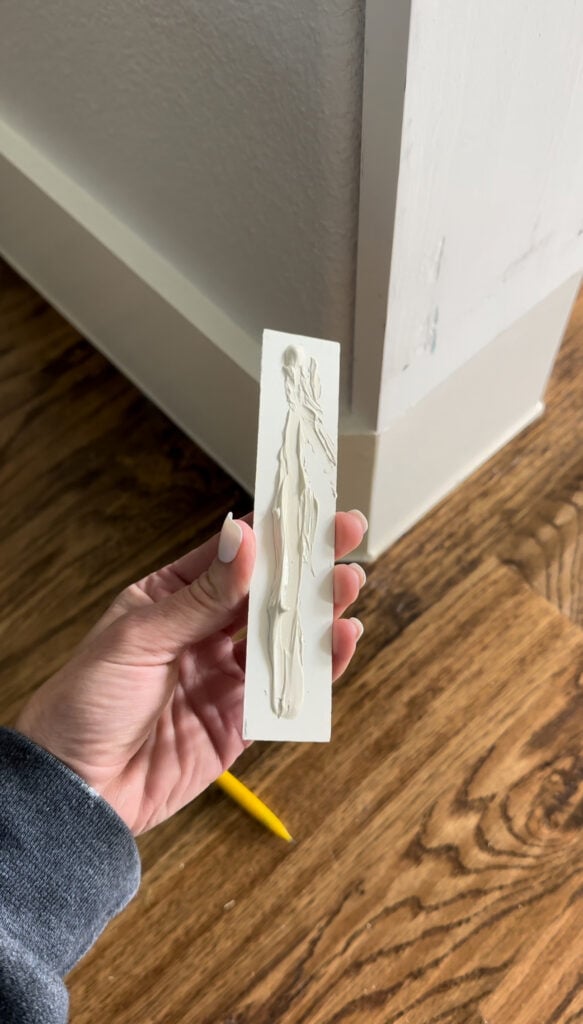
Now, we’re back to the bottom corner piece area that I updated to cover the rounded corners. I went ahead and filled some of the gashes and nail holes on the MDF boards before adding the trim block. This was an easier way of filling these imperfections in the wood.
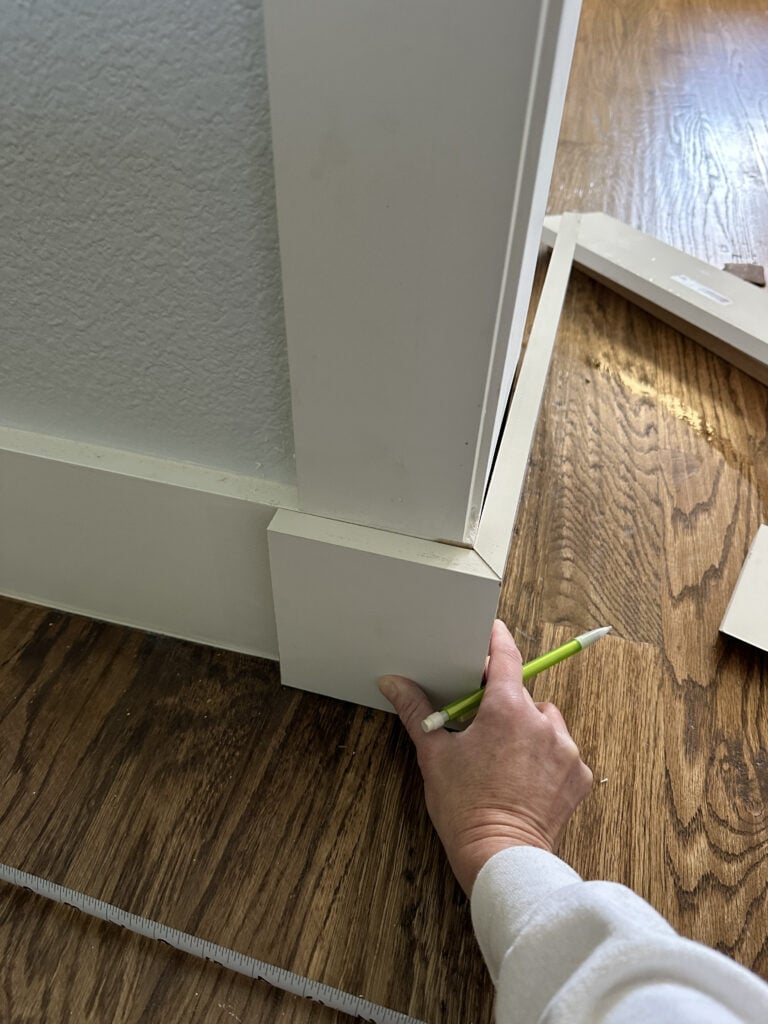
I sanded the wood filler down and measured for the miter cuts at the base of the casing. This is going over the existing baseboards and corner pieces that I added. I cut one end of the front corner piece to a 45° angle and marked the straight edge to extend over the front trim piece by 3/4″.
After I measured for the front and back bottom trim pieces, I measured for the longer middle bottom piece. This piece needed both ends cut at 45°.
Here are the pieces I cut to make this bottom trim block.
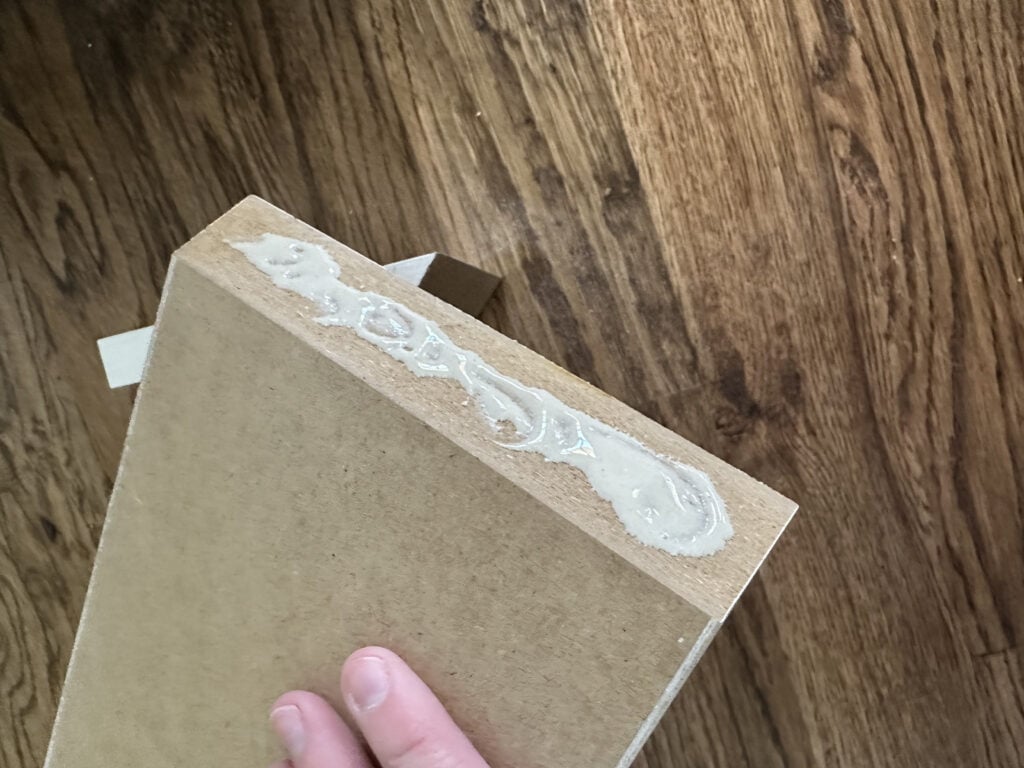
I added wood glue to the mitered edges.
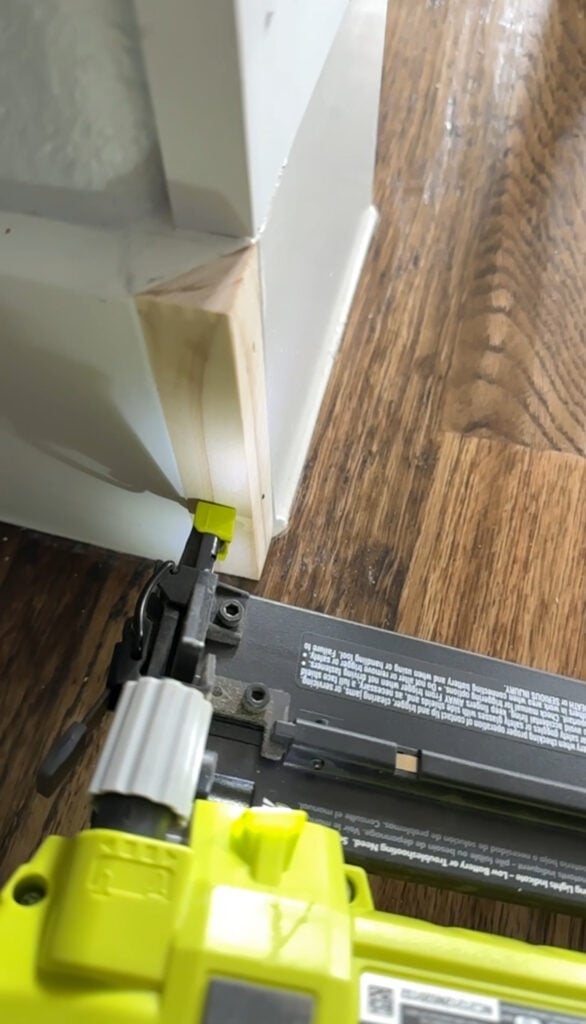
Then, I used 1″ pin nails to attach the pieces (you can use brad nails here).
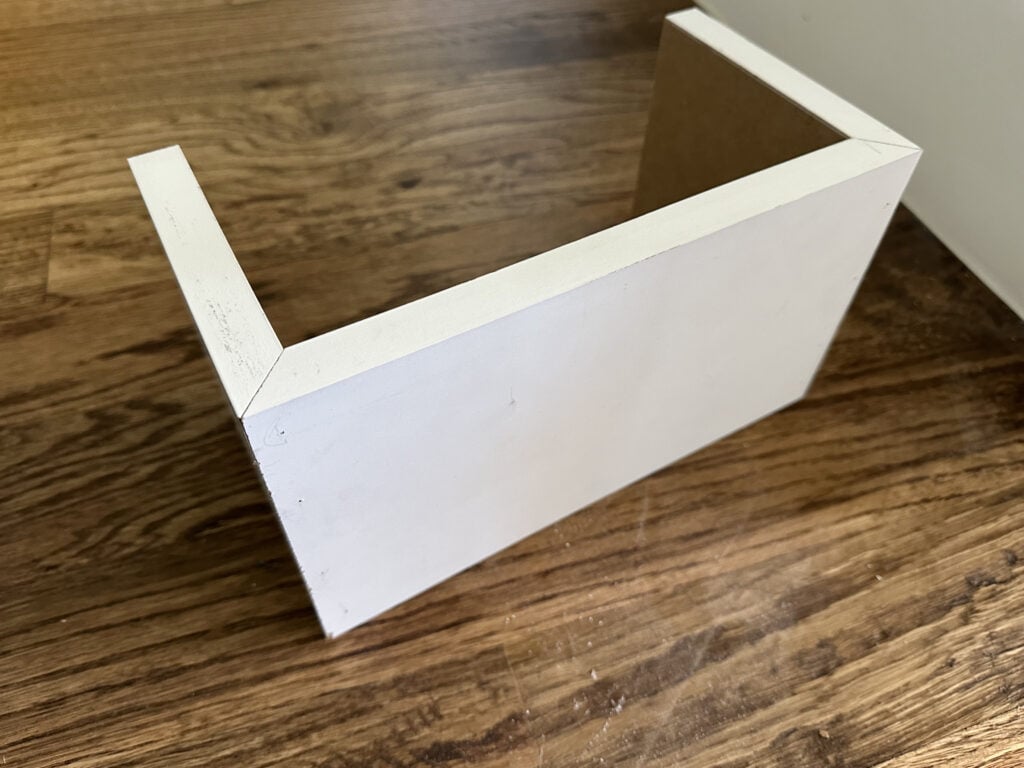
This is what the trim block looked like before I attached it to the opening.
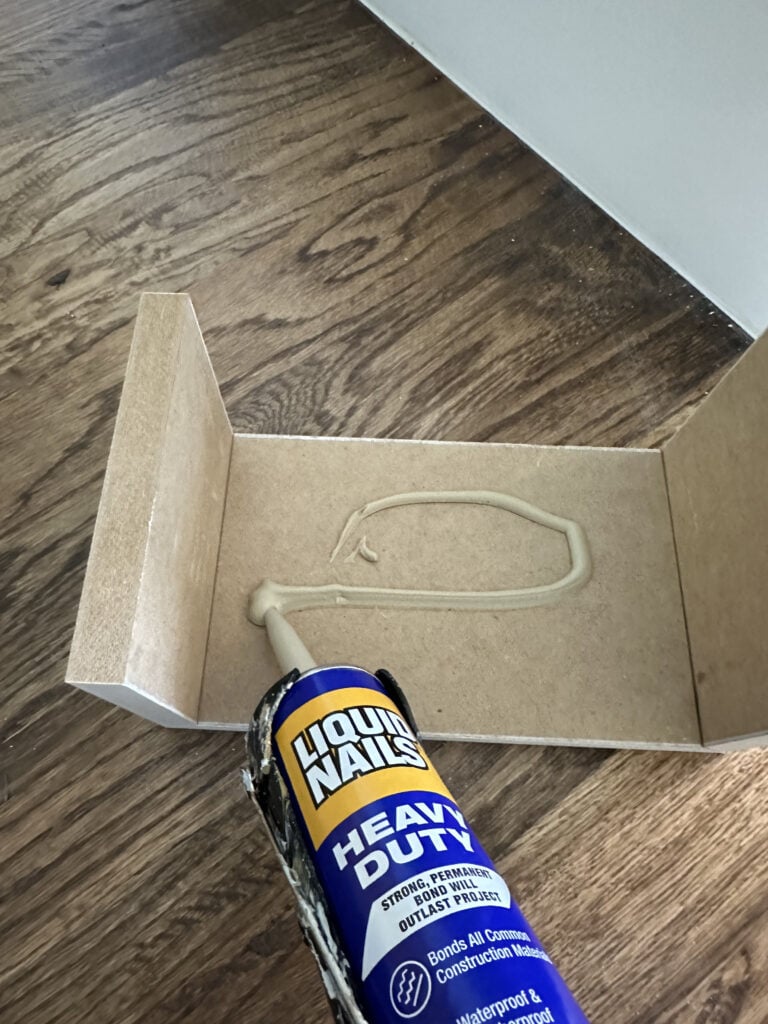
I applied liquid nails to the inside of the trim block.
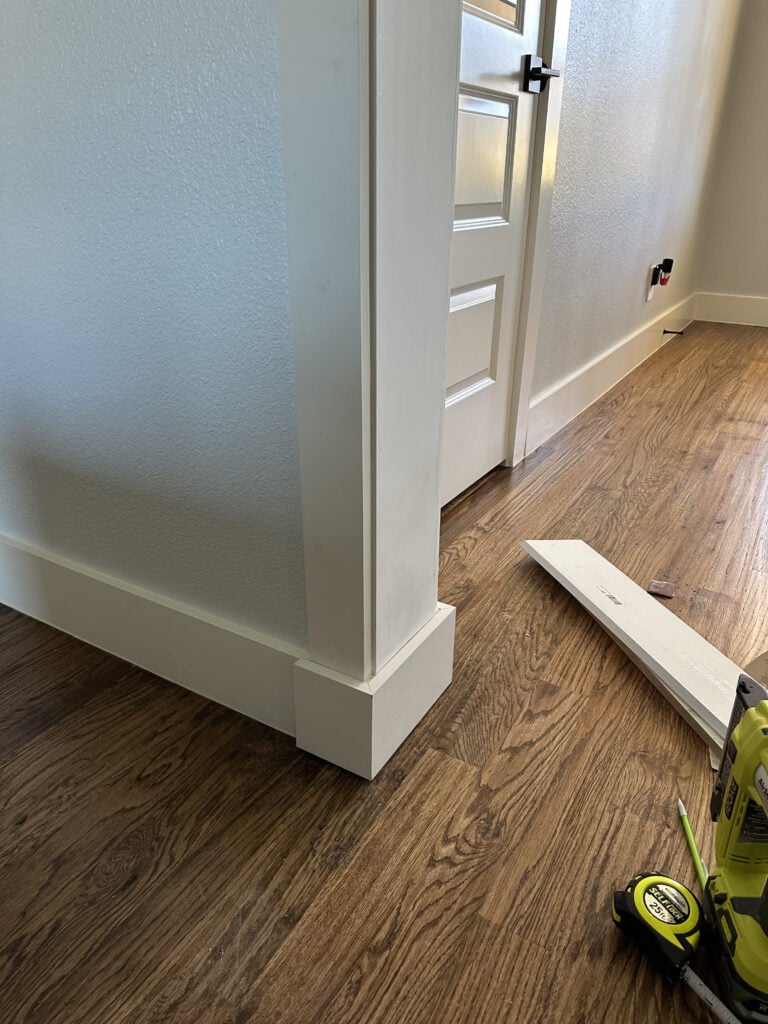
Then, I attached it to the base of the casing with 1 1/4″ brad nails. I’m loving the chunky look now!
The Finish
Step 7: Filling the Nail Holes
Once the entire opening was cased, I filled any exposed nail holes with wood filler and let it dry.
Step 8: Sanding
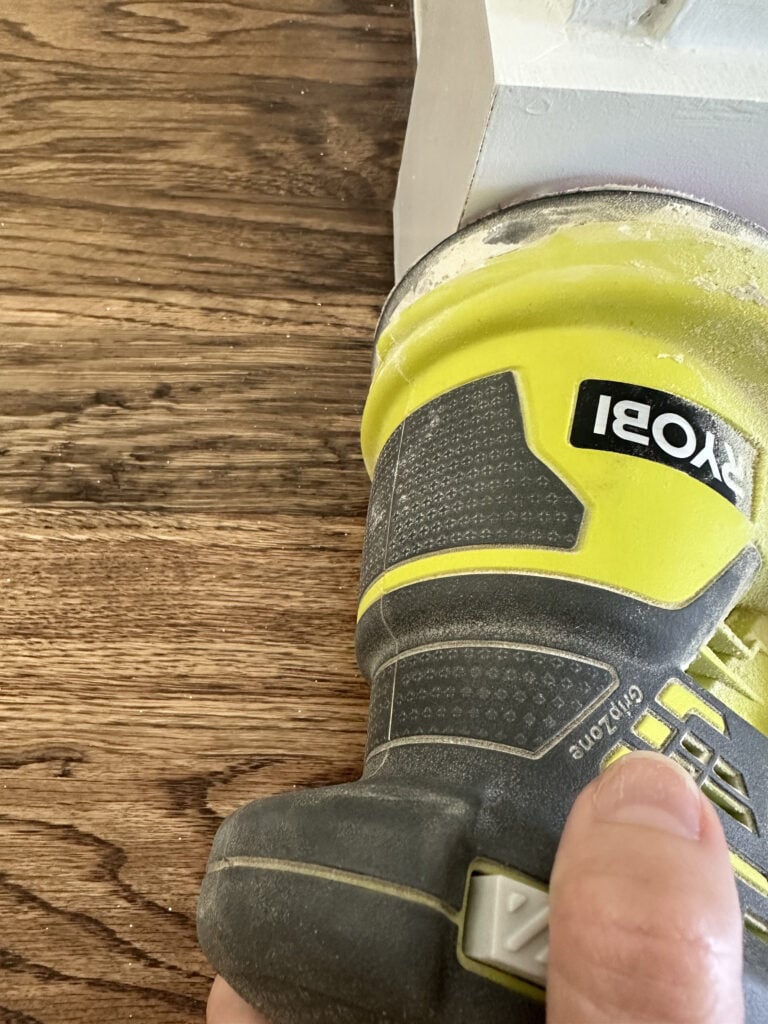
When the wood filler was dry, I sanded everything down. You want to spend a good amount of time sanding the boards because what they look like unfinished will be exaggerated once they are painted.
Step 9: Caulking
I caulked every joint and seam in the casing and on the outside edges of the face frame.
Step 10: Painting
Once everything was sanded down, I taped everything off before painting.

I used 2 coats our favorite paint – Valspar Cabinet and Furniture Paint tinted to Ultra White by Sherwin Williams to match the trim and doors in my home. This paint is AMAZING and our go-to for any type of paint project. It will paint over any oil or water based paint with not sanding required. It is also self-leveling and gives a great finish after the second coat!
That was it!
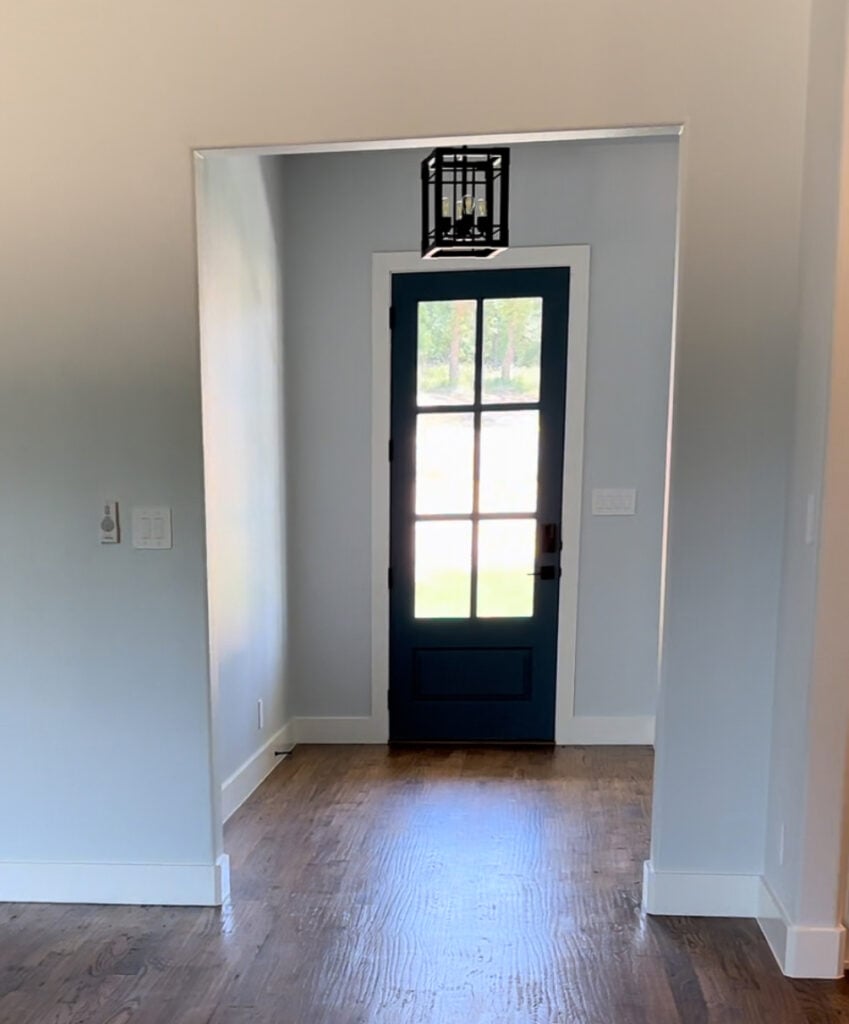
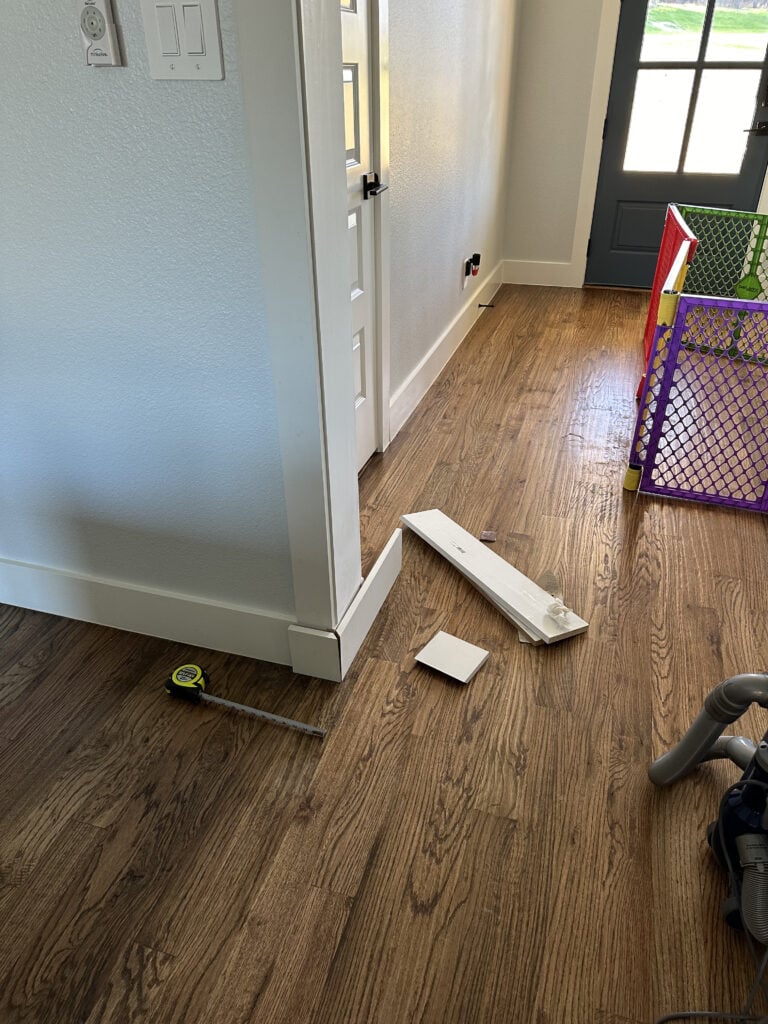
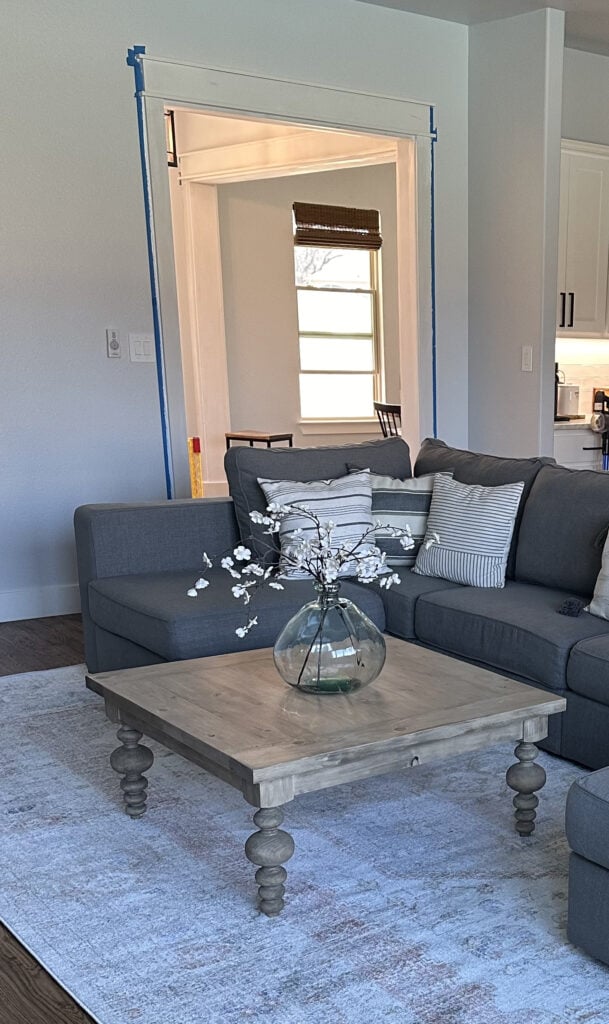
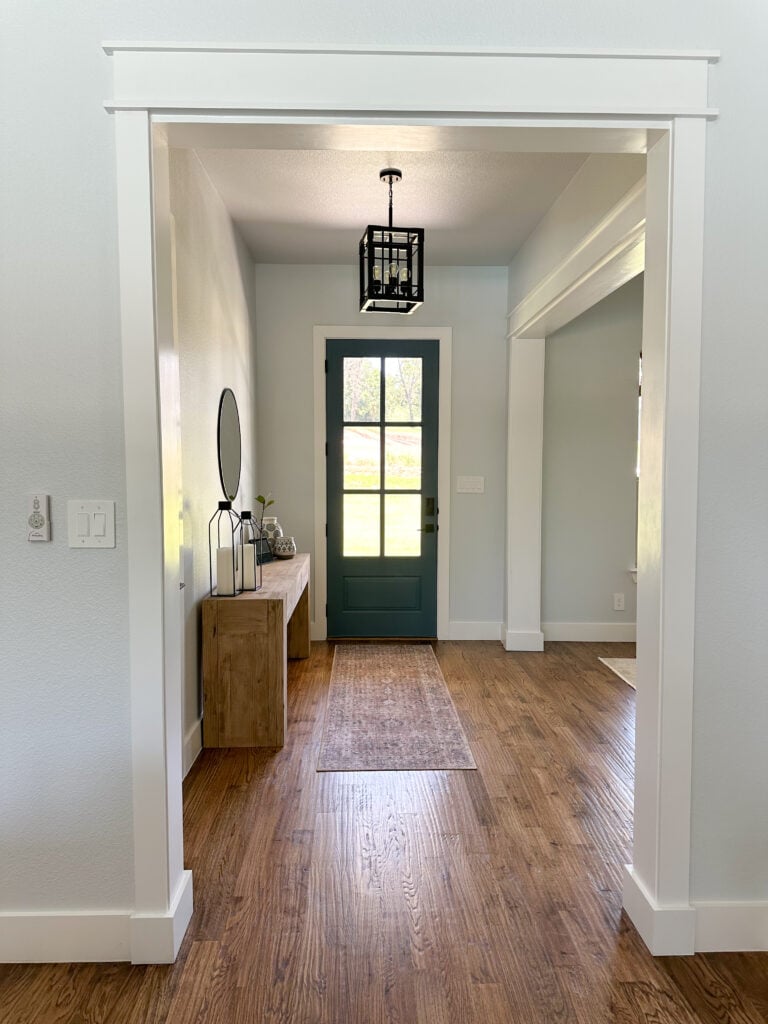
Here is the opening before the casing.
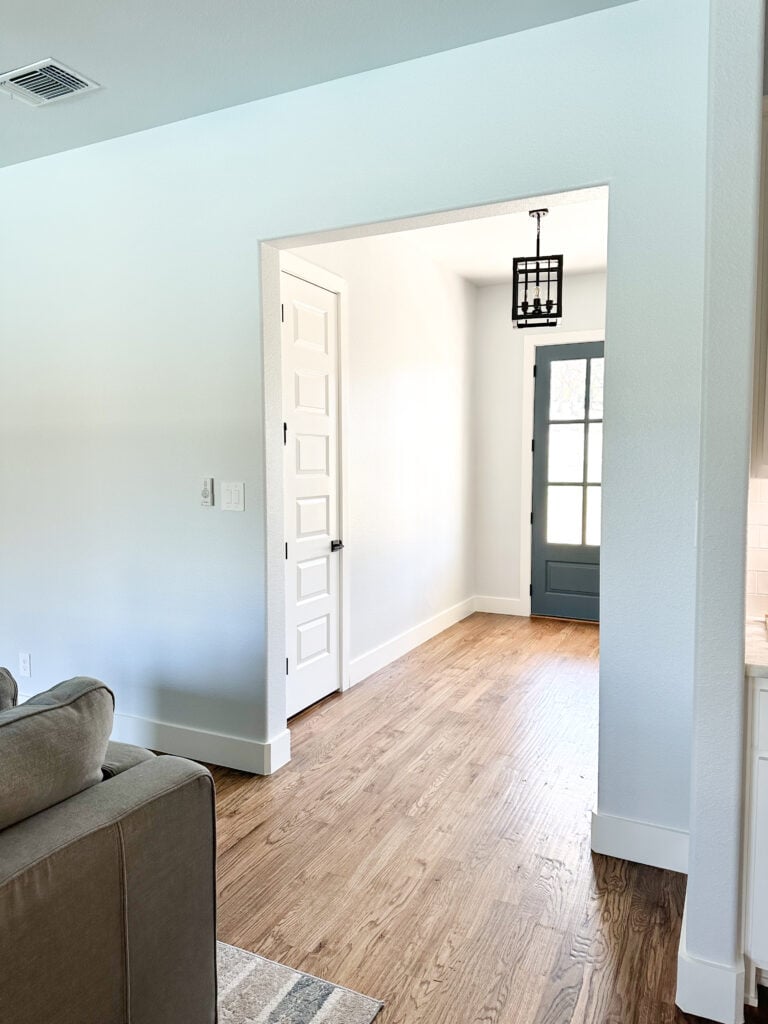
Here she is after the easy upgrade! It gives this space so much character and makes it look and feel so much more homey!
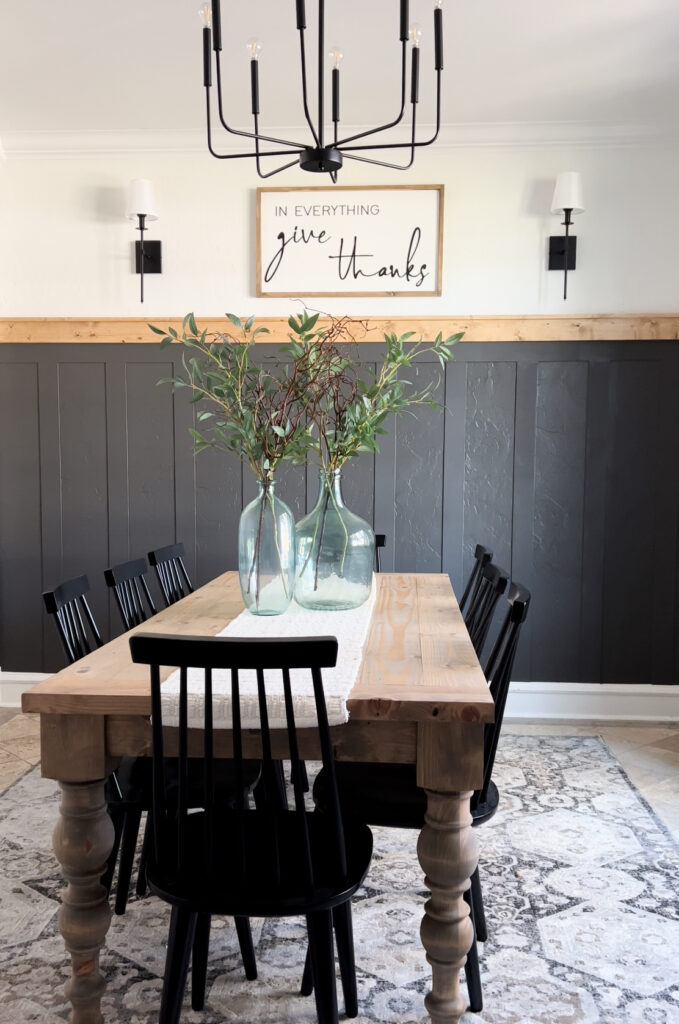
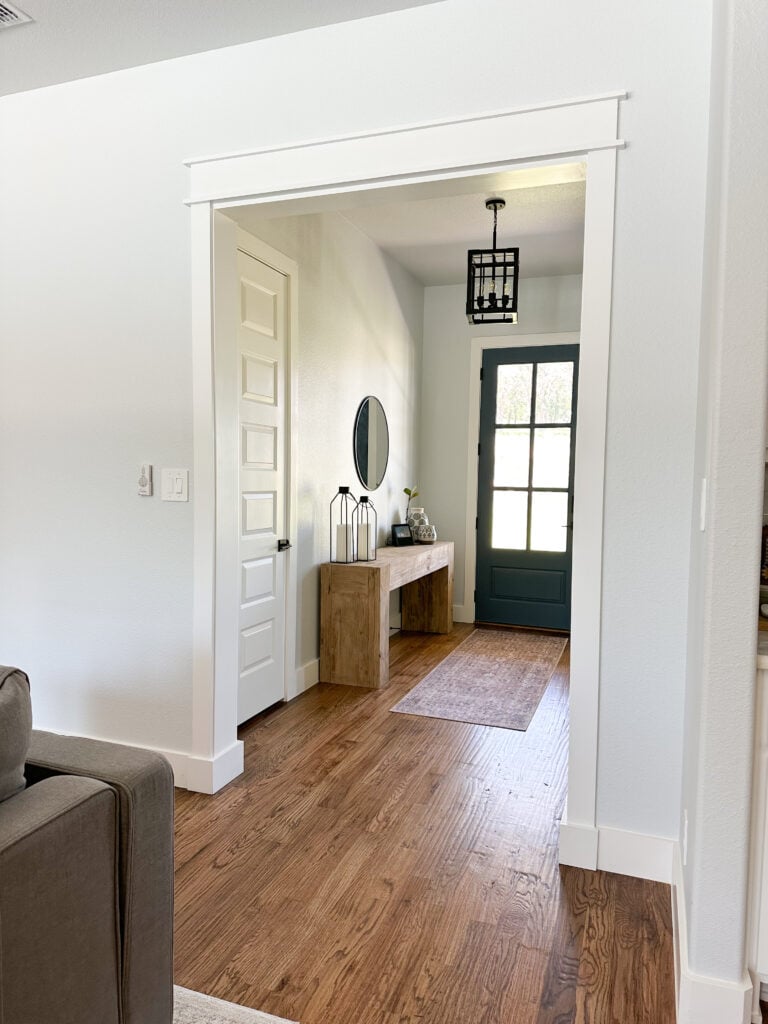
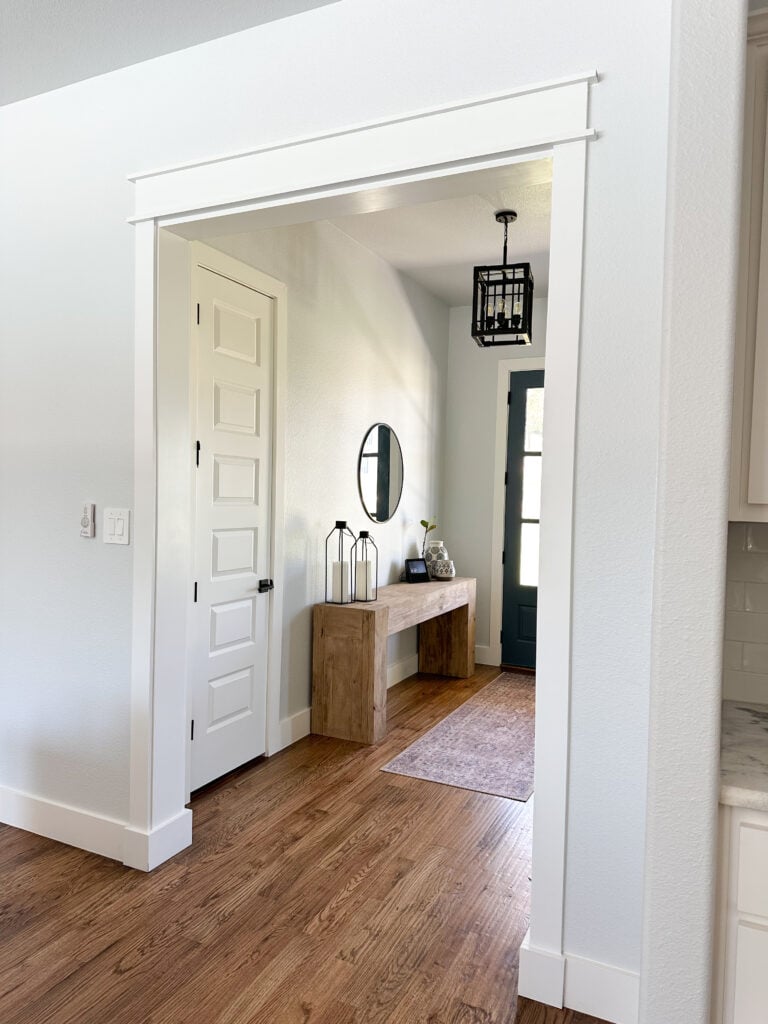
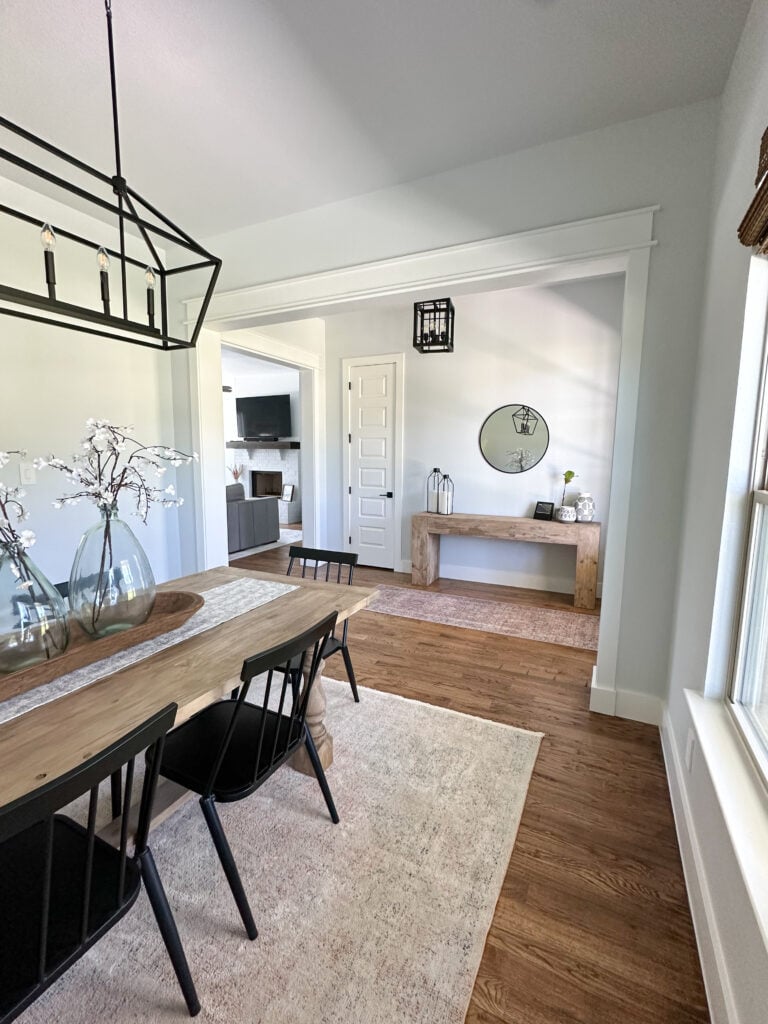
Here’s another before of the opening for my dining room.
Here’s the after shot of the dining room casing.
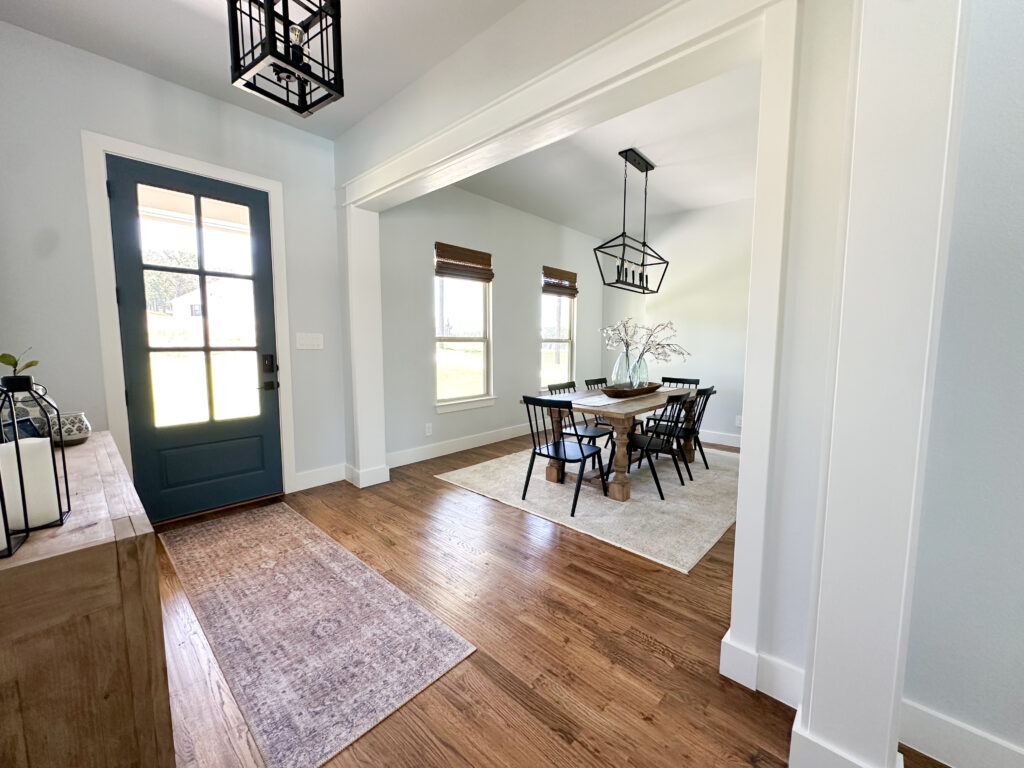
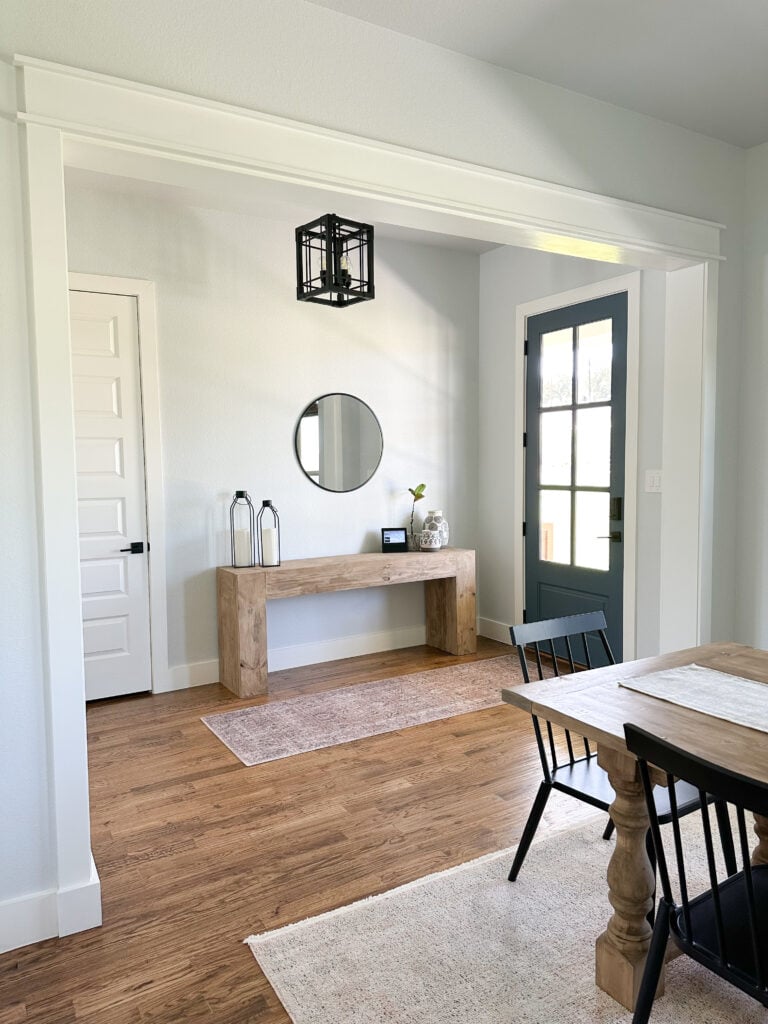
One more before picture.
The after!
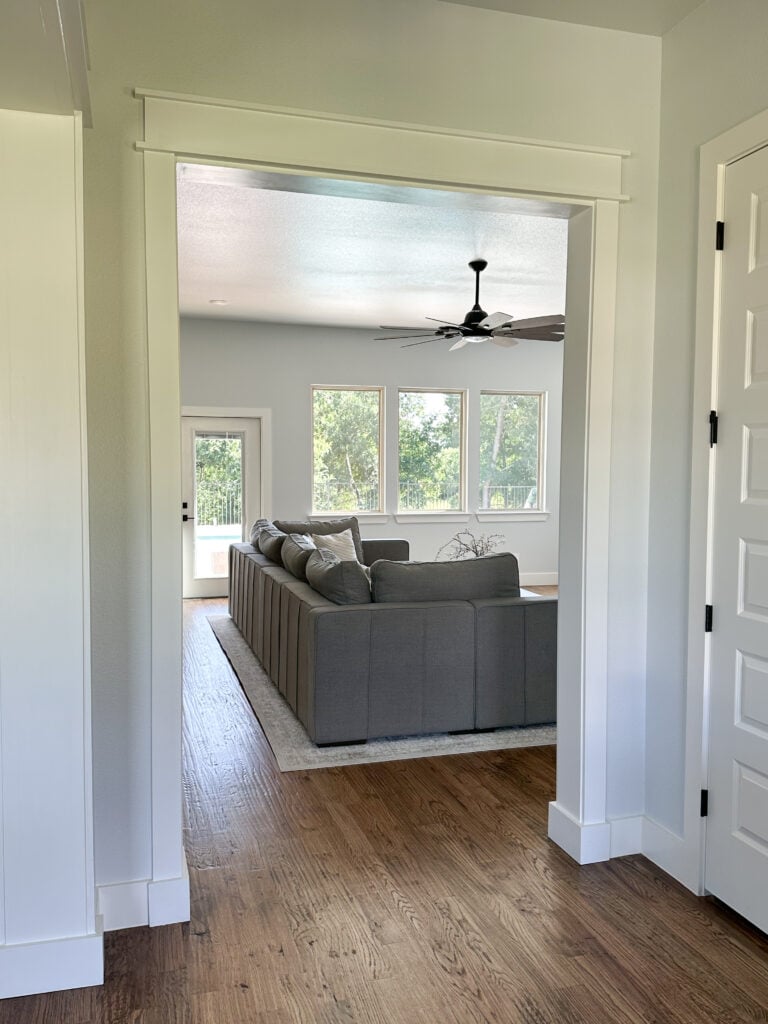
I absolutely love how my new cased openings make my home feel! I’m also glad that I started with the two largest, most challenging openings. I have 4 smaller openings left to do and then I’ll tackle the windows!
Make sure to subscribe to our email list so you don’t miss the next DIY project!
Thanks so much for stopping by!
Happy Building!
Check Out Some of Our Other DIY Wall Projects