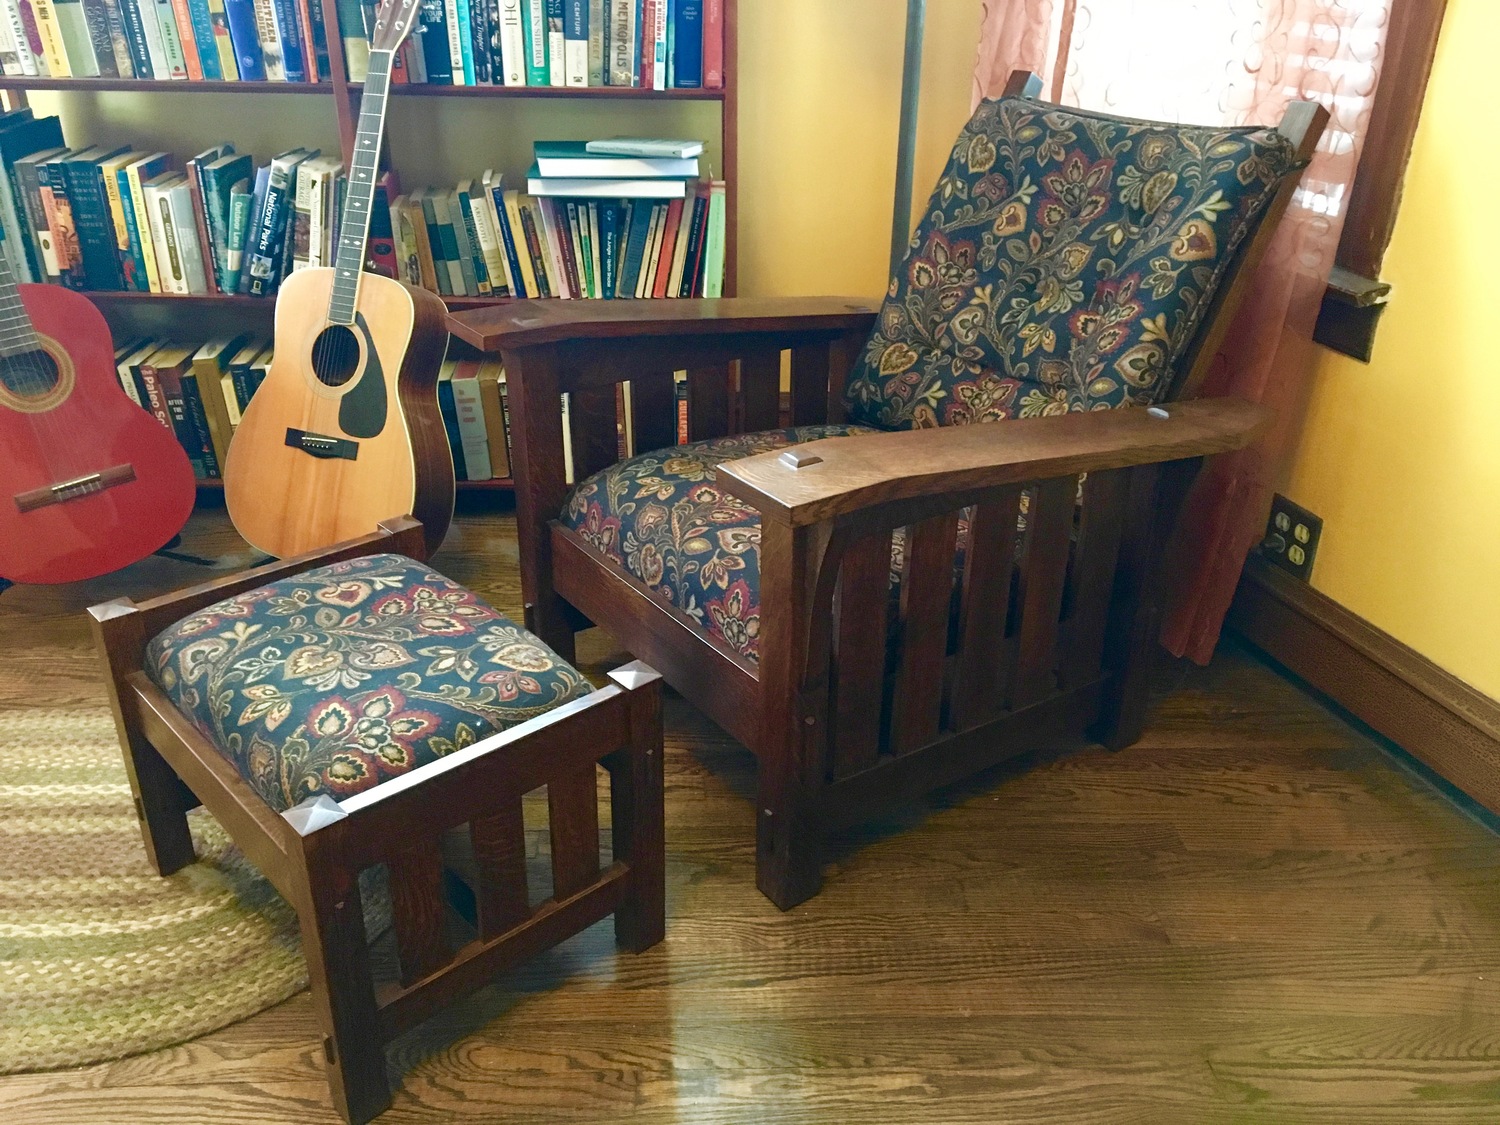
In Part 1, I went through the joinery and build of the chair. Here I’ll cover the finishing and upholstery.
I’ve pretty much settled on a finishing regimen for these Craftsman / Mission / Arts & Crafts white oak pieces. I first raise the grain with a damp rag, wait for it to dry, then lightly sand down the “standers” with 220 grit paper. Then I apply a water based Trans Fast dye (it comes in powder form, then I mix it with distilled water), usually a dark brown mixed with more or less reddish dye to taste. That gets applied with a rag and foam brushes, then the excess wiped away. I usually have to even out the color by adding more in light areas, and removing some in heavy areas with a damp rag. Once dry, the piece will look terrible – flat and dull. But then I apply shellac, usually by HVLP spraying, and it comes to life. I use either Zinsser Amber shellac from the can, or mix my own from flakes, coloring to taste. I usually apply about four to seven or eight thin coats, sanding lightly between every other coat, until I reach the color and coverage I’m after. Finally, I apply dark brown or black paste was with 0000 steel wool, then buff off with a lint free rag.
For this chair, inspired by Bob Lang’s suggestion on his article on his Morris chair build, I did something different on the dye stage. I used Lockwoods alcohol based dye instead of a water based dye. One of the stated advantages to alcohol based dyes is as alcohol doesn’t raise the grain, it saves you from having to do that initial step. So, I gave it a try. It looked good on my test piece, and seemed straight forward enough. But once I got into applying it on the chair, I ran into some trouble. I found that as the alcohol dries much faster than the water based dye, I had real difficulty applying it evenly. Unless I worked on a very small area, I would get blotches of darker areas that were very hard to even out. After a lot of elbow grease I was able to get things looking good, that was a lot of extra work. By the end I’d learned that it takes a gentle hand to apply using with little, light touches. The water based dye is more of a flood-on, wipe-off process. The end result looked about the same as the water based, so I don’t think I’ll use this stuff again — I’ll stick to my go-to process.