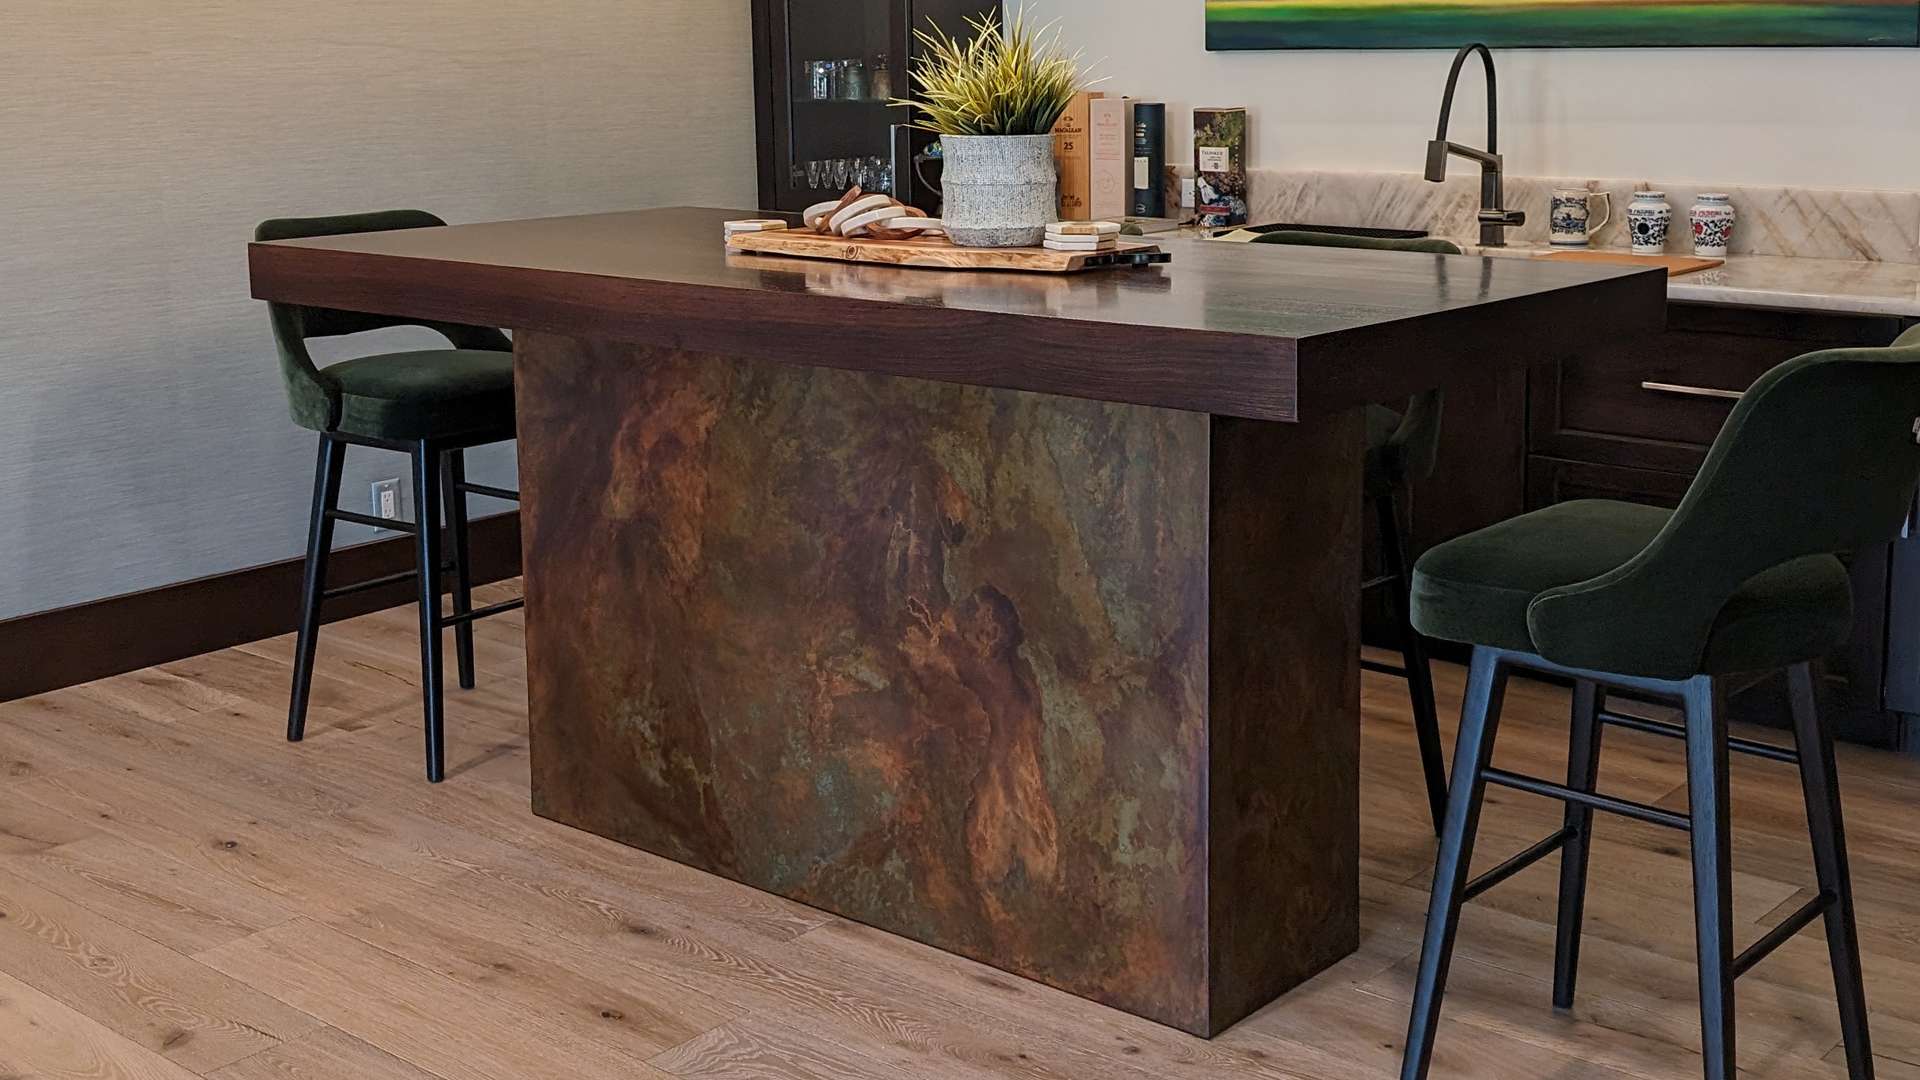
The base of this table is made of steel, and I used a blend of chemicals to give it a unique patina. The result is a beautiful marbled, aged copper finish. The copper colors in the steel base accent, the copper-colored lines in the marble countertops, and the greens from the patination process complement the green velvet chairs.
I used Wenge wood for the tabletop because it complements the cabinets’ dark espresso stain. Then, I finished it with a clear coat highlighting the wood’s natural deep espresso brown coloration.
The Build Process

The table base was so large that I decided to clean the parts before welding them up. I did have to go back and reclean the weld splatter and grime from handling them after assembly. However, it was easier to reclean it than it would have been to get all the mill scale and oils off after it was assembled. The unassembled parts were much easier to handle.
I used muriatic acid to clean all the parts. Muriatic acid is available in different strengths; some are marked as low-order or environmentally friendly. I have found that those are not strong enough to do what I need, and I end up using more of the product to get the job done. As a result, my use case probably negated any benefit from buying the low-odor/friendly versions. It is important to know your use case and select the appropriate version for that case. I have found that being in the 30% range will get the job in a reasonable amount of time and not waste any product.

After I cleaned all the sheet metal, I set it aside to dry while I welded up a steel frame. The tabletop that is going on this will be heavy, so I wanted to be sure it was strong enough to hold the weight. So, I used 1/8″ x 1″ angle iron to create a strong steel frame and then cladded it with sheet metal.

Acquiring quality tools takes time, and some tool purchases are tool bombs. It would have been great to just miter the corners of the steel, but my saw is really finicky to get it dialed in to cut an accurate angle. So I decided to cut a notch in the steel and then use my fixture table to ensure everything is welded up square.

Sorry, the picture is a little blurry, but this is what the notched joint looked like before welding it up. I used this joint on all the connections for the frame.

The table is tall, and the base is narrow, so to prevent it from tipping over, I welded in a base plate to set buckets full of concrete on to add some weight. I can tell you that the buckets of the concert did the trick. You can party on top of this table and not have an issue.

Once I got the frame welded up, I tack-welded the sheet metal to it. This made the whole base rigid, at this point the project was coming together.

I had to weld the seam shut at each corner of the base so that when ground and buffed, it looked like one piece of steel.

Finally, the fun part: I used various chemicals and application techniques to add copper plating to the steel and then aged it to create a nice patina ranging from bright copper to browns and various shades of green. People keep asking me what chemicals I use to copper plate the steel. It doesn’t matter; Google will tell you which ones will copper plate steel, and there are several different ways to do it, and they all work. However, to get cool results, it is the application process that matters, and that comes with practice.

Here is the finished piece!


