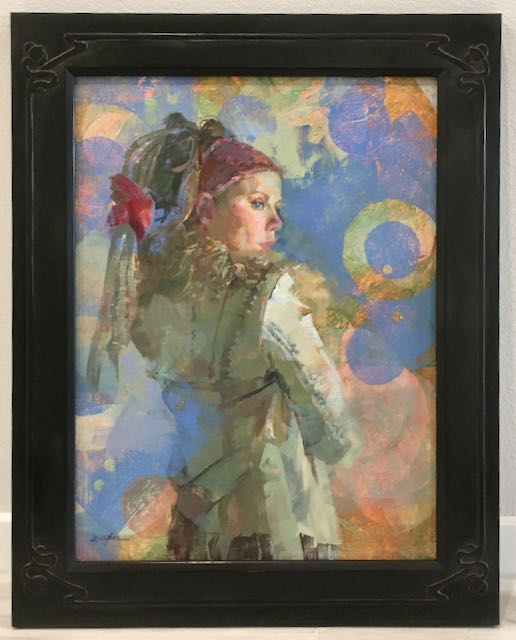
The title of this painting is Tapestry and it’s painted by Diane Eugster. This piece is oil on panel measuring 18″ x 24″. To compliment her work I wanted to carve a very low relief, Art Nouveau motif with the goal of creating a subtle pattern around the frame that would isolate the figure into her own world. I’ll leave it up to you to decide whether or not I accomplished that goal.
Those of you who follow my blog know that I like to share what I’ve learned and discovered in that process. Two main reasons for that, one is that as the years advance we all tend to forget how we did things so for me the blog is like a diary that I keep on line for my own use which reminds me how I did what I did — seven plus decades has shown me that I need this!! The other reason is that when I first began this journey of creating picture frames about 20 years ago finding out the techniques others used and also finding those willing to share them was a challenge. Because of that I decided I’d share what I’ve learned along the way with anyone searching for it.
I’m not very artistic so drawing a design and then being able to replicate it exactly the same on the four corners of a frame isn’t something that I’m able to do. Even if I had the ability to create my own design, reproducing that same image on each corner would be a challenge. Thanks to the ease of the internet I’m able to search for and copy what I need. Once I find a suitable design I put it into my Pages program and resize it to whatever the frame requires. Using spray adhesive the design is attached to a piece of plastic taken from a salad container. My next step is to cut that design out with my carving gouges and annotating which is used where on another piece of paper. This becomes my road map to execute the design.
This is what it looks like when I begin to draw the design onto the frame. The first thing is to determine the placement from the corners, you can see the lines drawn in this picture. The plastic is flexible and you can flip it over to get a mirror image on opposite corners. The design on the paper has been enlarged and you can see the sizes of gouges used on the various elements. I set these in with a small mallet, the goal being to have the same depth all the way around the design. I use various sized gouges of a #2 sweep to ground out the design.


To carve in the line that goes along the outside of the frame I first scribed it with a marking gauge, this insures that the placement is the same on all four sides. The plastic pattern is flexible enough to line it up with the scribed lines. After the curves were established on the corners I used a a #1F/16 Pheil held vertically to deepen the scribed lines. These were then ground out using a #2 gouges and blended into the frame. During this process I found that setting an LED lamp next to my work created a nice, raking light to help me see the surface. These surfaces were then sanded with 220 paper and tadpole sanders.
All that remained was the finish — a step that is usually met with some apprehension. All of your work up to this point can be ruined with the stroke of a brush!! After signing the frame I brush on 2 coats of burnisher sealer, red for this frame. After it is dry and burnished with 4/0 steel wool I use Ronan Japan in Drop black for the top coat. This frame received 2 coats with a light sanding between. I wanted to expose some of the red base coat to highlight the carving and add a sense of age to the painting and frame. The process begins with 4/0 steel wool (Liberon, oil free) and once I’m satisfied with the rub back the entire frame will be waxed. Again, my preference is Liberon’s Black Bison wax applied with cotton balls. The wax will also remove some of the black finish so care is needed. Once you remove it with during the rub-out process it’s hard to put back — small spots or edges do respond well to a black Sharpie though!


